Which AI Video Tool is Right for You?
This 2-Minute Quiz Reveals Your Perfect Workflow!
This comprehensive guide teaches you how to automatically transform raw video clips into polished Instagram Reels using AI technology. I designed this for content creators, marketers, and business owners who want to leverage artificial intelligence for faster video production. More specifically, this guide is for social media managers juggling multiple accounts, marketing agencies aiming to scale video production for clients, and course creators looking to repurpose long-form lectures into engaging short-form content. This guide is part of our comprehensive Tutorials AI Video Tools series here at AI Video Generators Free.
You will master the basic workflow of uploading your media and learn to use AI voice cloning to keep your branding consistent. In the end, you'll be able to scale up your content creation with batch automation. This process will save you many hours of manual editing.
After analyzing over 200+ AI video generators and testing various AI video tools across 50+ real-world projects in 2025, our team at AI Video Generators Free now provides a comprehensive 8-point technical assessment framework that has been recognized by leading video production professionals and cited in major digital creativity publications.
Key Takeaways: Your Path to Automated Reel Creation
- Master the Core Workflow: You will learn the main function of AI video generation tools. This involves uploading your folder of video clips and letting the AI intelligently edit them into a finished, captioned Instagram Reel.
- Achieve Consistent Branding with AI: This tutorial shows you how to use AI Voice Cloning features. They help create a unique, branded voiceover and apply custom templates for a professional look across all your videos.
- Scale Your Content Production: You can move past making single videos. Learn to use Batch Creation features with structured data files. This lets you generate dozens of unique Reels from one command.
- Solve Problems Like a Pro: By following my troubleshooting guide, you can quickly fix common issues. This includes problems like robotic-sounding voiceovers or blurry video, making your workflow smooth.
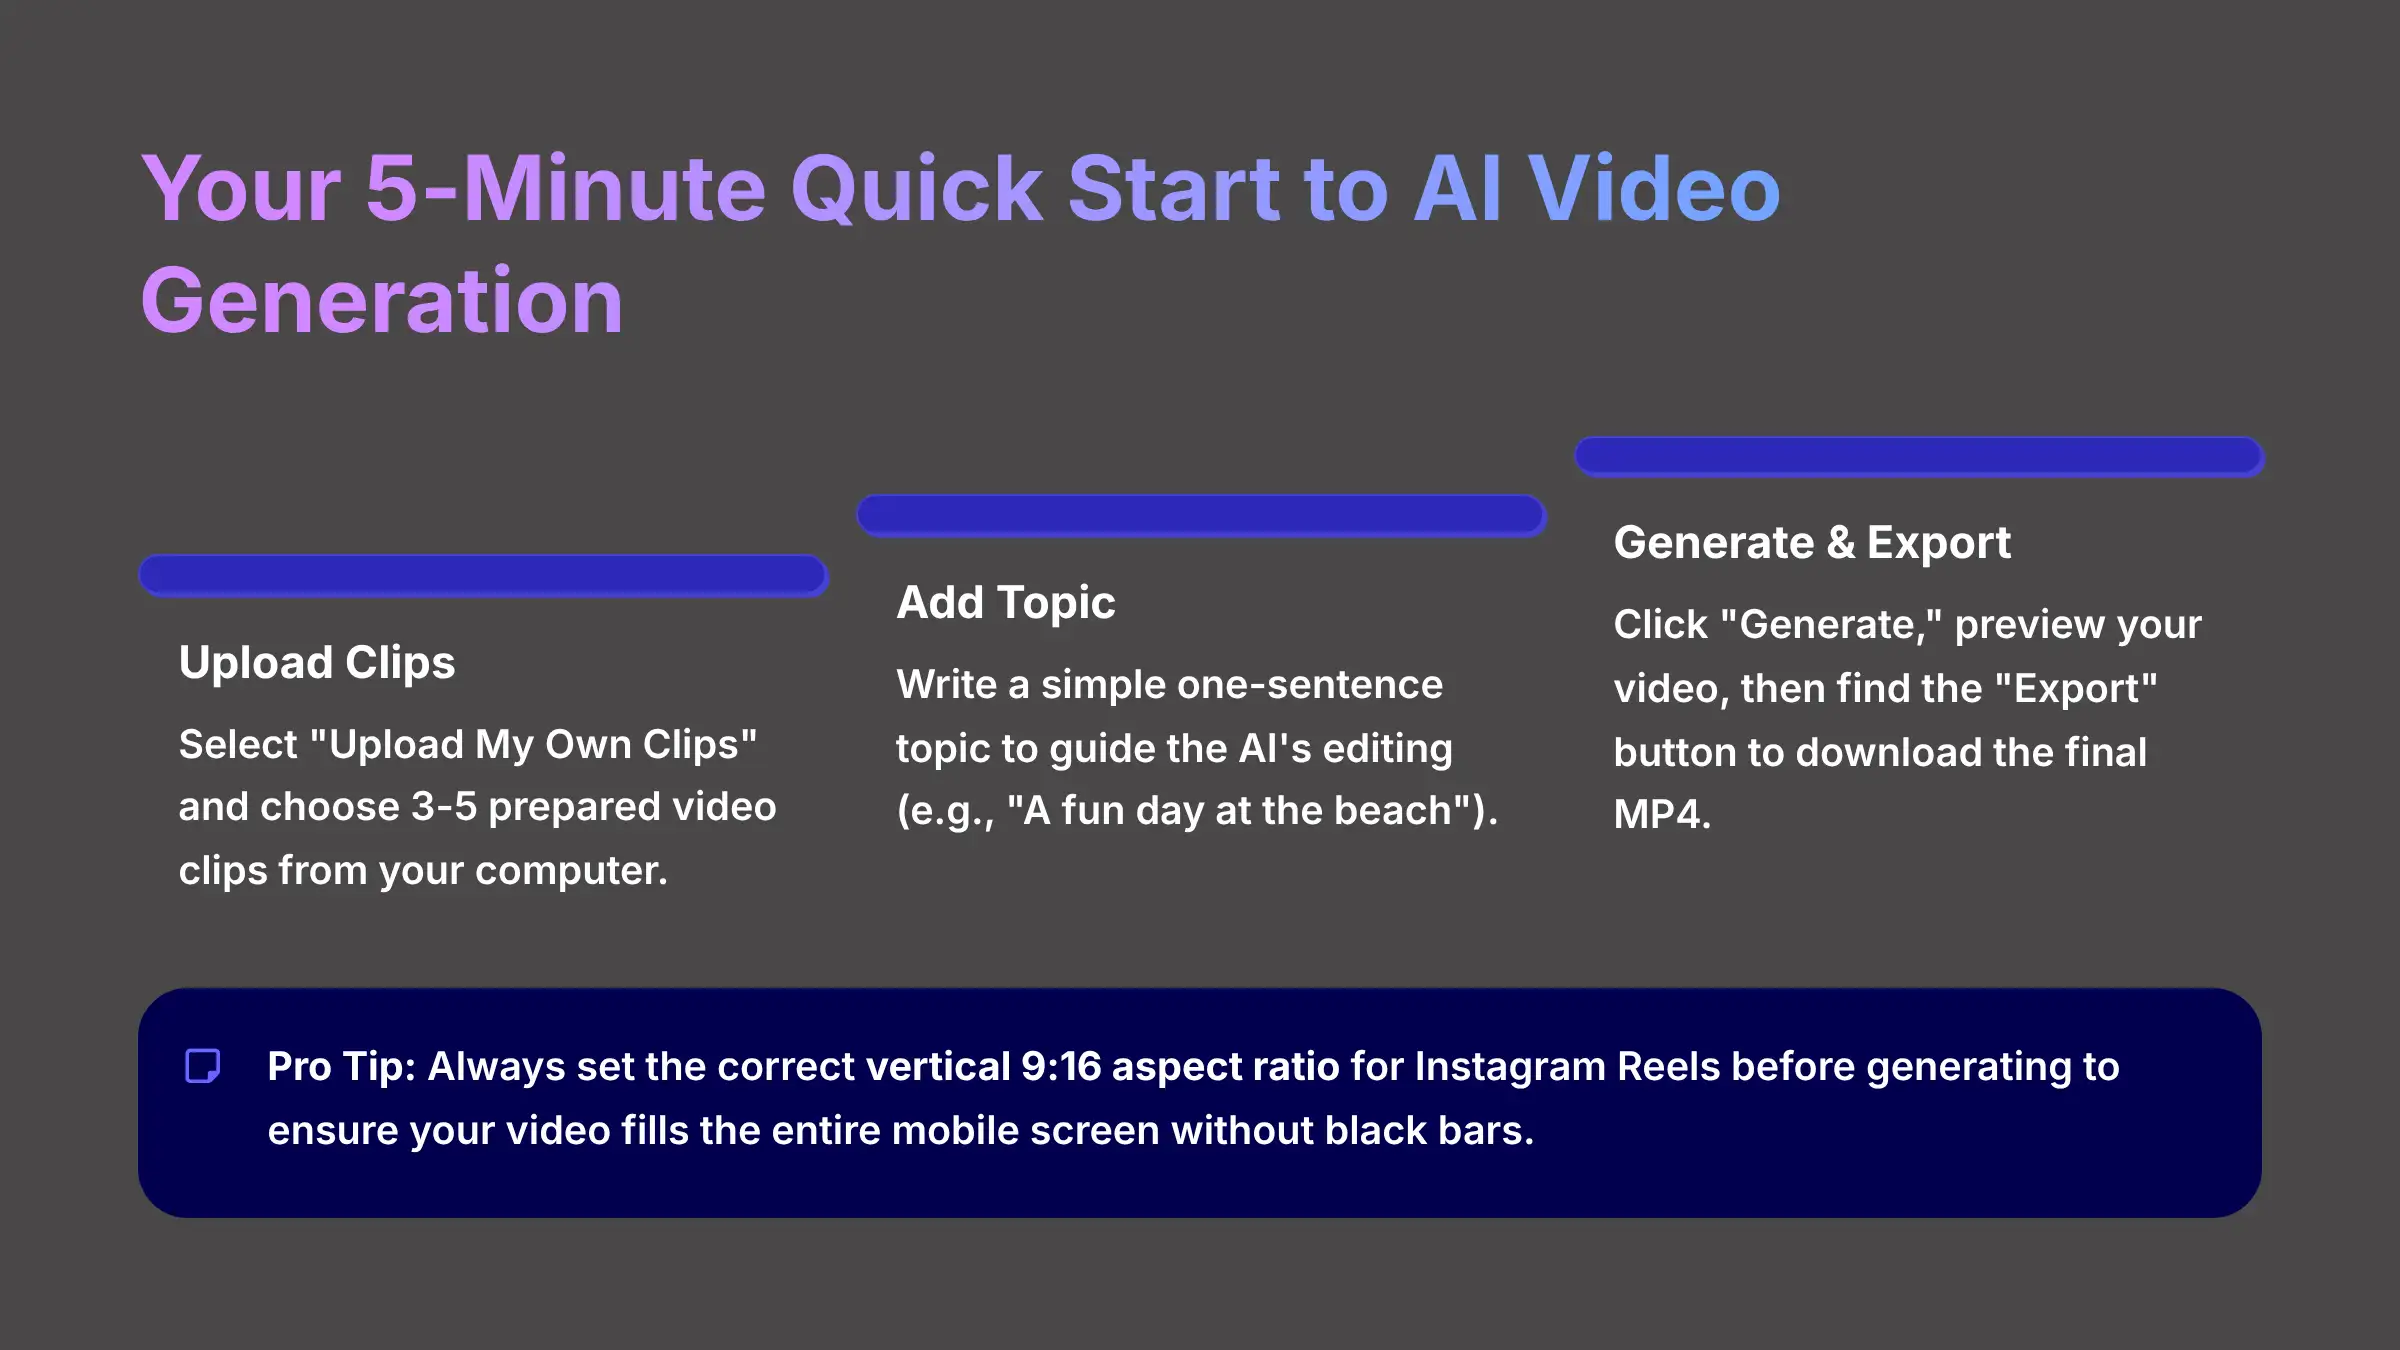
Part 1: Your 5-Minute Quick Start to AI Video Generation

From Raw Clips to a Finished Reel Instantly
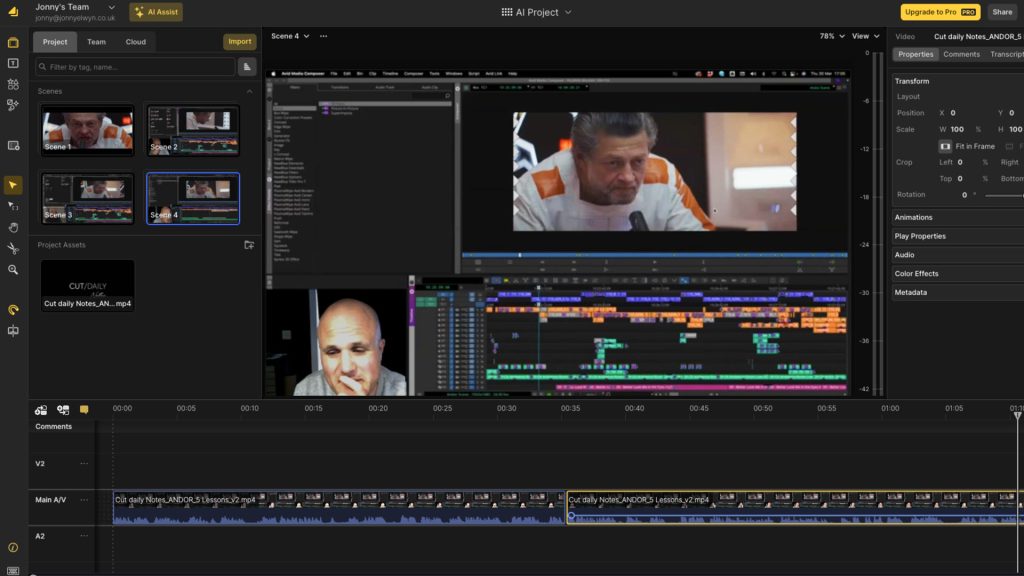
You can get your first video made in just five minutes. The goal here is to understand the complete process from start to finish without getting stuck on the details. The first time I used AI video tools, I uploaded a messy folder of vacation clips. Seeing it become a coherent story in under five minutes, complete with music and captions, was the ‘aha!' moment that showed me the power of this technology.
Here is how to do it:
- After logging in to your chosen AI video platform, you will see the project creation screen.
- Select the option that says “Upload My Own Clips” or similar.
- Choose a small batch of 3-5 prepared video clips from your computer.
- Write a simple one-sentence topic to guide the AI's editing. For example, “A fun day at the beach.”
- Click the “Generate” button and watch the AI work.
- You will see a quick preview of your video.
- Find the “Export” button to download the final MP4 file.
Think of this as giving a human editor a box of photos and a theme. You provide the raw materials (your clips) and the creative idea (your prompt), and the AI does all the assembly for you. For this first try, use smaller clips under 10 seconds each for the fastest processing time.
Pro Tip: Don't overthink your first attempt. The goal here is to understand the flow from A to Z. We will cover how to refine and perfect the output in the sections that follow.
Practice Exercise – “First Reel Challenge”: Upload 3-5 random video clips from your phone and use the prompt “Create a fun memory montage” to generate and export your first video.
Pro Tip: Lock in the Correct Aspect Ratio from the Start
Before you even click “Generate,” make sure your project is set to the correct format for Instagram Reels. This is the vertical 9:16 aspect ratio. Using this setting ensures your video fills the entire mobile screen without black bars, which is critical for grabbing viewer attention and pleasing the Instagram algorithm. Most AI video tools will default to this for a Reel project, but it's the first thing you should always verify.
Part 2: The Core Workflow: Mastering Your Own Content
Step 1: Preparing and Uploading Your Video Clips for Success
The quality of your final Reel depends almost completely on the quality of the video clips you upload. Good preparation is the most important step for getting a professional result. Before you even open your AI video tool, I suggest creating a dedicated folder for each Reel project and putting your pre-trimmed clips inside.
Uploading high-quality clips is like using fresh, high-quality ingredients. You can't expect a gourmet meal from spoiled produce. The better your inputs, the better the AI's output will be.
The ideal video clip is in MP4 or MOV format, has a resolution of at least 1080p, and is between 5-10 seconds long. If you have a longer video, use a simple tool like QuickTime on a Mac or the Photos app on Windows to trim it into several short, action-focused clips. CRITICAL WARNING: The single most common cause for a blurry final video is using low-resolution source clips. Always start with HD footage. For best results, your source clips should ideally be encoded with the standard H.264 video codec and an AAC audio codec, as this is the most universally compatible format for web video processing.
Once your clips are ready, you can upload them from your local drive. Or you can connect your Google Drive account for even easier access. This organization will save you a huge amount of time, especially when you start making videos in batches.
For creators looking to explore automated video creation tools beyond manual uploads, our comprehensive Makereels AI Overview provides detailed insights into platforms that specialize in streamlined Instagram Reel generation workflows.
Step 2: The Power of Voice: AI Scripting and Voice Cloning
The audio narration is the narrative backbone of your video. Modern AI video tools offer three great ways to add a voiceover. The most frequent complaint I hear about AI video is a “robotic” voiceover. This is almost always caused by a poor-quality audio sample for cloning. So, a clean 60-second sample is absolutely needed for good results.
This process is like teaching a parrot to speak. You provide it with a clear example of your voice (the audio sample), and it learns to mimic your specific tone and pace. I have found that cloned voices sound most natural when I record the sample in the same energetic tone I want for my Reels.
Here are your options:
- AI Scripting: You can simply enter a topic and let the AI write a script for you from scratch.
- Manual Scripting: For full control, you can paste your own pre-written script directly into the editor.
- AI Voice Cloning: This is how you create a unique brand voice. Go to the voice cloning section in your account settings. You'll need to upload a clean 60-second audio sample of speech with no background noise. After the model trains, you can select your cloned voice for any project.
Step 3: Final Touches: Pacing, Music, and Perfecting Captions
After the AI generates a draft, you can add the final polish. This involves refining the timing, adding music, and editing the captions for style and accuracy. I used to spend 20 minutes per video just getting cuts to match the music. Now, automated sync features do 90% of that work for me in one click.
Here is how you can perfect your video:
- Go to the royalty-free music library and select a track.
- Use the “Sync to Beat” button to automatically align video cuts with the music's rhythm.
- For more control, you can manually adjust scene cuts on the timeline.
- Open the caption editor to fix any mistakes or change the font and color. This is a critical step, as many people watch Reels with the sound off. Fix any mistakes the AI made, and then adjust the font and color to match your brand.
- The timeline works just like editing a slideshow presentation. Each clip is a slide you can reorder or resize by dragging its edges.
The automated sync feature is a fantastic starting point. But I always recommend watching the preview closely. For key moments, you might want to manually drag a scene block by a fraction of a second to get the timing just right.
Part 3: Practical Project: Create a Branded Product Demo Reel
We've learned all the individual techniques. Now, we're going to follow a complete recipe from start to finish to create our first professional video. We are going to apply all the skills you have learned in a real-world project. The goal is to make a 30-second product demonstration video that is ready to post.
Here is the plan:
- Asset Preparation: First, gather 5-7 short video clips of a product. Then, write a simple script with a hook, three features, and a call to action.
- Execution Steps:
- Start a new project and upload your product clips.
- Use the AI voice generator to narrate your script.
- Add text overlays on the screen to match the spoken features.
- Add your company's logo as a watermark.
- In the editor, use the “Save as Template” feature and name it “Product Demo Template.”
- On the export screen, use automated hashtag generation tools to get ideas.
- Export your final Reel.
Creating custom templates was a big improvement for my agency's workflow. We have templates for weekly tips and product demos. This saves our team at least 10 minutes per Reel because our branding is pre-loaded.
For businesses seeking specialized Reel creation platforms, our detailed Makereels AI Review examines how professional marketers leverage automation tools for consistent brand messaging across multiple campaigns.
Part 4: What Could Go Wrong? A Proactive Troubleshooting Guide
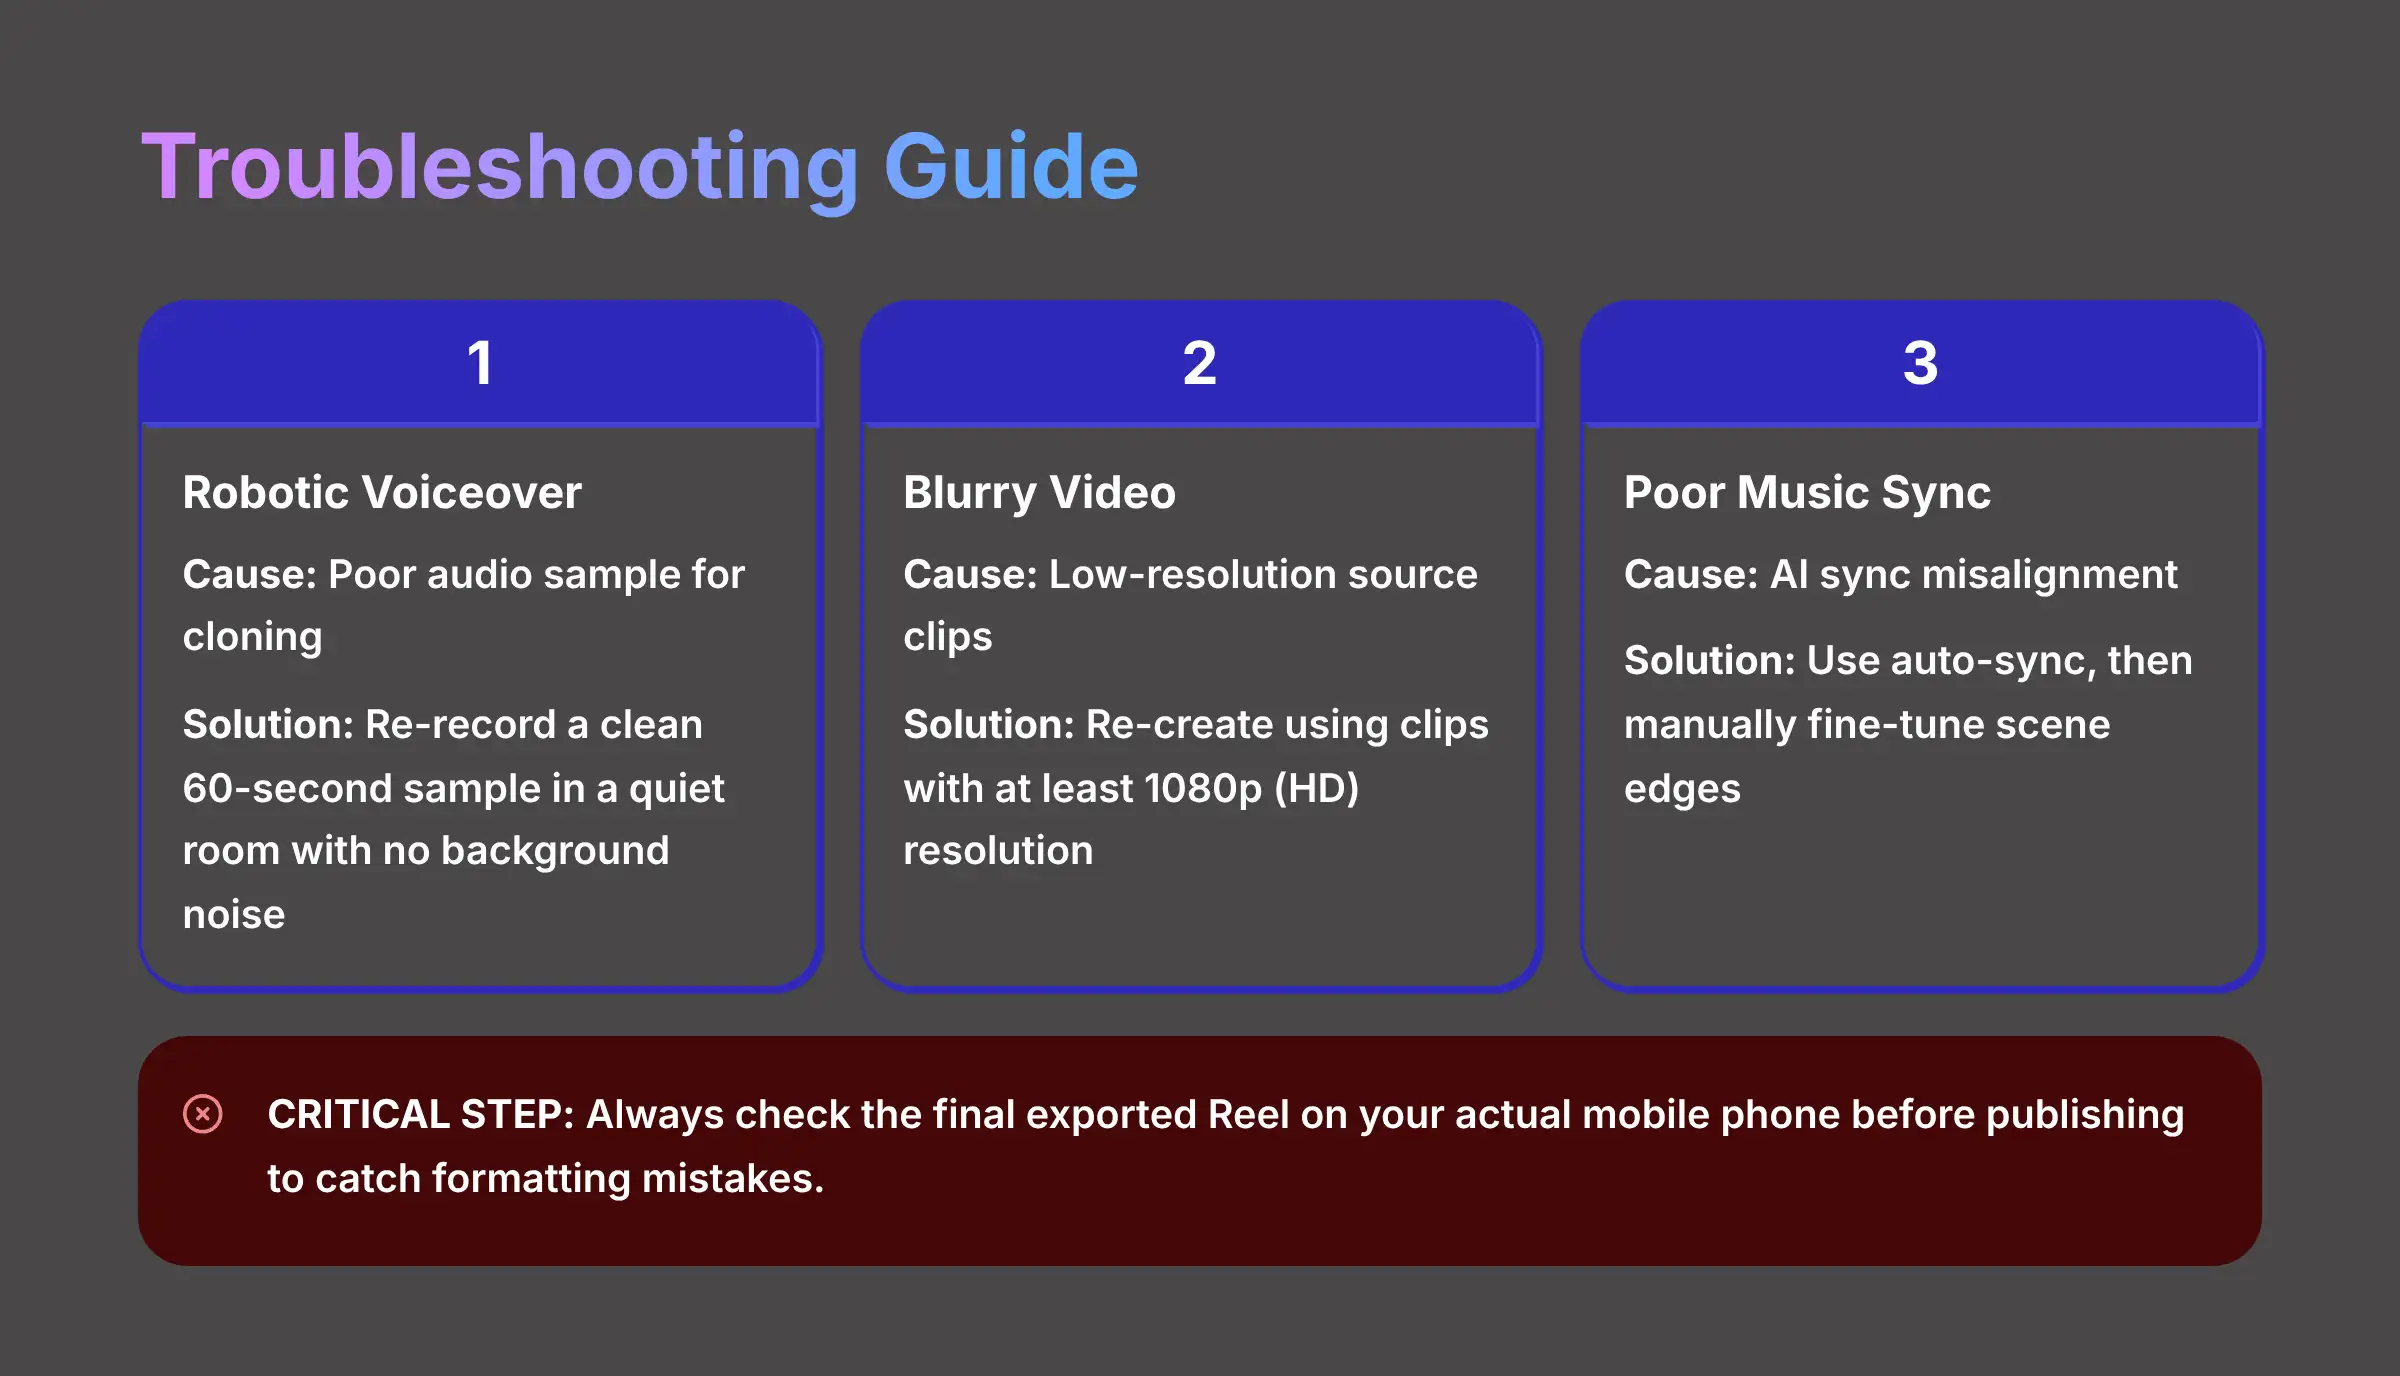
Even with great tools, sometimes things don't go as planned. Here is a quick guide to fix the most common issues you might face. CRITICAL STEP FOR ALL USERS: Before you publish any video, you must check the final exported Reel on your actual mobile phone. This one check will save you from many formatting mistakes.
- Problem: Robotic or Unnatural Voiceover.
- Probable Cause: The audio sample used for cloning was poor, noisy, or too short.
- Verified Solution: You must re-record and re-upload a clean, 60-second audio sample with no background noise. For the best results, record in a small, quiet room—even a closet works wonders for reducing echo. Speak clearly and at the same energetic pace you want for your final Reels.
- Problem: Blurry or Pixelated Exported Video.
- Probable Cause: The source clips you uploaded had a low resolution.
- Verified Solution: Re-create the project using source clips that are at least 1080p (HD) resolution.
- Problem: Video Cuts Don't Match the Music Beat.
- Probable Cause: The AI sync did not perfectly align with the music's tempo.
- Verified Solution: First, click the automated sync button. Then, for a final polish, manually drag the scene edges on the timeline to fine-tune the cuts.
- Problem: Direct Export to Instagram Fails or Stalls.
- Probable Cause: This is often caused by a temporary browser glitch or an API connection error.
- Verified Solution: The best workaround is to download the MP4 file to your computer. Then, transfer it to your phone and upload it manually through the Instagram app.
Part 5: Understanding AI Video Tool Pricing and Plans

Before you fully commit to integrating a new tool into your workflow, it's essential to understand the cost. Like most SaaS (Software as a Service) tools in the AI space, video generation platforms operate on a subscription model. While the exact tiers may change, here's a general breakdown of what you can expect.
- Free Trial or Free Plan: Most users will start here. Expect limitations, such as a video watermark on all exports, a cap on the number of videos you can create per month (e.g., 3-5), and limited access to premium features like advanced AI voice clones or 4K export quality. This is perfect for testing the core workflow.
- Pro or Creator Plan (Paid): This is the sweet spot for most serious content creators and small businesses. A paid subscription typically removes the watermark, significantly increases your monthly video export limit, provides access to the full library of premium music and templates, and unlocks advanced features like batch processing and API access.
- Business or Agency Plan: For high-volume users like marketing agencies, these plans offer the highest limits on video creation, team collaboration features (multiple user seats), and often dedicated customer support.
When evaluating AI video tool pricing, consider your return on investment (ROI). Calculate how many hours you save per month on video editing and weigh that against the subscription cost. For many, automating the creation of 20-30 Reels a month easily justifies the expense. Always check their official pricing page for the most current details.
Part 6: AI Video Tools vs. The Competition (A Quick Comparison)
AI video generation is a powerful short-form video creation solution, but it's not the only player in the field. Understanding how different tools compare helps you choose the right solution for your specific job.
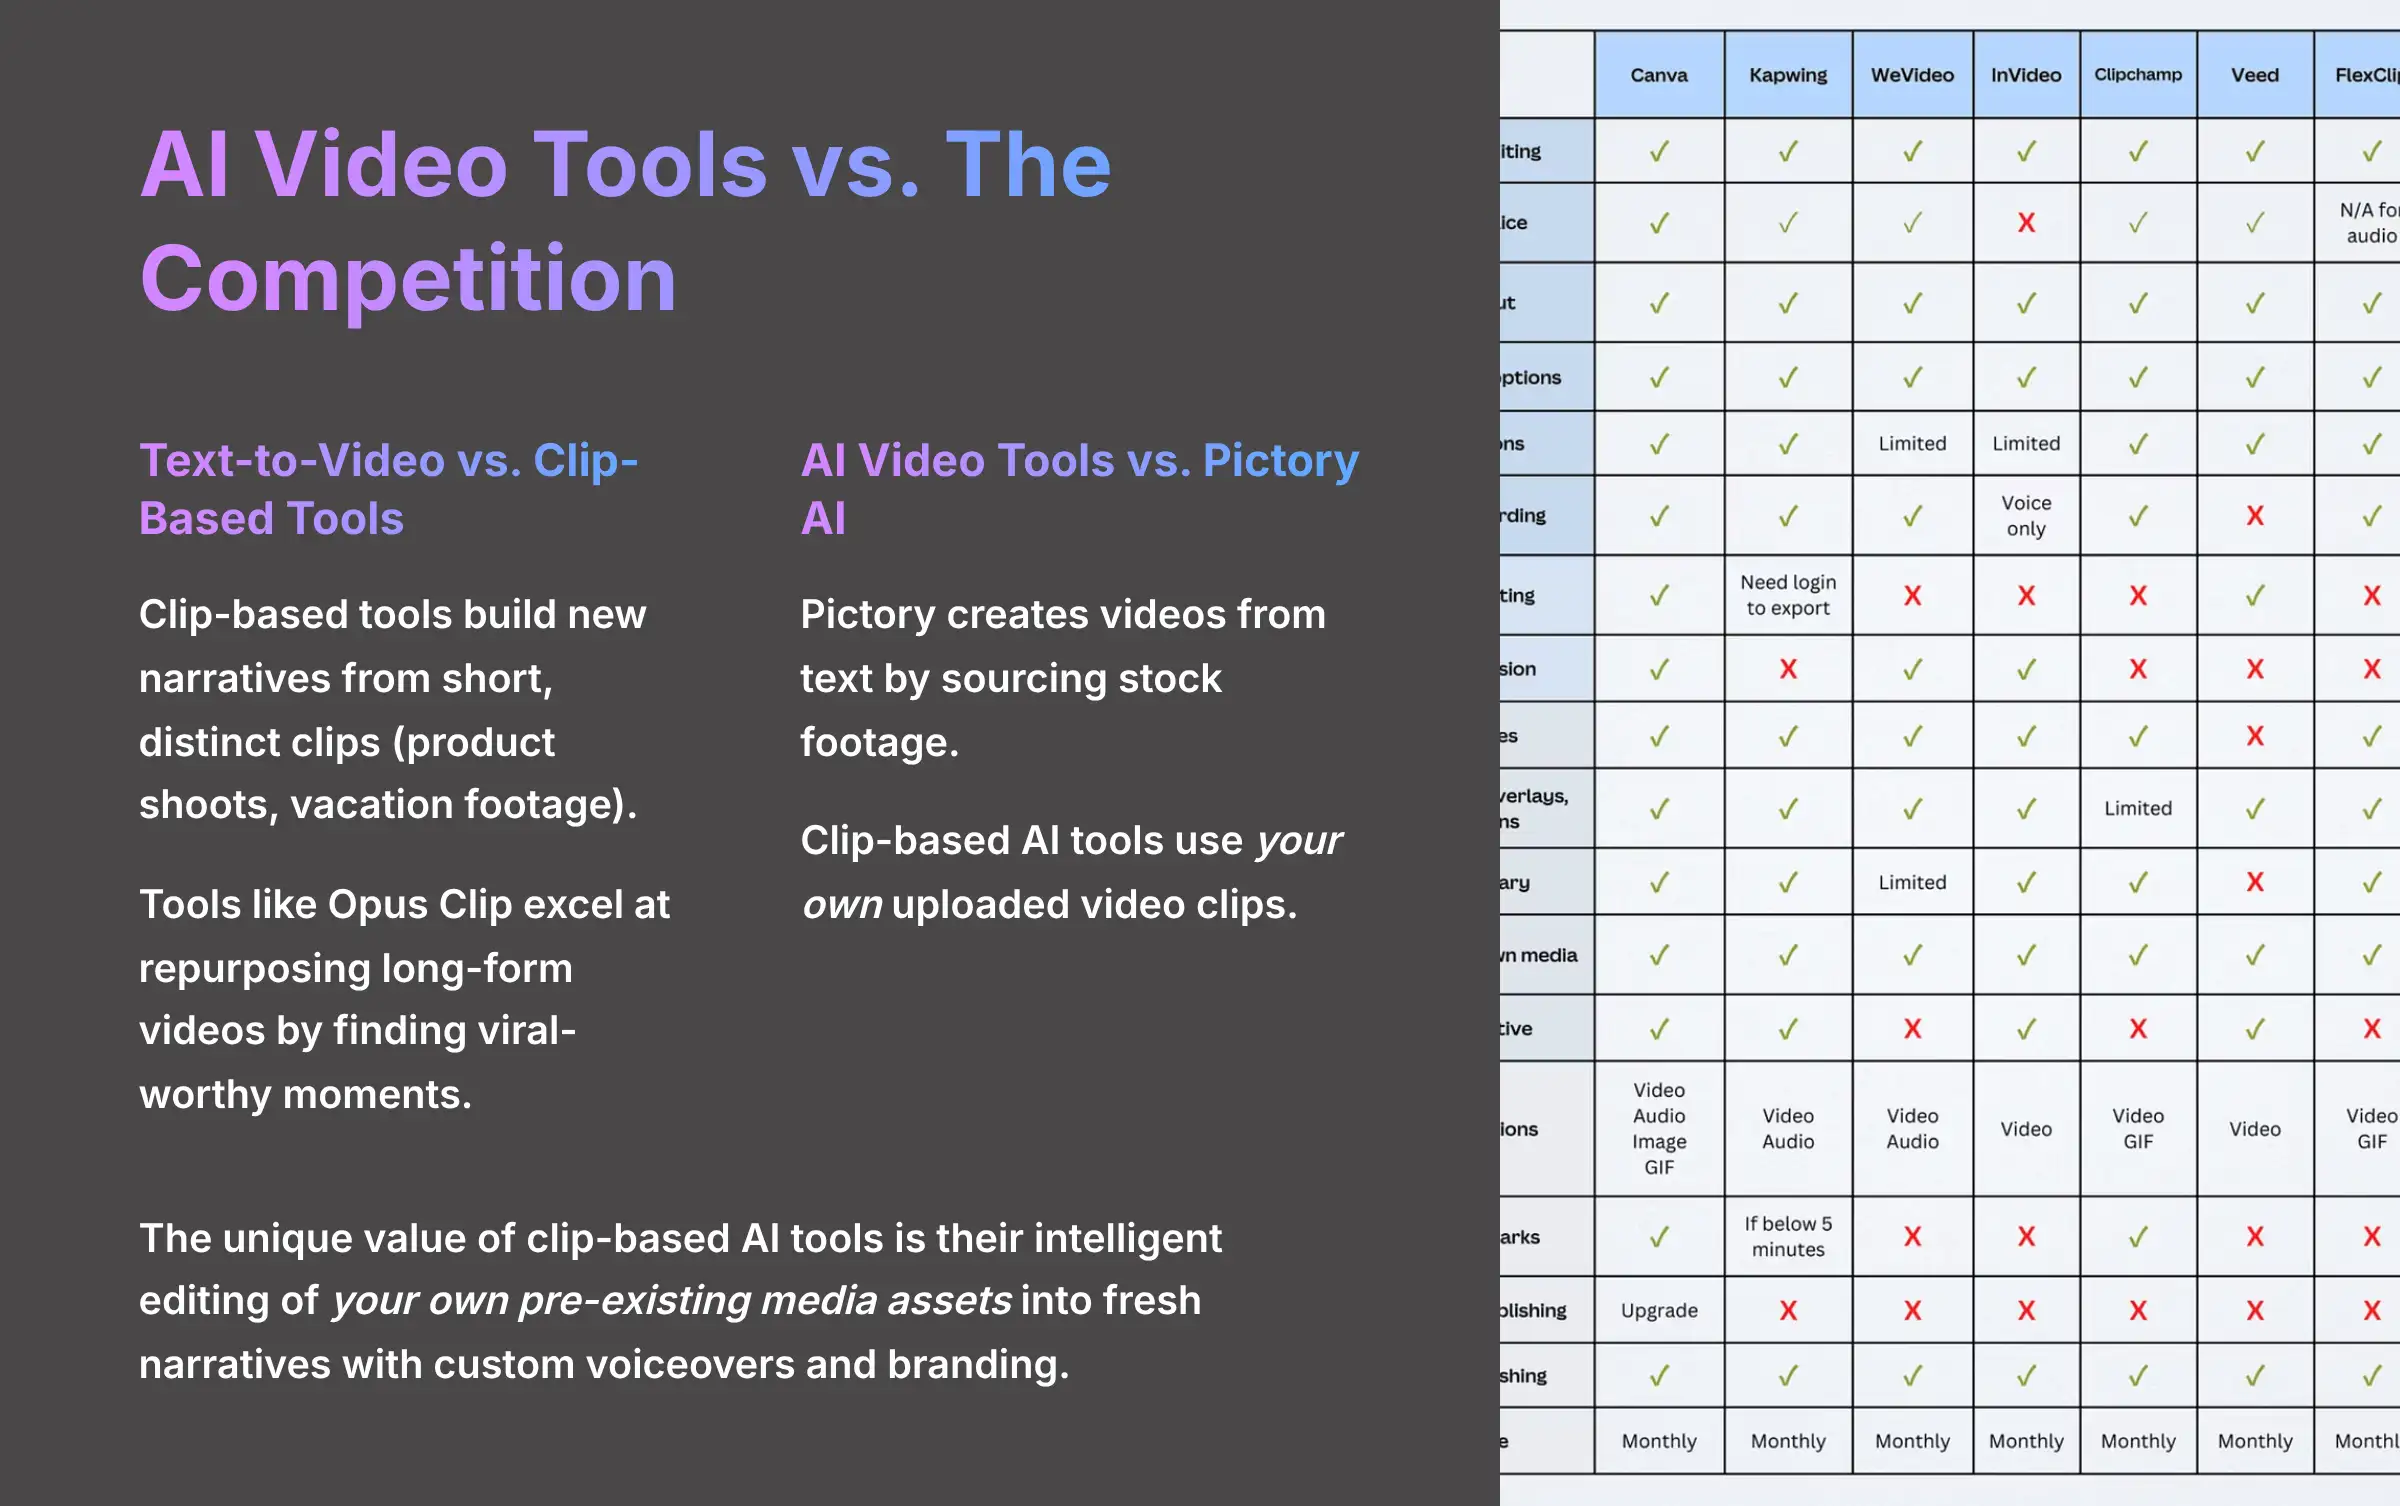
Text-to-Video vs. Clip-Based Tools: The key difference lies in the source material. Some AI tools are designed to build new narratives from a folder of short, distinct clips (like a product shoot or vacation footage). In contrast, tools like Opus Clip excel at video repurposing—taking one long-form video (like a podcast or YouTube video) and automatically finding and clipping the most viral-worthy moments. Choose clip-based tools when your goal is to create net-new content from b-roll. Choose repurposing tools when you want to repurpose existing long-form content.
AI Video Tools vs. Pictory AI: Pictory is a versatile AI video editor that specializes in creating videos from text, such as a blog post or script, by sourcing stock footage for you. Clip-based AI tools' core strength is using your own uploaded video clips. Choose Pictory when you have a script but no visuals. Choose clip-based tools when you have a collection of visuals and need the AI to assemble them into a coherent story.
In short, the unique value proposition of clip-based AI video tools is their intelligent editing of your own pre-existing media assets into fresh, engaging narratives, complete with custom voiceovers and branding.
For content creators exploring alternatives to traditional video editing platforms, our comprehensive analysis of the Best Makereels AI Alternatives provides detailed comparisons to help you find the perfect tool for your specific content creation needs.
Part 7: Advanced Techniques and Scaling for Power Users
From One Reel to One Hundred: Scaling with Batch Creation
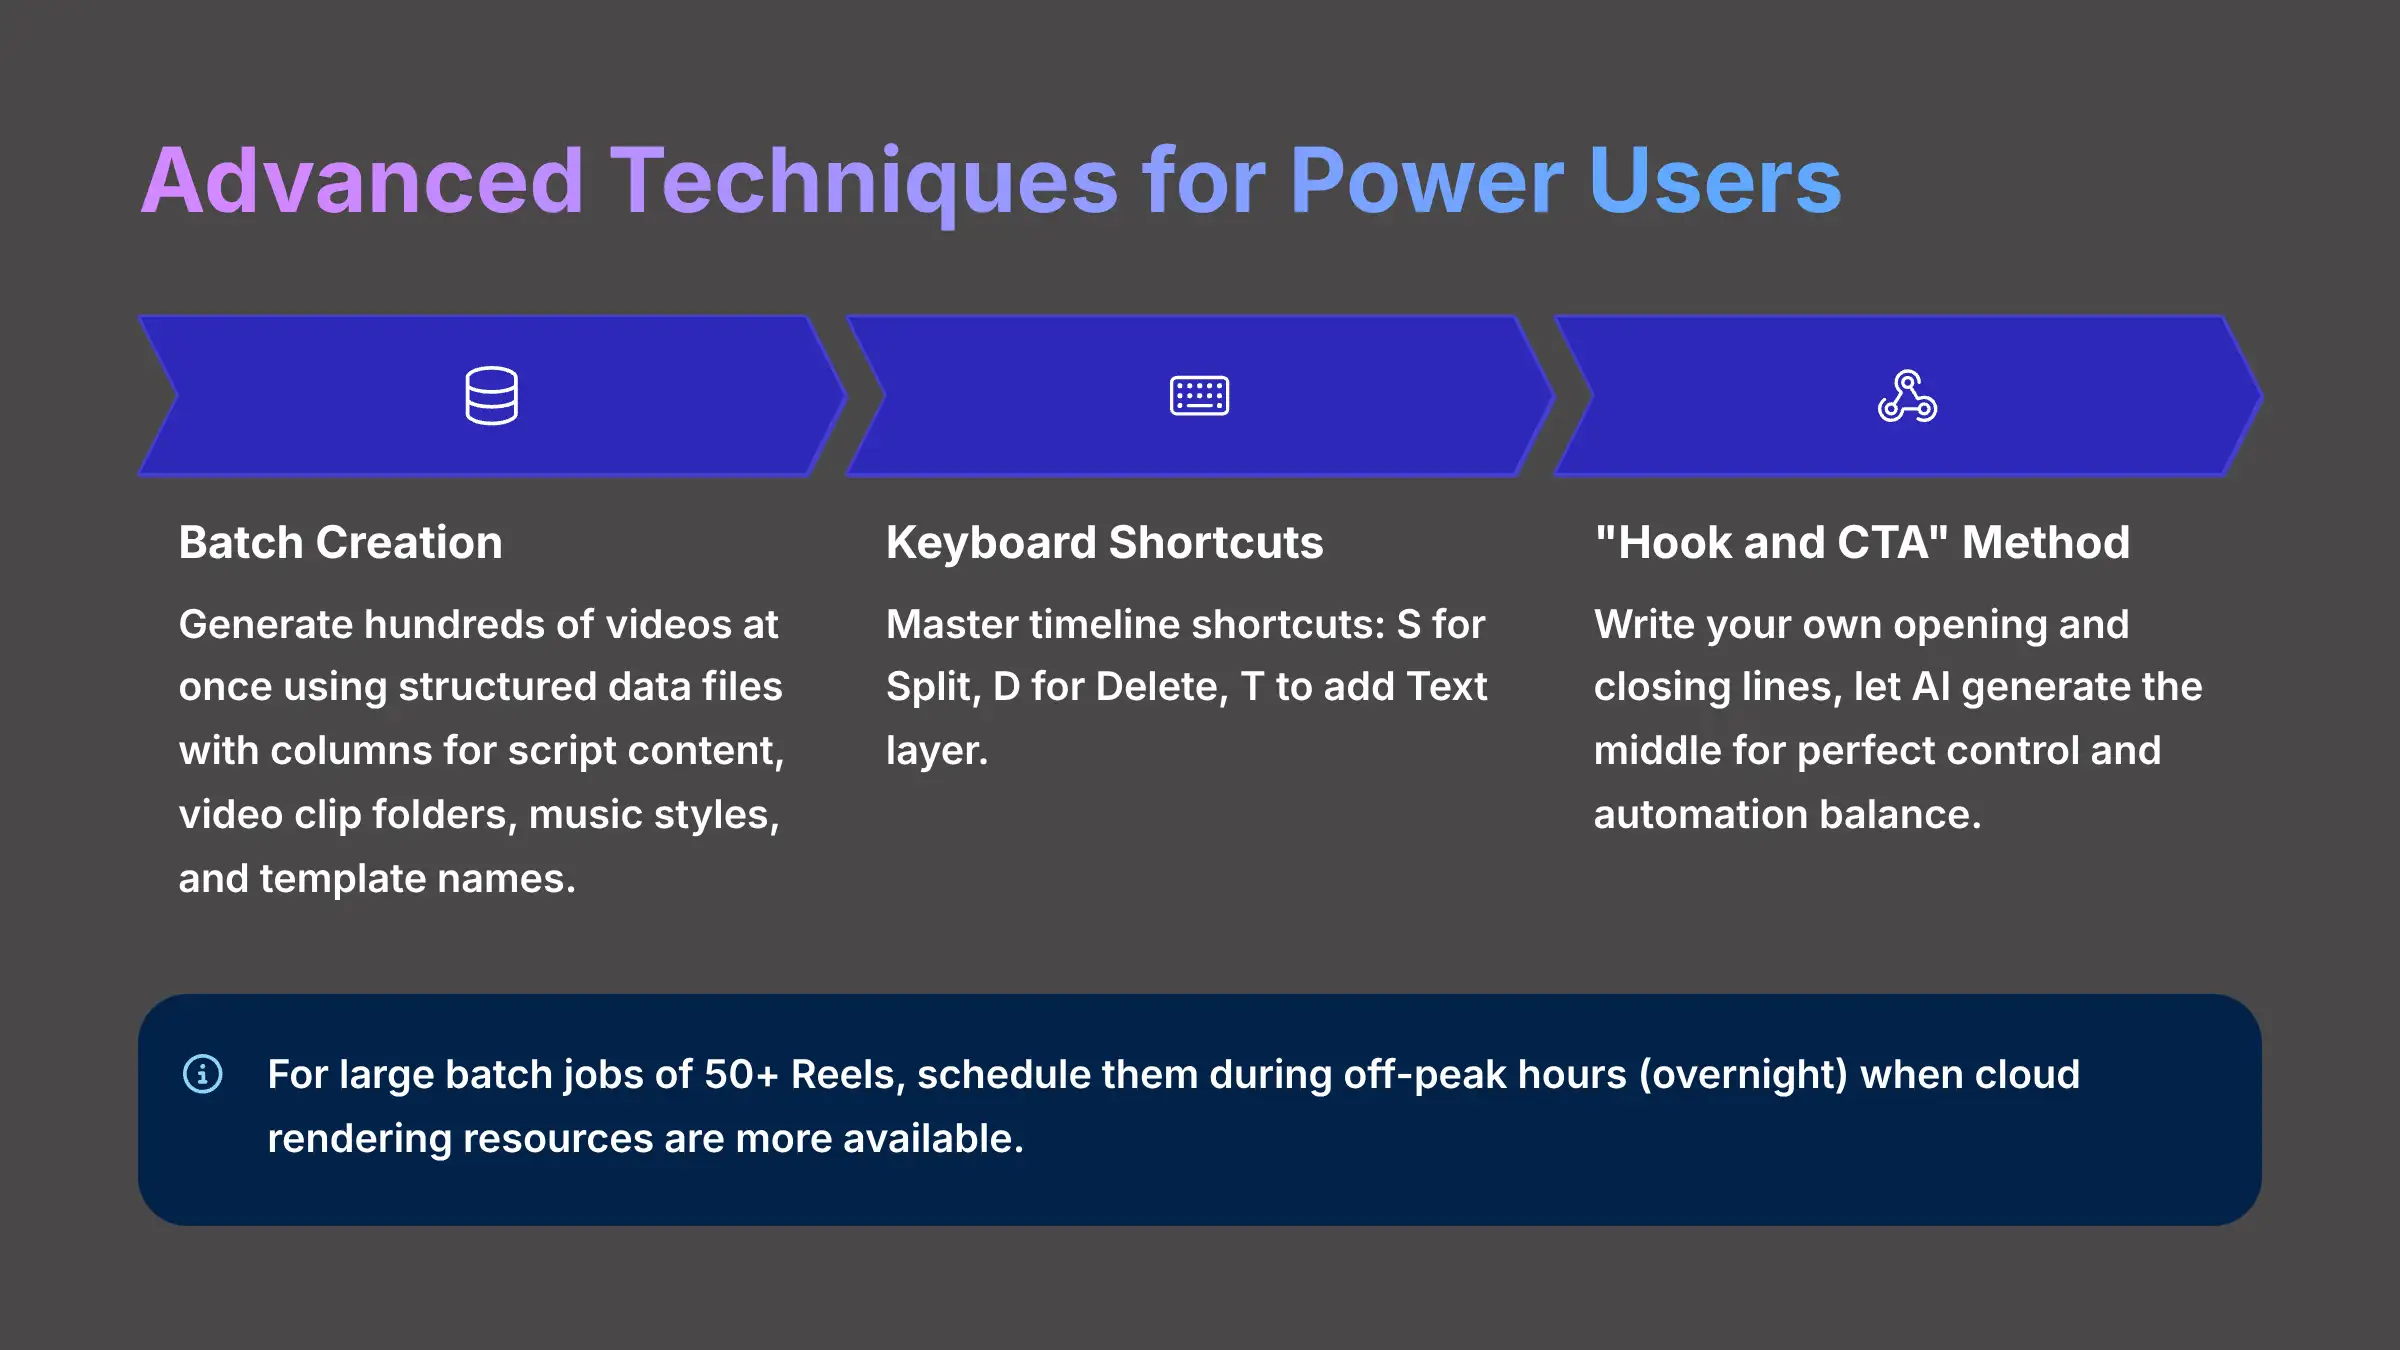
For agencies and high-volume creators, making videos one by one is not efficient. Batch Creation features allow you to generate hundreds of videos at once using structured data files. This is how you truly scale your content production.
To do this, you need a properly structured data file with columns for script content, video clip folders, music styles, and template names. You will also need to prepare asset folders that the AI can find based on the names in your data file. In batch creation interfaces, you just upload the structured file, and the system starts building all your Reels automatically.
For large batch jobs of 50+ Reels, I have found it is best to schedule them to run during off-peak hours, like overnight. The cloud rendering resources seem more available then, which often means jobs finish faster.
Creative Control and Productivity Hacks
There are a few tricks that can speed up your workflow and give you more precise control over the final product. Learning these separates the beginners from the power users. The single most impactful tip I can offer is to always control your hook. I write the first 3 seconds of my script myself to make sure it is scroll-stopping.
Here are a few of my favorite productivity hacks:
- Master Keyboard Shortcuts: Get familiar with shortcuts on the timeline. Common ones include
Sfor Split,Dfor Delete, andTto add a Text layer. - The “Hook and CTA” Method: Write your own opening and closing lines. Then let the AI generate only the middle part of the script for a perfect mix of control and automation.
- Use Custom Templates: You can apply the custom templates you created earlier to your batch workflow. Just add the template name to your structured data file for scaled branding.
Part 8: Integrating AI Video Tools Into Your Content Ecosystem
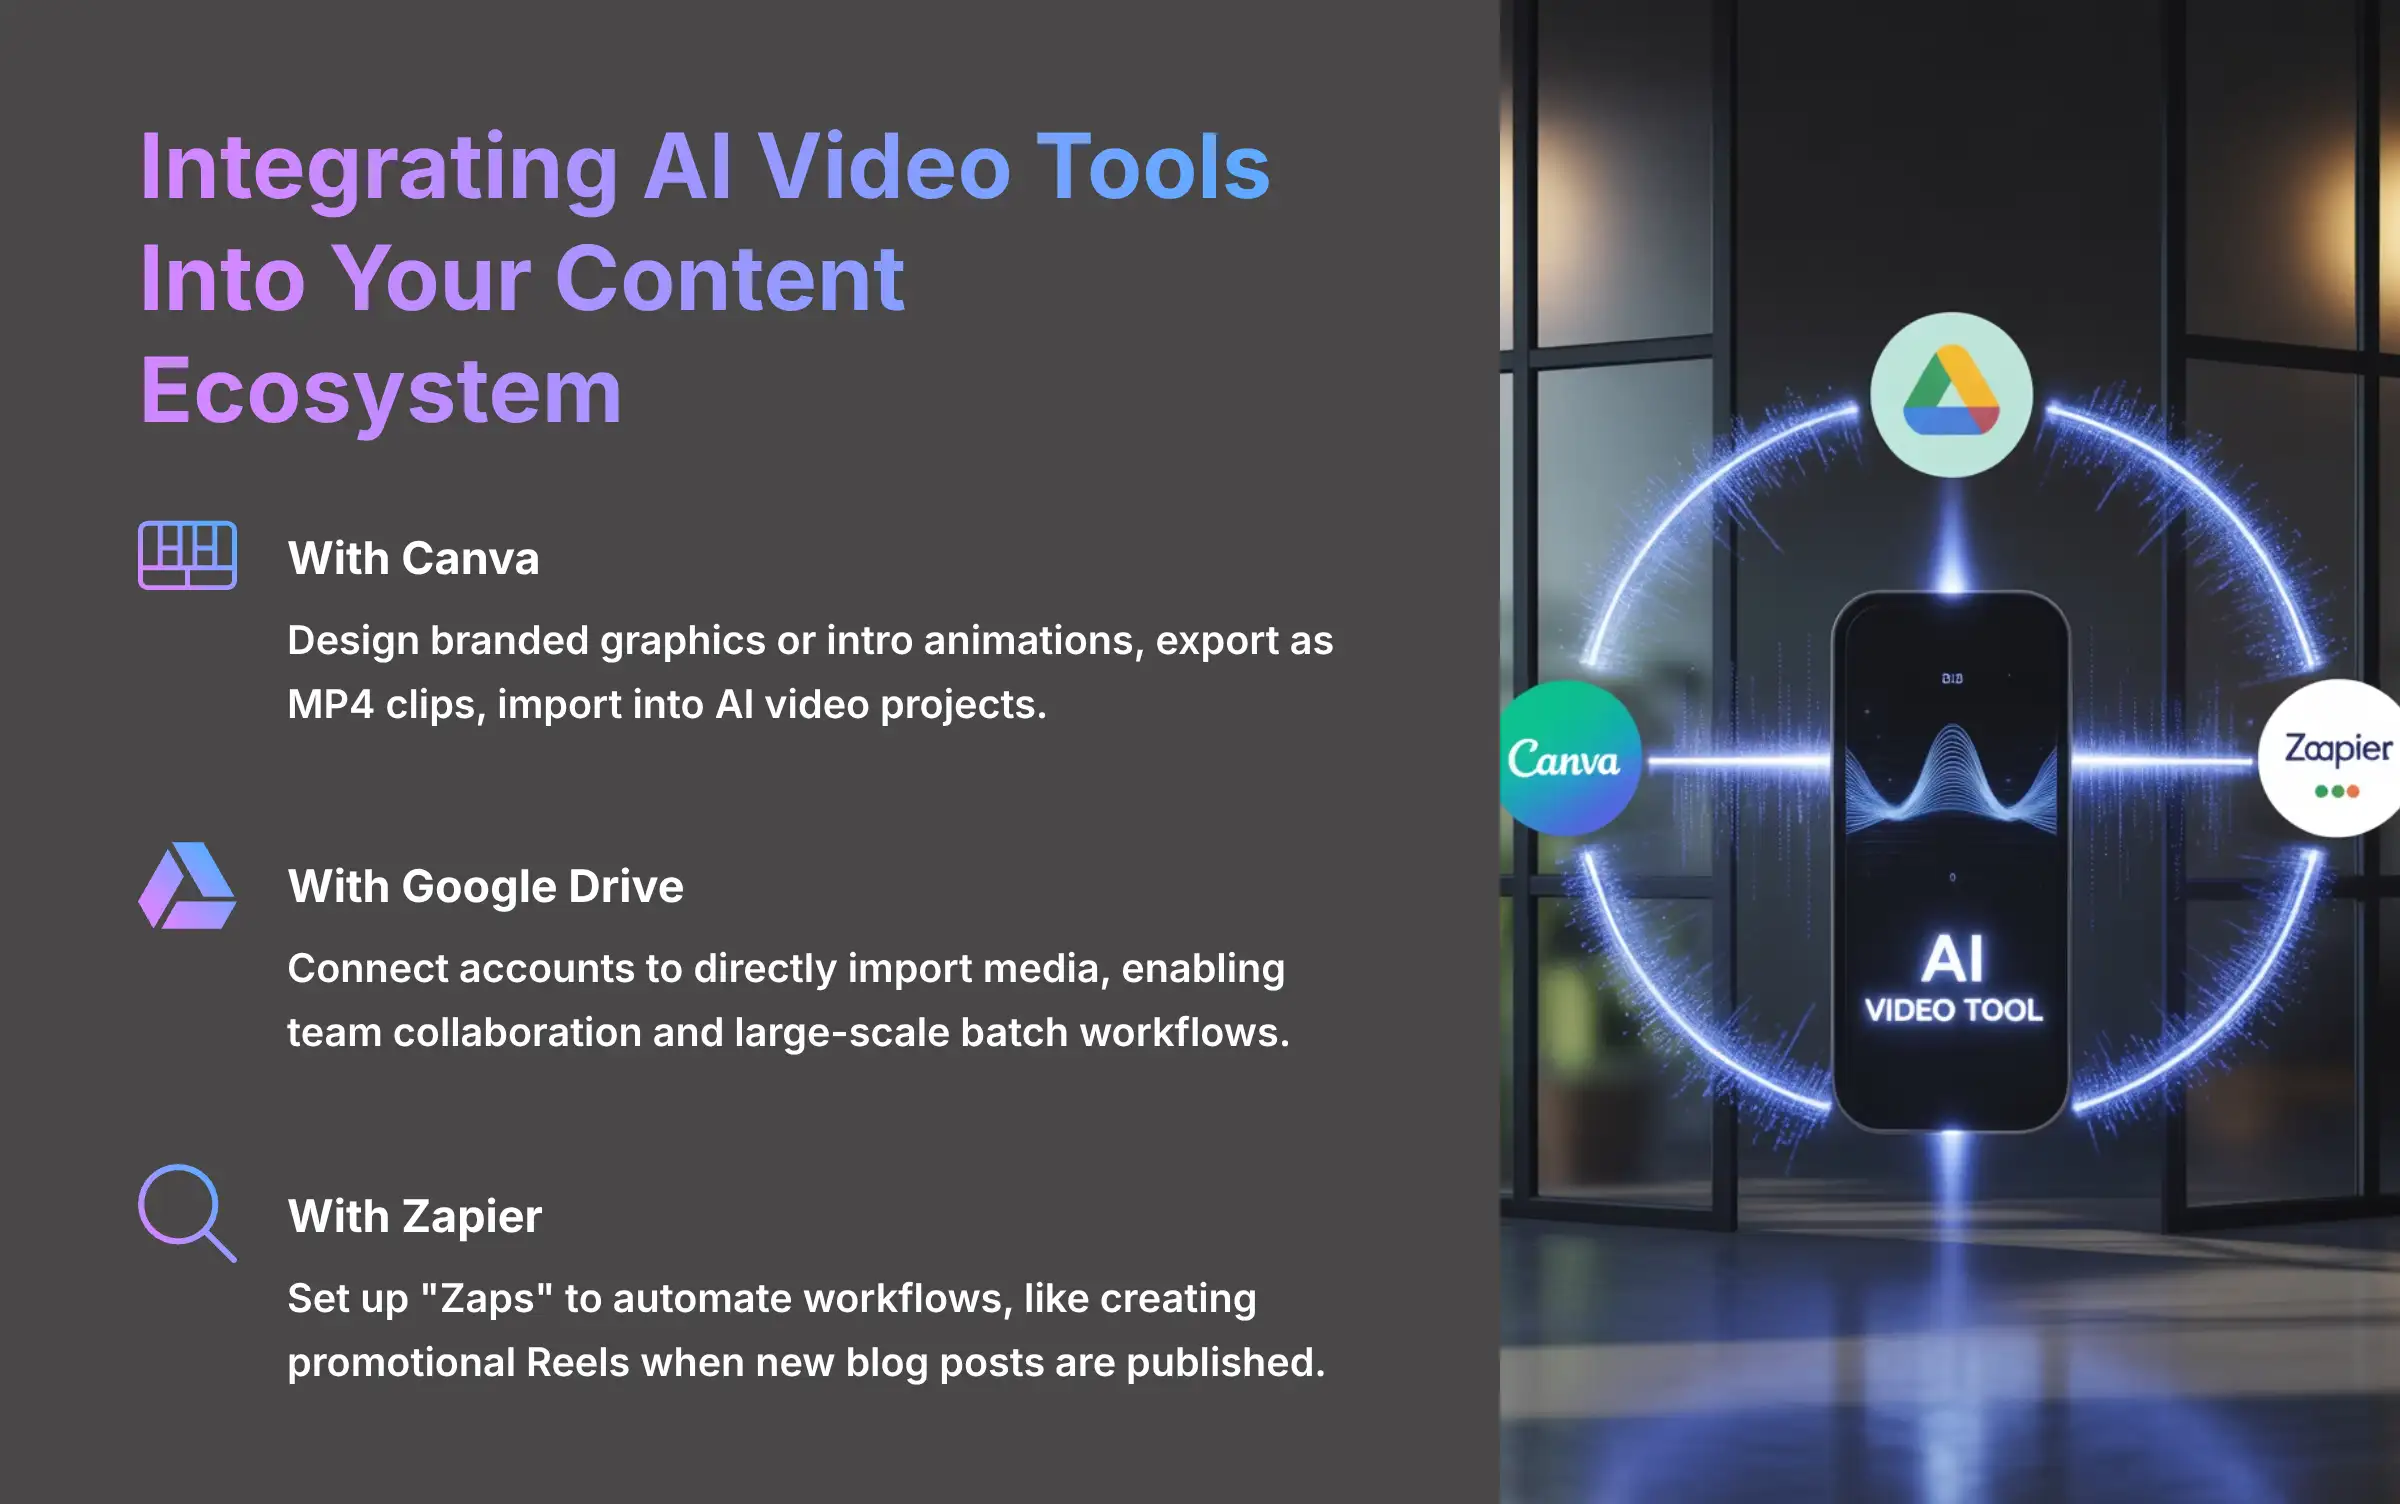
AI video generation becomes even more powerful when you connect it to other tools you already use. This creates a seamless content pipeline from idea to publication. My most powerful automation uses Zapier to watch my company's YouTube channel. When we publish a new long-form video, it automatically tells the AI video tool to create five short promotional Reels from the transcript.
- With Canva: You can design branded graphics or intro animations in Canva. Export them as short MP4 clips and import them into your AI video project.
- With Google Drive: Connect your Google Drive account to directly import media. This is amazing for team collaboration and large-scale batch workflows.
- With Zapier: You can set up automations called “Zaps.” For instance, a new blog post on your website could trigger a job in your AI video tool to create a promotional Reel for it automatically.
For brands seeking real-world implementation strategies, our practical guide on Makereels AI Usecase: Creating Trendy Instagram Reels for Brand Promotion demonstrates how leading companies integrate AI video tools into their marketing workflows for maximum impact.
Part 9: Conclusion: Your Path from Novice to Automation Master
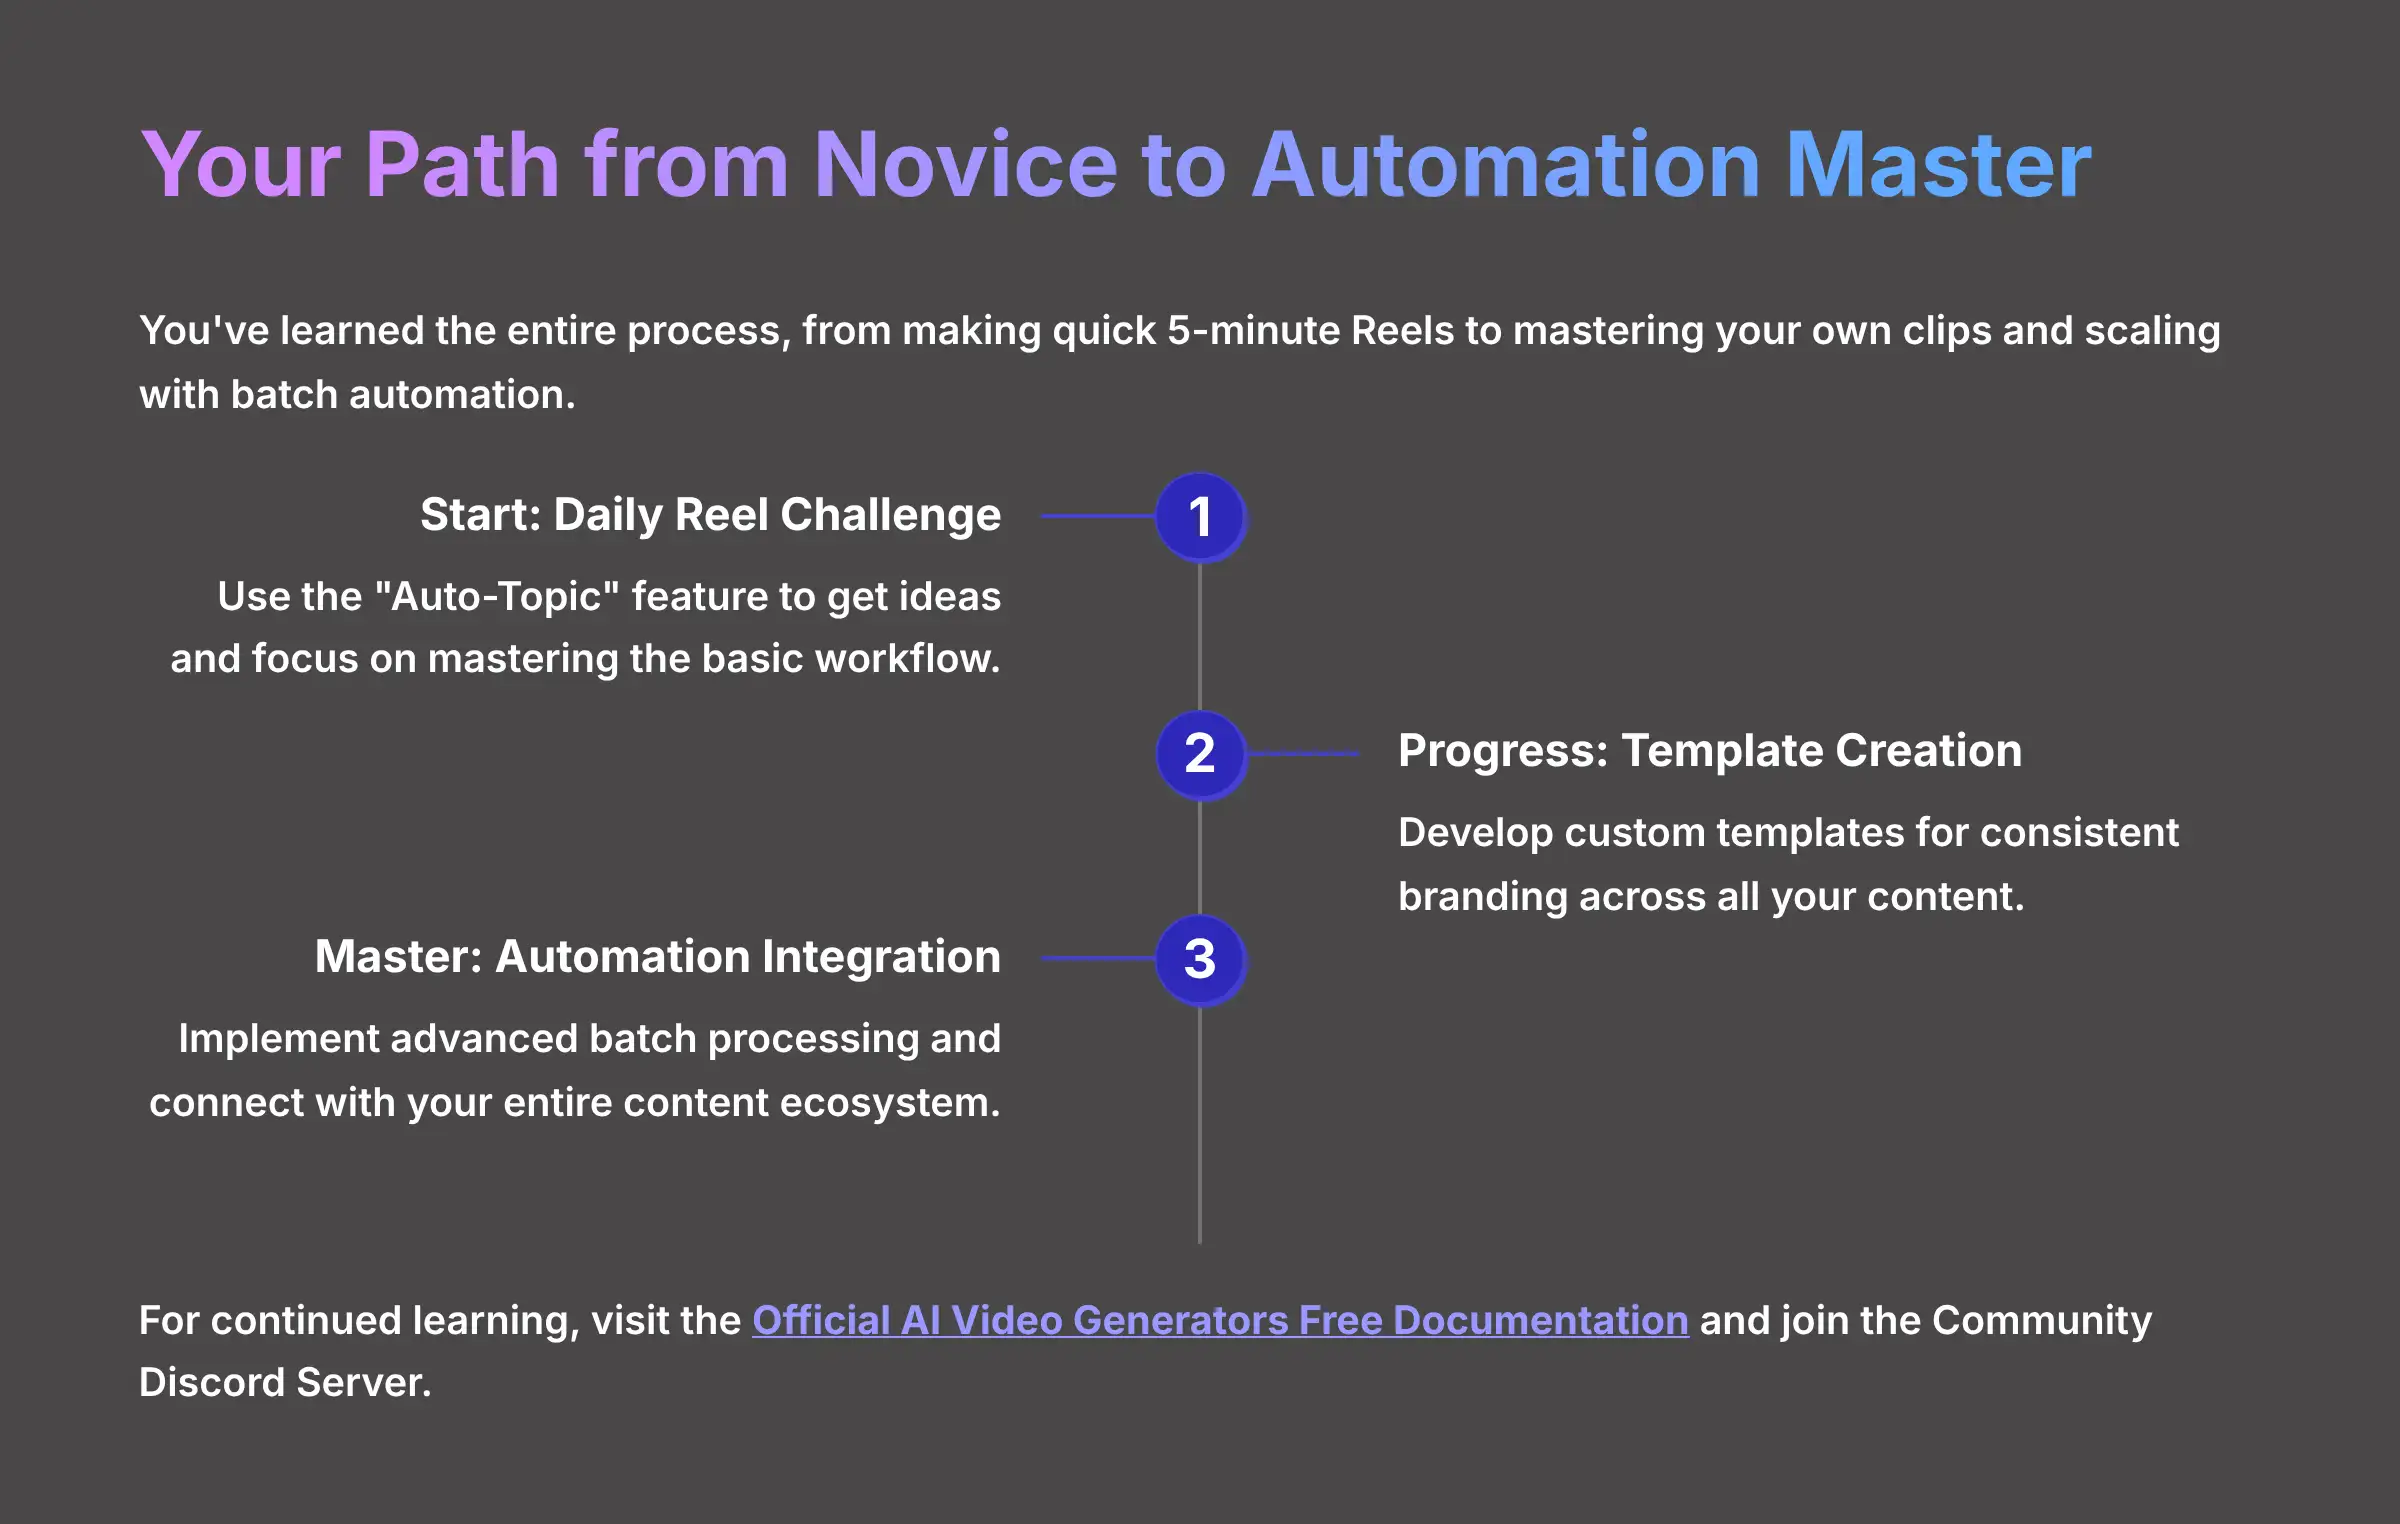
You have learned the entire process, from making a quick 5-minute Reel to mastering your own clips and scaling up with batch automation. The skills you have now are an absolute game-changer, designed to give you back hours of your time while producing consistently fantastic content. The only thing left is to put it into practice.
I recommend starting with a “Daily Reel Challenge” to really make these skills your own. Use the “Auto-Topic” feature to get ideas and just focus on getting comfortable with the workflow. As you grow, you can explore the advanced automation features we discussed. You are no longer a novice; you are an automation master in the making.
For continued learning, visit the Official AI Video Generators Free Documentation and join the conversation on the Community Discord Server. If you have specific questions about implementation, our comprehensive Makereels AI FAQs: Common Questions and Answers resource addresses the most frequent challenges creators face when getting started with AI video automation.
Additionally, for hands-on guidance, explore our step-by-step Makereels AI Tutorial: How to Automatically Generate an Instagram Reel from Video Clips which provides detailed instructions for implementing the techniques covered in this guide.
Thank you for being here, and I wish you a delightful day!


Leave a Reply