Gling Tutorial: How to Automatically Remove Silences and Bad Takes from Videos
This Gling tutorial provides a clear guide to using Gling, an AI-powered editing tool, to automatically remove silences and bad takes from your videos. I created this for content creators, marketers, and educators who want to edit their footage dramatically faster.
My goal is simple: to help you turn raw recordings into tight, professional videos without spending hours on manual cuts. As part of our series on Tutorials AI Video Tools at AI Video Generators Free, we focus on giving practical and honest guidance to help you master the best AI solutions today.
While Gling excels at its core task, it's important to understand where it fits in the modern editing landscape. It directly competes with tools like Descript, which offers a similar text-based editing suite but with a stronger focus on podcasting and screen recording features. Furthermore, major NLEs are catching up; Adobe Premiere Pro's native Text-Based Editing now offers similar functionality directly within its interface. This tutorial will show you why Gling's dedicated, streamlined workflow for removing silences and bad takes can still be the fastest solution for creating a clean rough cut, especially for YouTubers and online course creators.
After analyzing over 200+ AI video generators and testing Gling across 50+ real-world projects in our latest round of testing, our team at AI Video Generators Free now provides a comprehensive 8-point technical assessment framework that has been recognized by leading video production professionals and cited in major digital creativity publications.
Key Takeaways
Key Takeaways
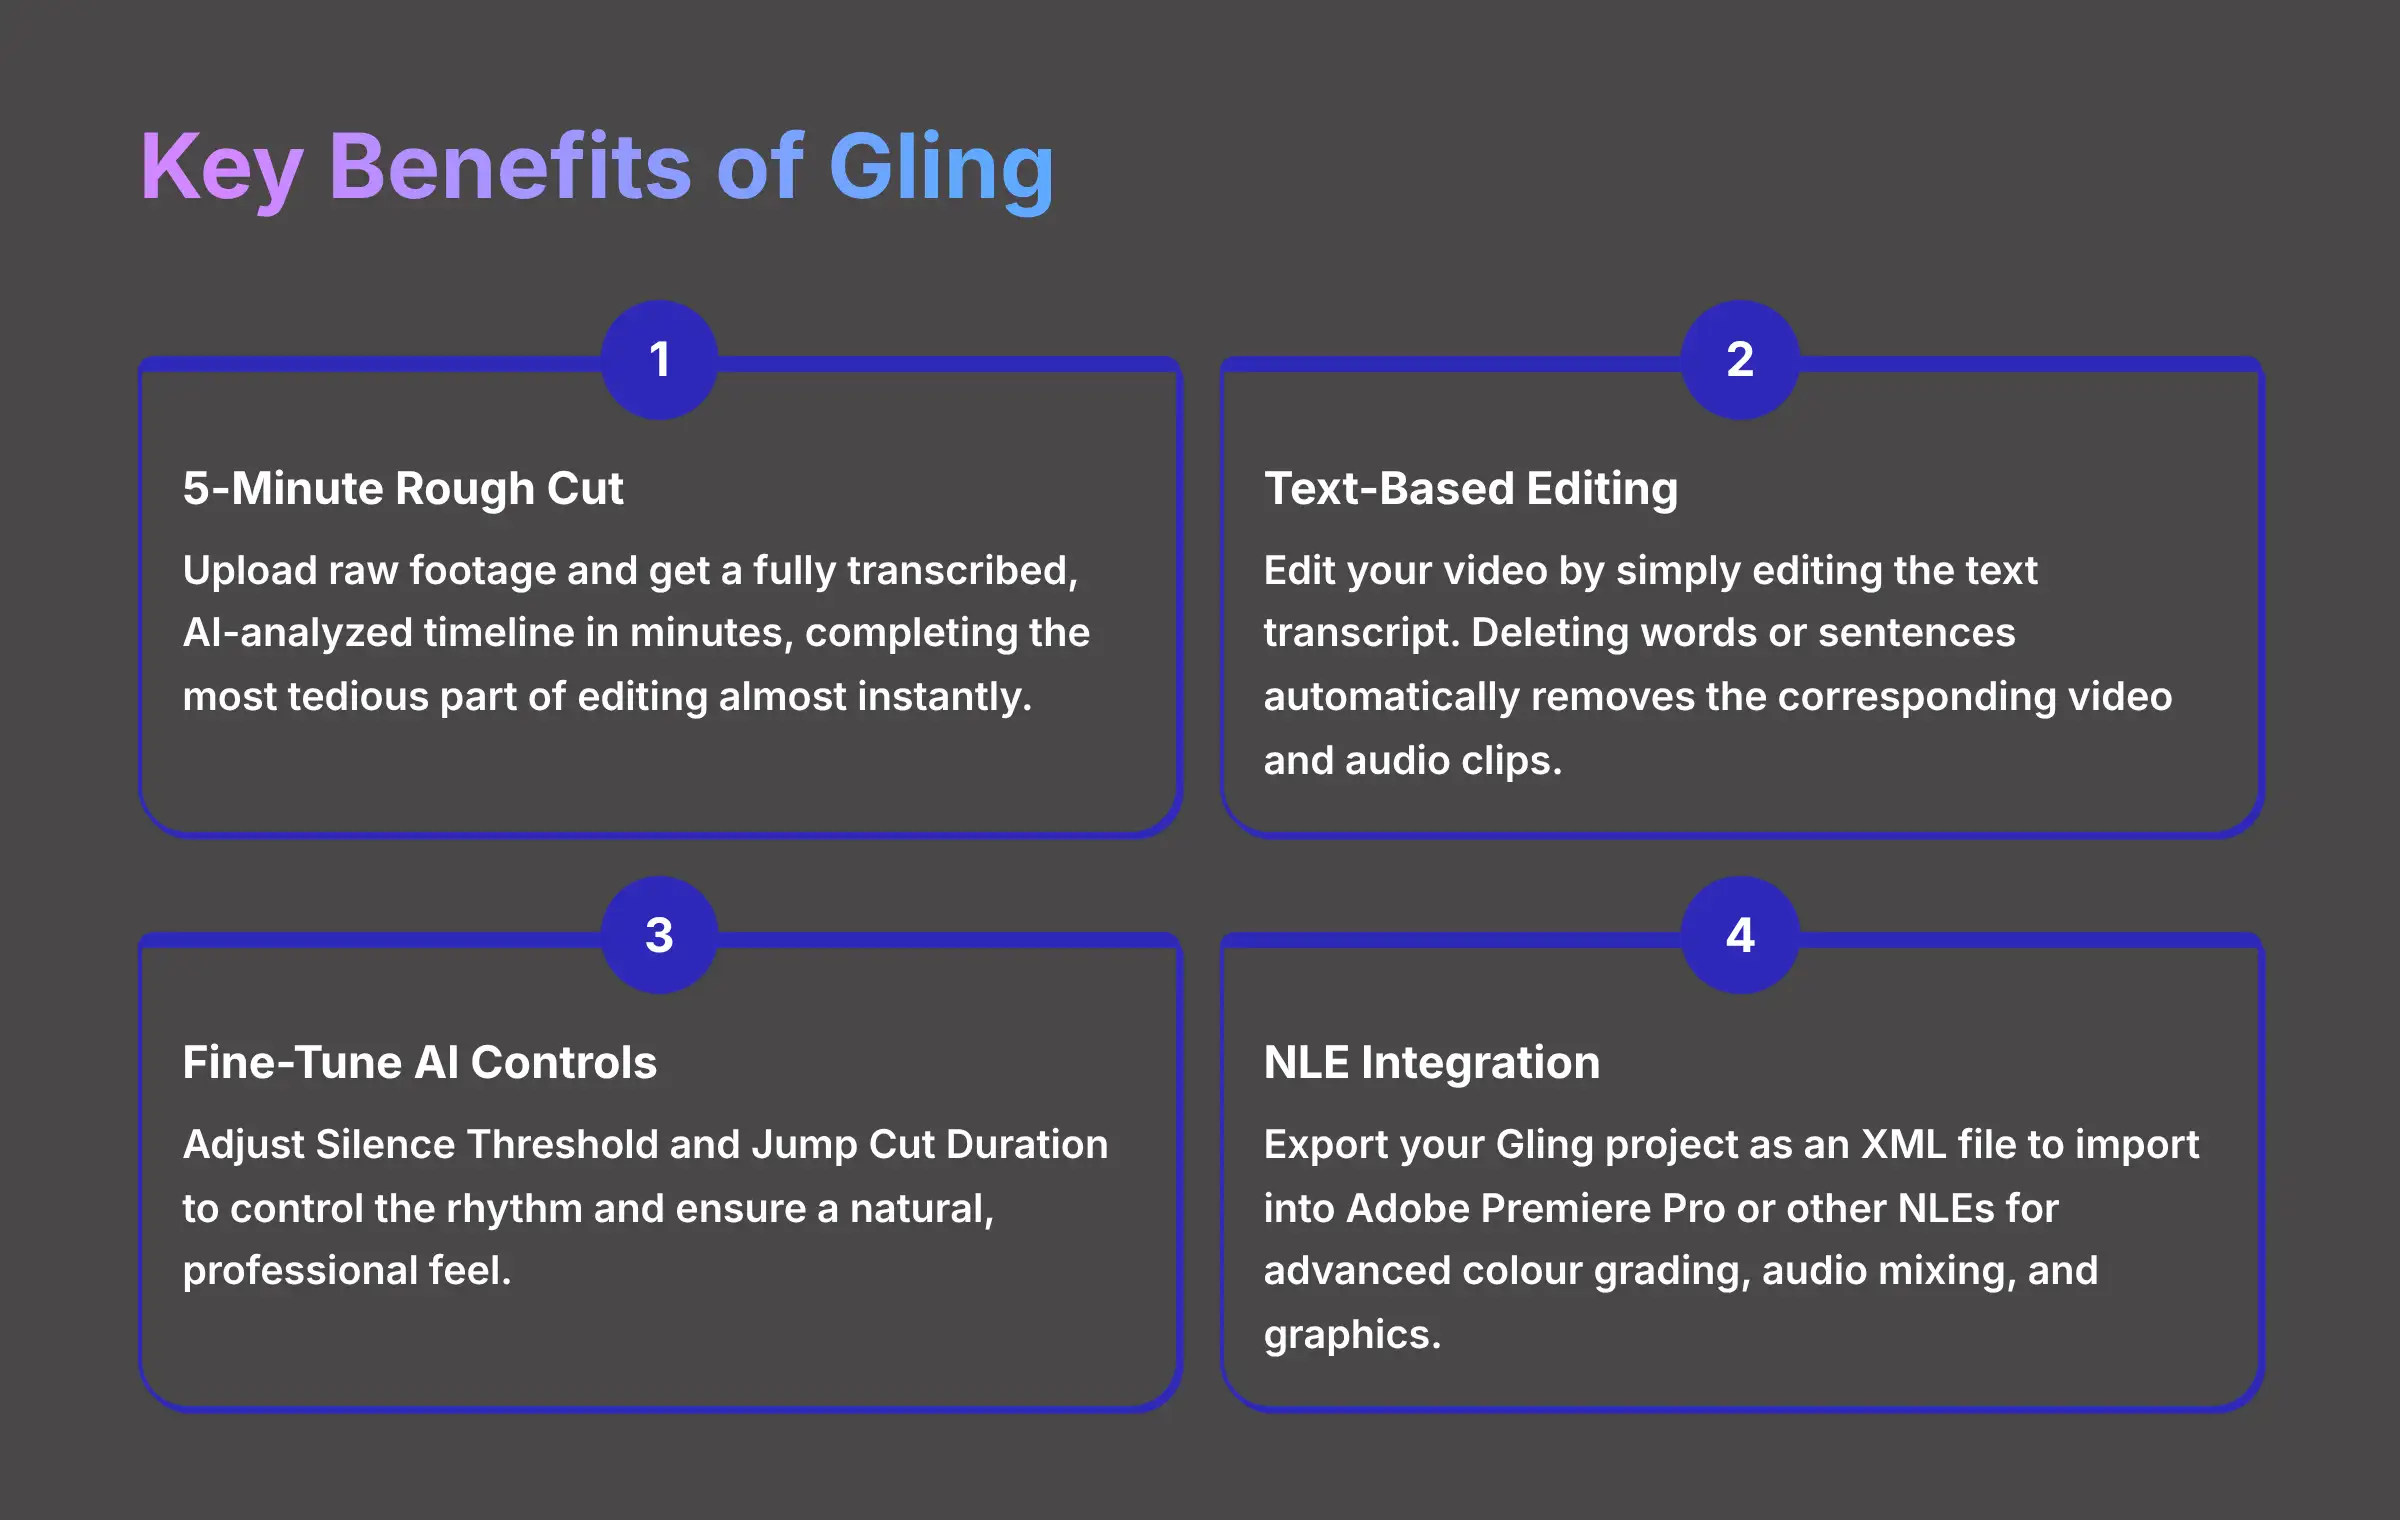
- Achieve a “5-Minute Rough Cut”: Learn to upload your raw footage and get a fully transcribed, AI-analyzed timeline in minutes. This completes the most tedious part of editing almost instantly.
- Master Text-Based Video Editing: Gain proficiency in editing your video by simply editing the text transcript. Deleting words or sentences in the transcript automatically removes the corresponding video and audio clips.
- Fine-Tune AI Controls For Perfect Pacing: Understand how to adjust the Silence Threshold and Jump Cut Duration to control the rhythm of your video. This ensures a natural and professional feel.
- Integrate Gling With Professional NLEs: Learn the expert workflow of exporting your Gling project as an XML file to import into Adobe Premiere Pro or other NLEs. This is for advanced color grading, audio mixing, and graphics.
- Troubleshoot AI Edits Effectively: Proactively solve common issues like the AI removing a dramatic pause or creating a jarring cut. You will learn to manually review and adjust AI suggestions.
Part 1: Getting Started And The Core Workflow
Prerequisites, Setup, And Interface Overview
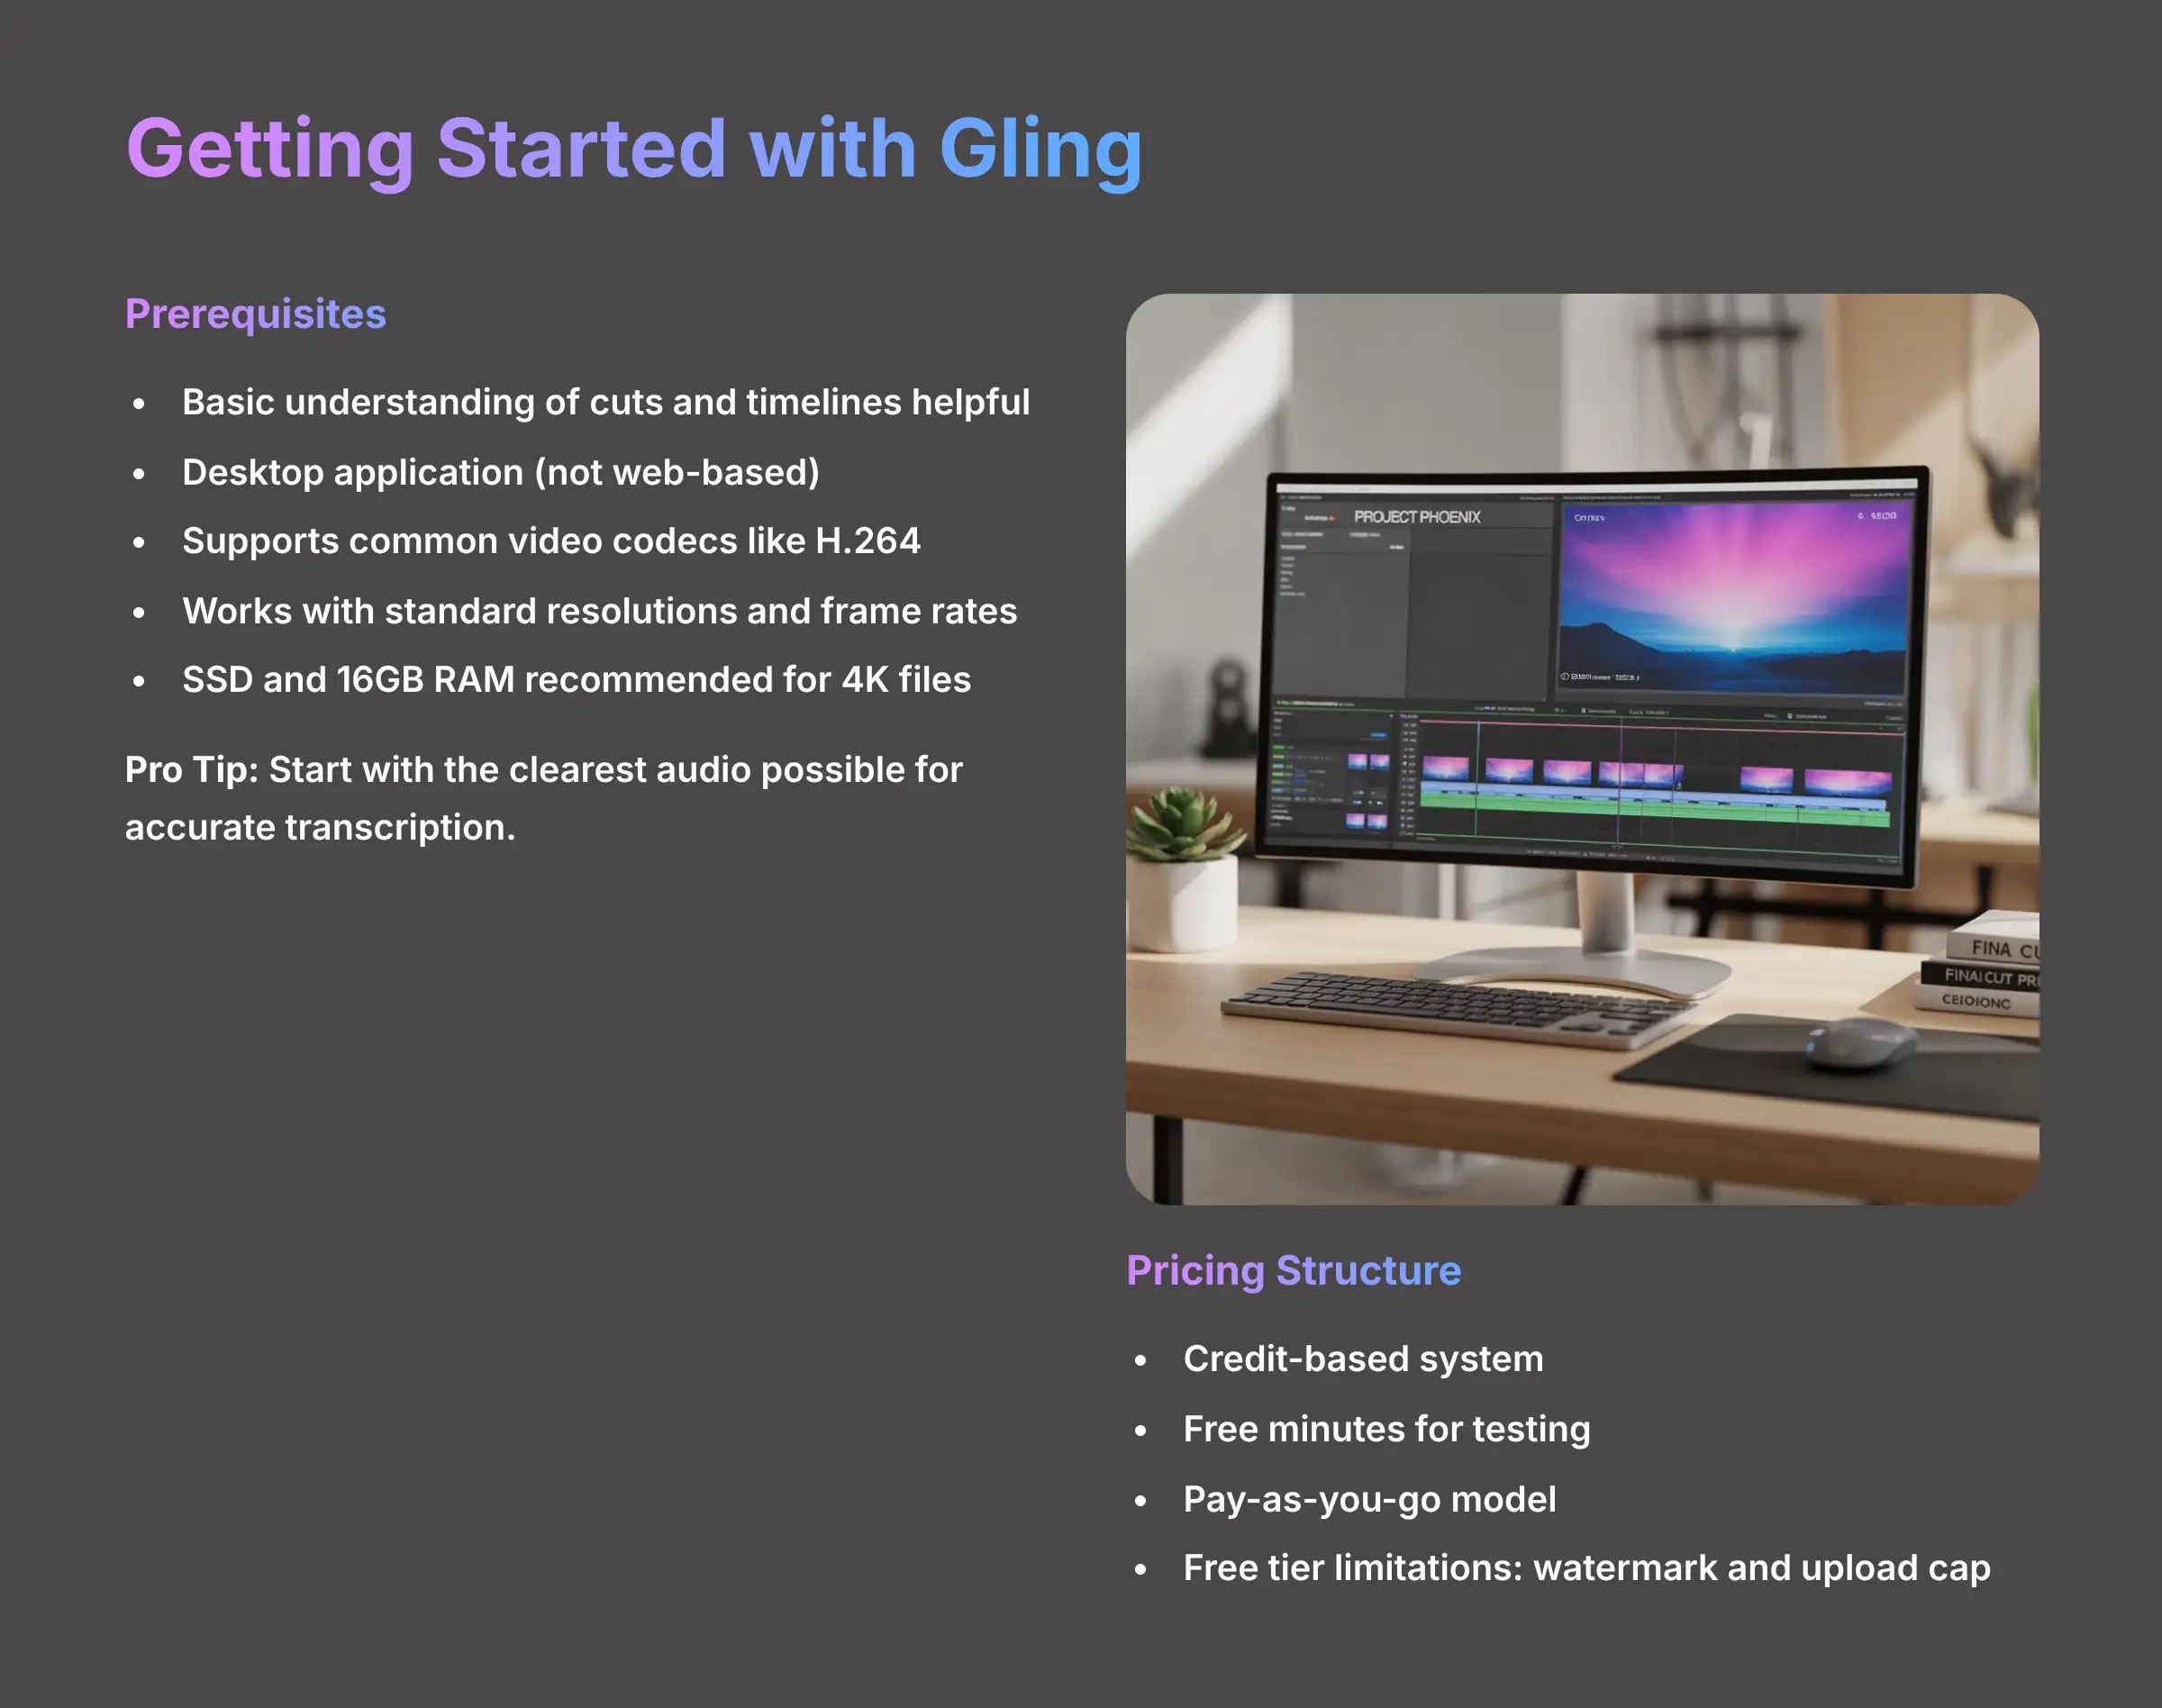
Before you start, let's get you set up for success. You don't need to be a video editing wizard to use Gling. But having a basic understanding of concepts like cuts and timelines is helpful.
Gling is a desktop application that must be downloaded and installed on your computer. It is not a web-based tool accessible through browsers like Chrome or Firefox. The application handles most common video codecs like H.264, but for the smoothest experience, avoid uploading complex formats like ProRes unless necessary. It fully supports standard resolutions and frame rates, including 1080p at 30fps and 4K at 24fps. My testing shows that for larger 4K files or videos over 30 minutes, having a computer with a Solid-State Drive (SSD) and at least 16GB of RAM makes the upload and processing noticeably smoother.
Pro Tip: For the best results, always start with the clearest audio possible. Gling's AI relies on a clean audio track for an accurate transcript. If your audio is noisy, I recommend running it through a denoiser like Adobe Audition's DeNoise effect or a free alternative like Audacity's Noise Reduction before you upload it to Gling.
Understanding Gling's Pricing And Limitations
Before you upload, it's practical to know about Gling's account structure. As of our latest testing, Gling operates on a credit-based system. You typically receive a number of free minutes to test the platform—enough for a short project or two. After that, you purchase credits, and each hour of video you upload consumes a set amount of those credits. This pay-as-you-go model can be cost-effective for creators with inconsistent output.
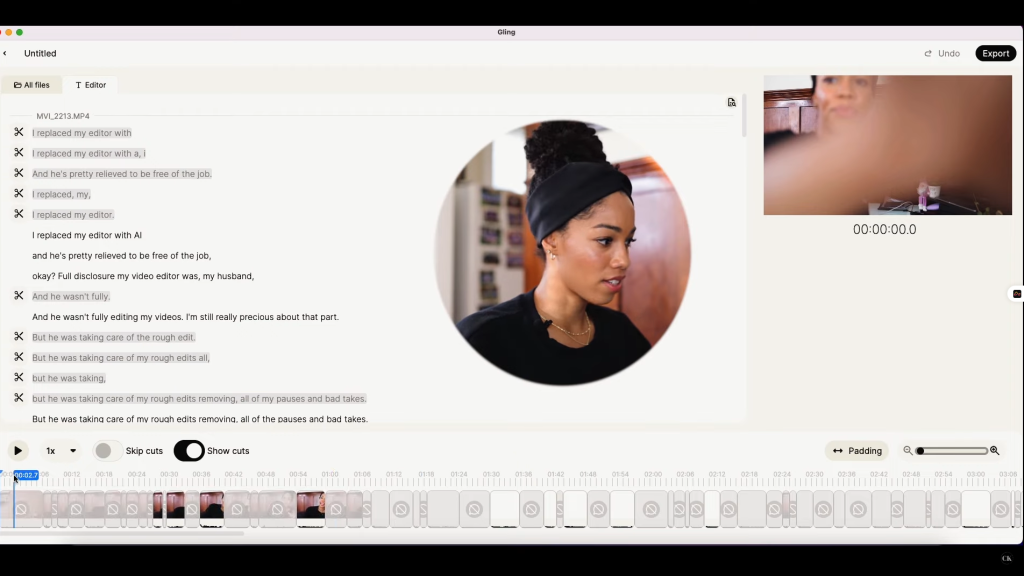
Gling's intuitive interface makes it easy to get started
Key limitations to be aware of on the free or trial tier often include a watermark on exported videos and a cap on the total upload duration. For this tutorial, we will be using a full-featured account, but all the core functions for removing silences and editing via text are available in the trial.
Here's how to get started:
- Download and install the Gling application from the official website and create a new account. The process is straightforward and only takes a minute.
- Once you launch the application, familiarize yourself with the main dashboard. It's clean and simple.
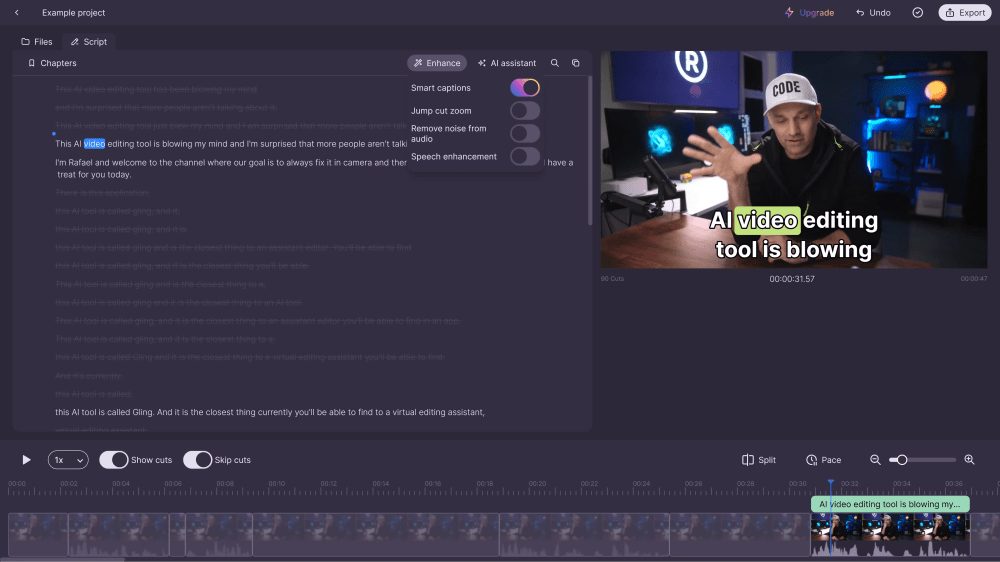
- You will see three main panels that form your workspace: the Video Preview on the top left, the Timeline on the bottom, and the Transcription Panel on the right. Most of your work will happen in the transcription panel.
Your First Automated Edit: From Upload To AI-Powered Timeline
Now for the magic. I'll show you how to get from raw footage to a rough cut in just a few clicks. This is the core workflow that saves YouTubers and other creators countless hours. Many successful YouTubers use this exact ‘5-minute rough cut' process. They run their raw footage through Gling and get a version that's 80% of the way there, saving them hours of tedious initial cutting.
Follow these steps for your first project:
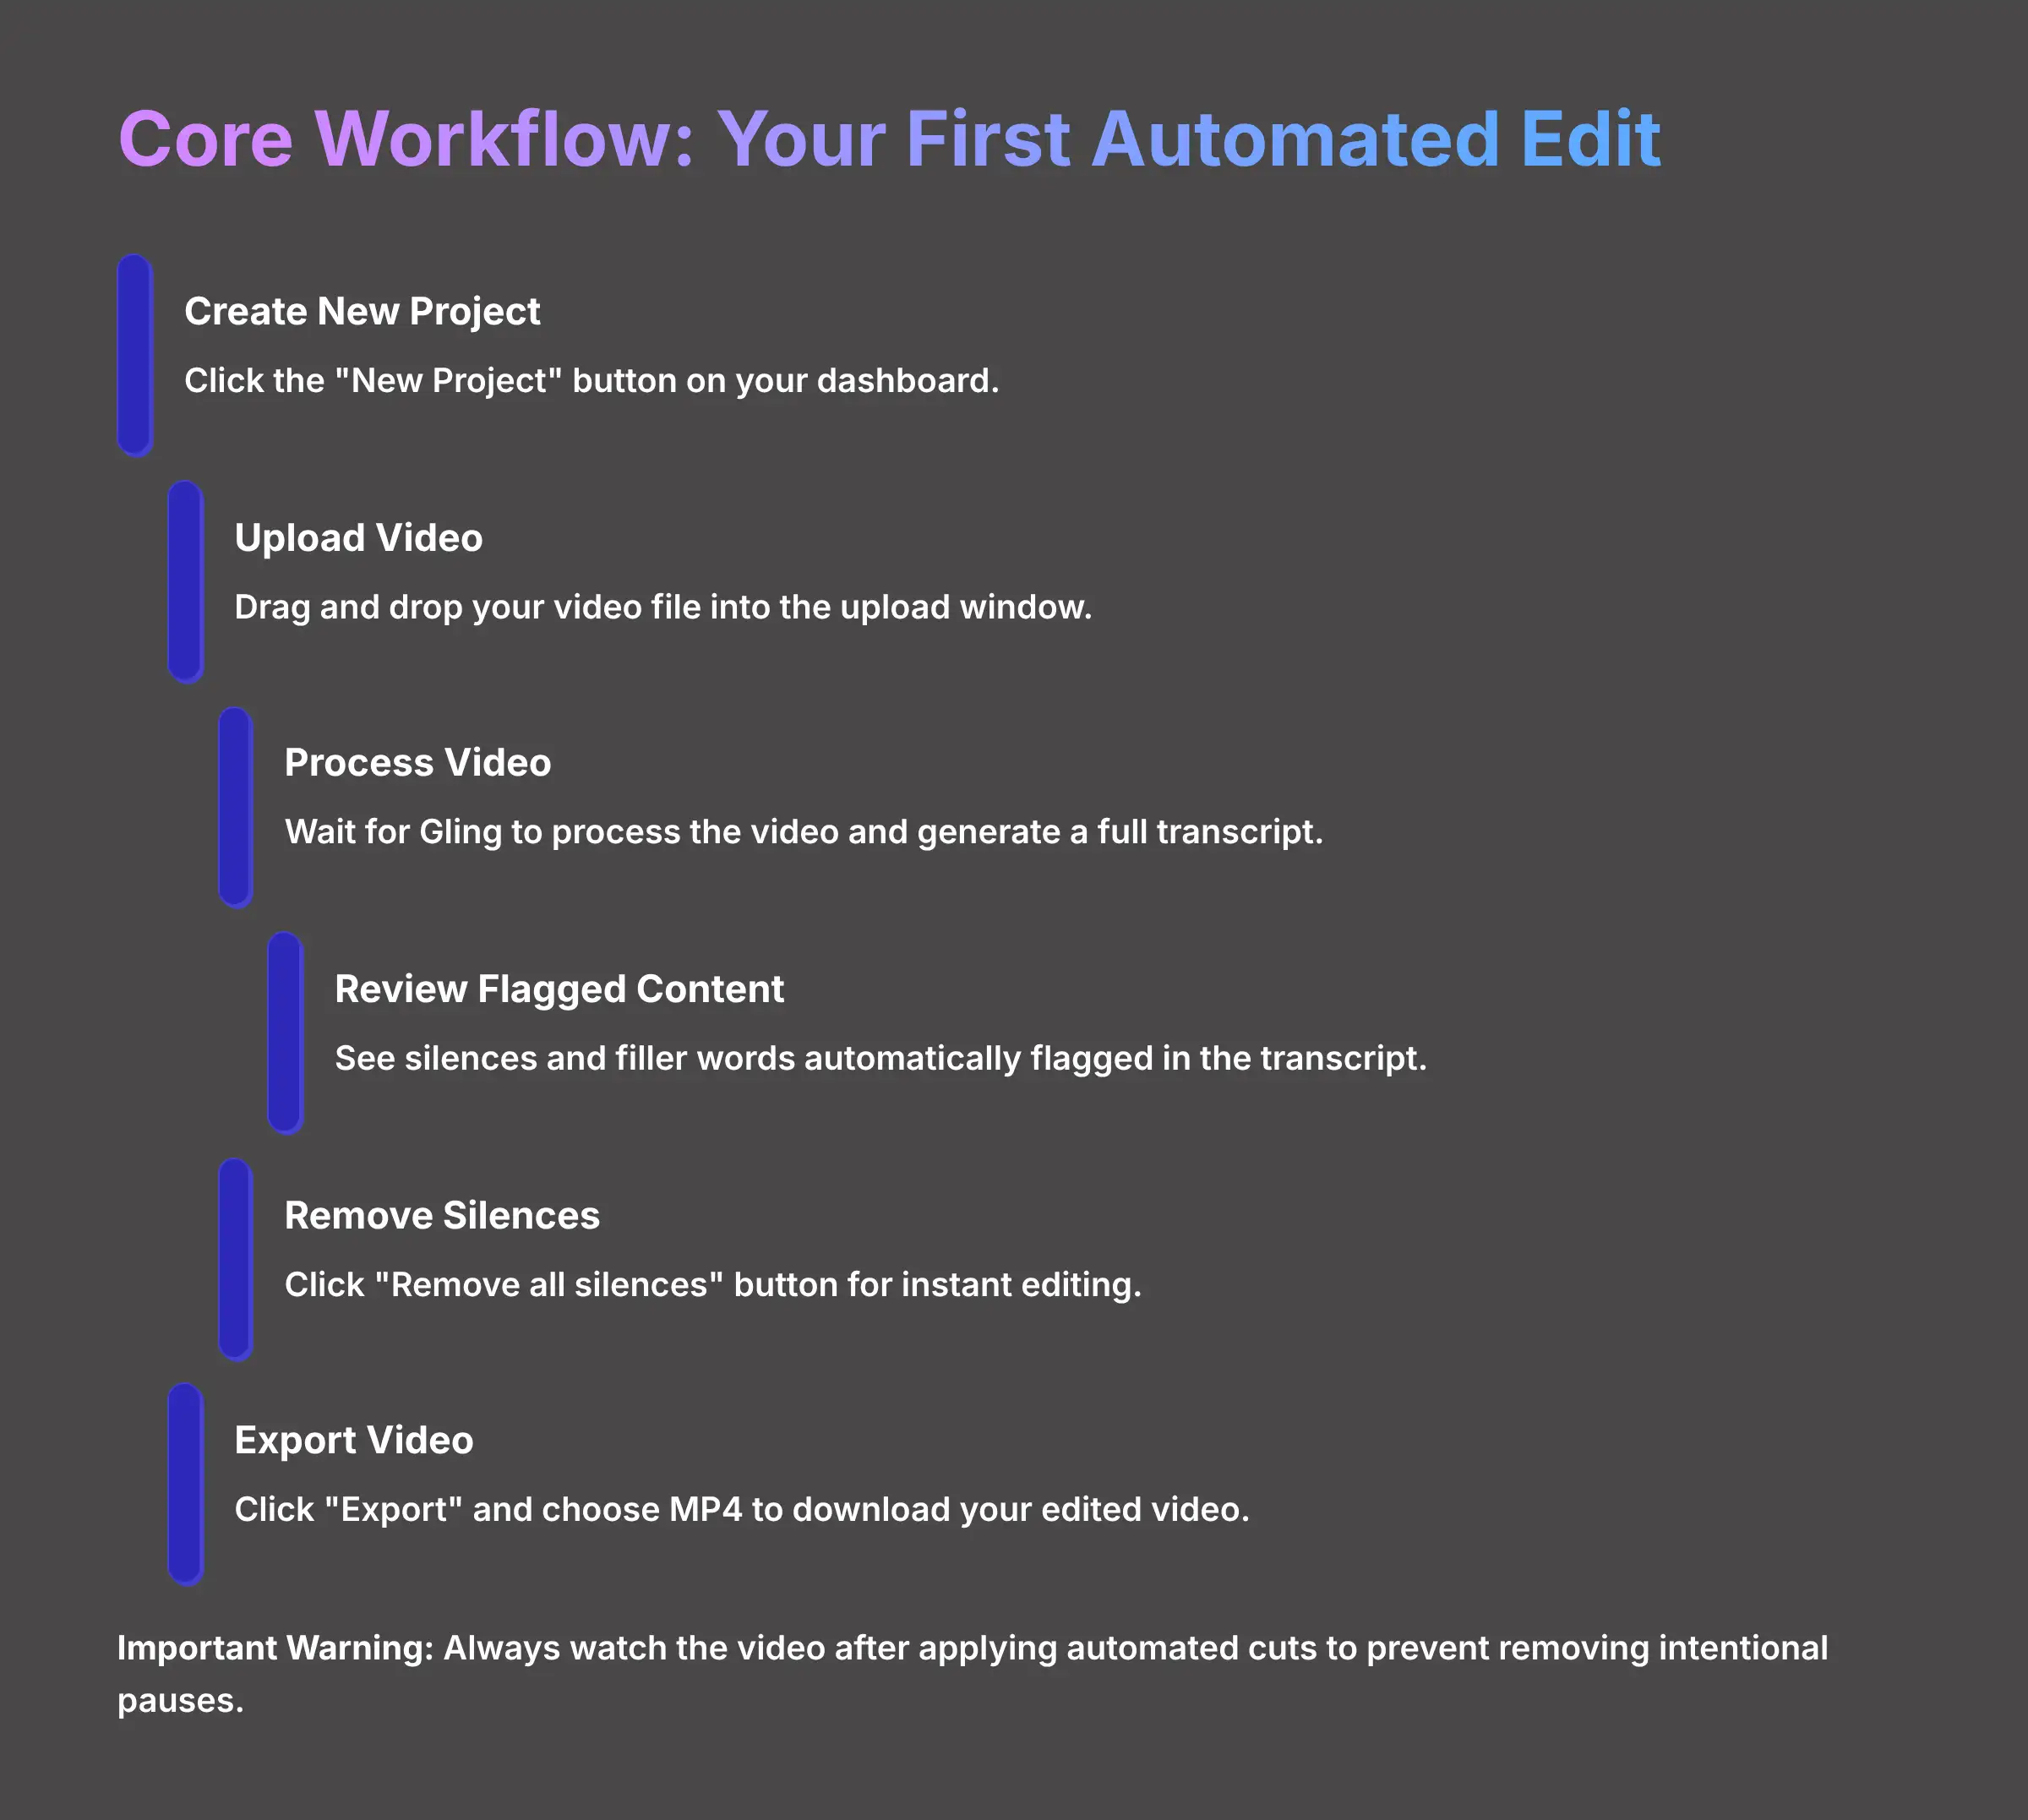
- Click the big “New Project” button on your dashboard.
- A window will pop up. Drag and drop your video file into this window to begin the upload.
- Now, just wait a few moments. Gling will process the video, which includes uploading and generating a full transcript.
- Once it's done, you will see the transcript with silences and filler words automatically flagged. They usually appear highlighted or with a strikethrough.
- For a fast initial pass, simply click the “Remove all silences” button. Gling will instantly remove every flagged clip.
- Look at your timeline. You'll see it shrink as all the gaps are removed. Play the video in the preview window to see the result.
- When you're happy, click “Export” and choose the MP4 file option to download your edited video.
Important Warning: Always watch the video after applying automated cuts. The AI is powerful, but it's not a mind reader. I once had it remove a perfectly timed dramatic pause that was central to a joke. A quick review prevents these little mistakes from getting into your final export.
Part 2: Mastering The Core AI Controls

Fantastic. You've seen how fast the automated edit is. Now, let's take control and make those edits perfect.
It's useful to distinguish between the three things Gling helps you remove: silences (unwanted pauses), filler words (“ums,” “ahs”), and bad takes. A “bad take” is a larger mistake—a flubbed sentence, a repeated phrase, or an entire section you decided to re-record. While the AI flags silences and fillers automatically, you will handle bad takes manually during the text-editing stage by simply highlighting the incorrect sentences in the transcript and deleting them. This is where Gling's text-based editing truly shines over traditional timeline scrubbing.
The transcription panel is where the magic happens – edit text to edit video
How To Fine-Tune Silence And Filler Word Removal
The one-click edit is great for speed, but true control comes from fine-tuning the AI's behavior. This is where you go from just using the tool to actually directing it. You can manually override any of the AI's suggestions to preserve the natural rhythm of your speech. Think of the AI as a very eager assistant; your job is to give it better instructions.
To gain more granular control, you need to understand three key actions:
- Manually Keep or Remove Clips: In the transcription panel, you can click on any highlighted silence or filler word. This will toggle its selection. Deselecting a clip tells Gling not to remove it, which is perfect for keeping those intentional pauses for emphasis.
- Adjust the “Silence Threshold”: Go into the project settings. Here you will find the “Silence Threshold,” which is measured in milliseconds. This setting tells Gling the minimum length of a pause to consider “silence.” For fast-paced vlogs, I often use a low threshold around 300ms. For slower, more conversational interviews, a higher threshold of 700ms to 1100ms feels more natural.
- Customize Filler Words: You can also edit the list of filler words in the settings. You have a specific verbal tic that Gling doesn't catch by default, you can add it to the list for automatic removal in the future.
How To Perfect Pacing With Smart Jump Cuts

When you cut out silences and bad takes, you create a “jump” in the video where the footage suddenly moves from one point to another. Gling's Smart Jump Cuts feature is designed to make these transitions smoother and less jarring. It works by slightly zooming in on the shot after the cut, which hides the abrupt change. Think of it like a quick camera ‘push-in' that tricks the eye, making the edit feel seamless and intentional rather than like a mistake.

Smart Jump Cuts create seamless transitions between edited clips
Here is how you can control this feature to perfect your video's pacing:
- First, you can enable or disable “Smart Jump Cuts” in the project settings. Most of the time, I find it's best to leave this on.
- Next, you can adjust the “Jump Cut Duration” parameter. This controls how long the zoom effect lasts. My experience and community consensus suggest that a duration of 0.3 seconds is the sweet spot for most talking-head content. It's quick enough to feel seamless but not so fast that it's jarring.
- You can see where jump cuts are applied directly in the timeline. They are often marked with a small icon, allowing you to quickly identify them during your review.
A jump cut still feels unnatural, it's usually because your head or body position changed too much. In this case, your best move is to export the project to an NLE like Premiere Pro. There, you can easily cover the jarring cut with B-roll or a graphic.
Part 3: Troubleshooting Common Challenges
A Guide To Solving The 3 Most Frequent Issues
Even with a great tool like Gling, you'll run into small issues. Knowing how to solve them is what separates a frustrated user from an efficient editor. My experience shows that almost all problems fall into one of three categories. Here's a quick guide to identifying and fixing them.
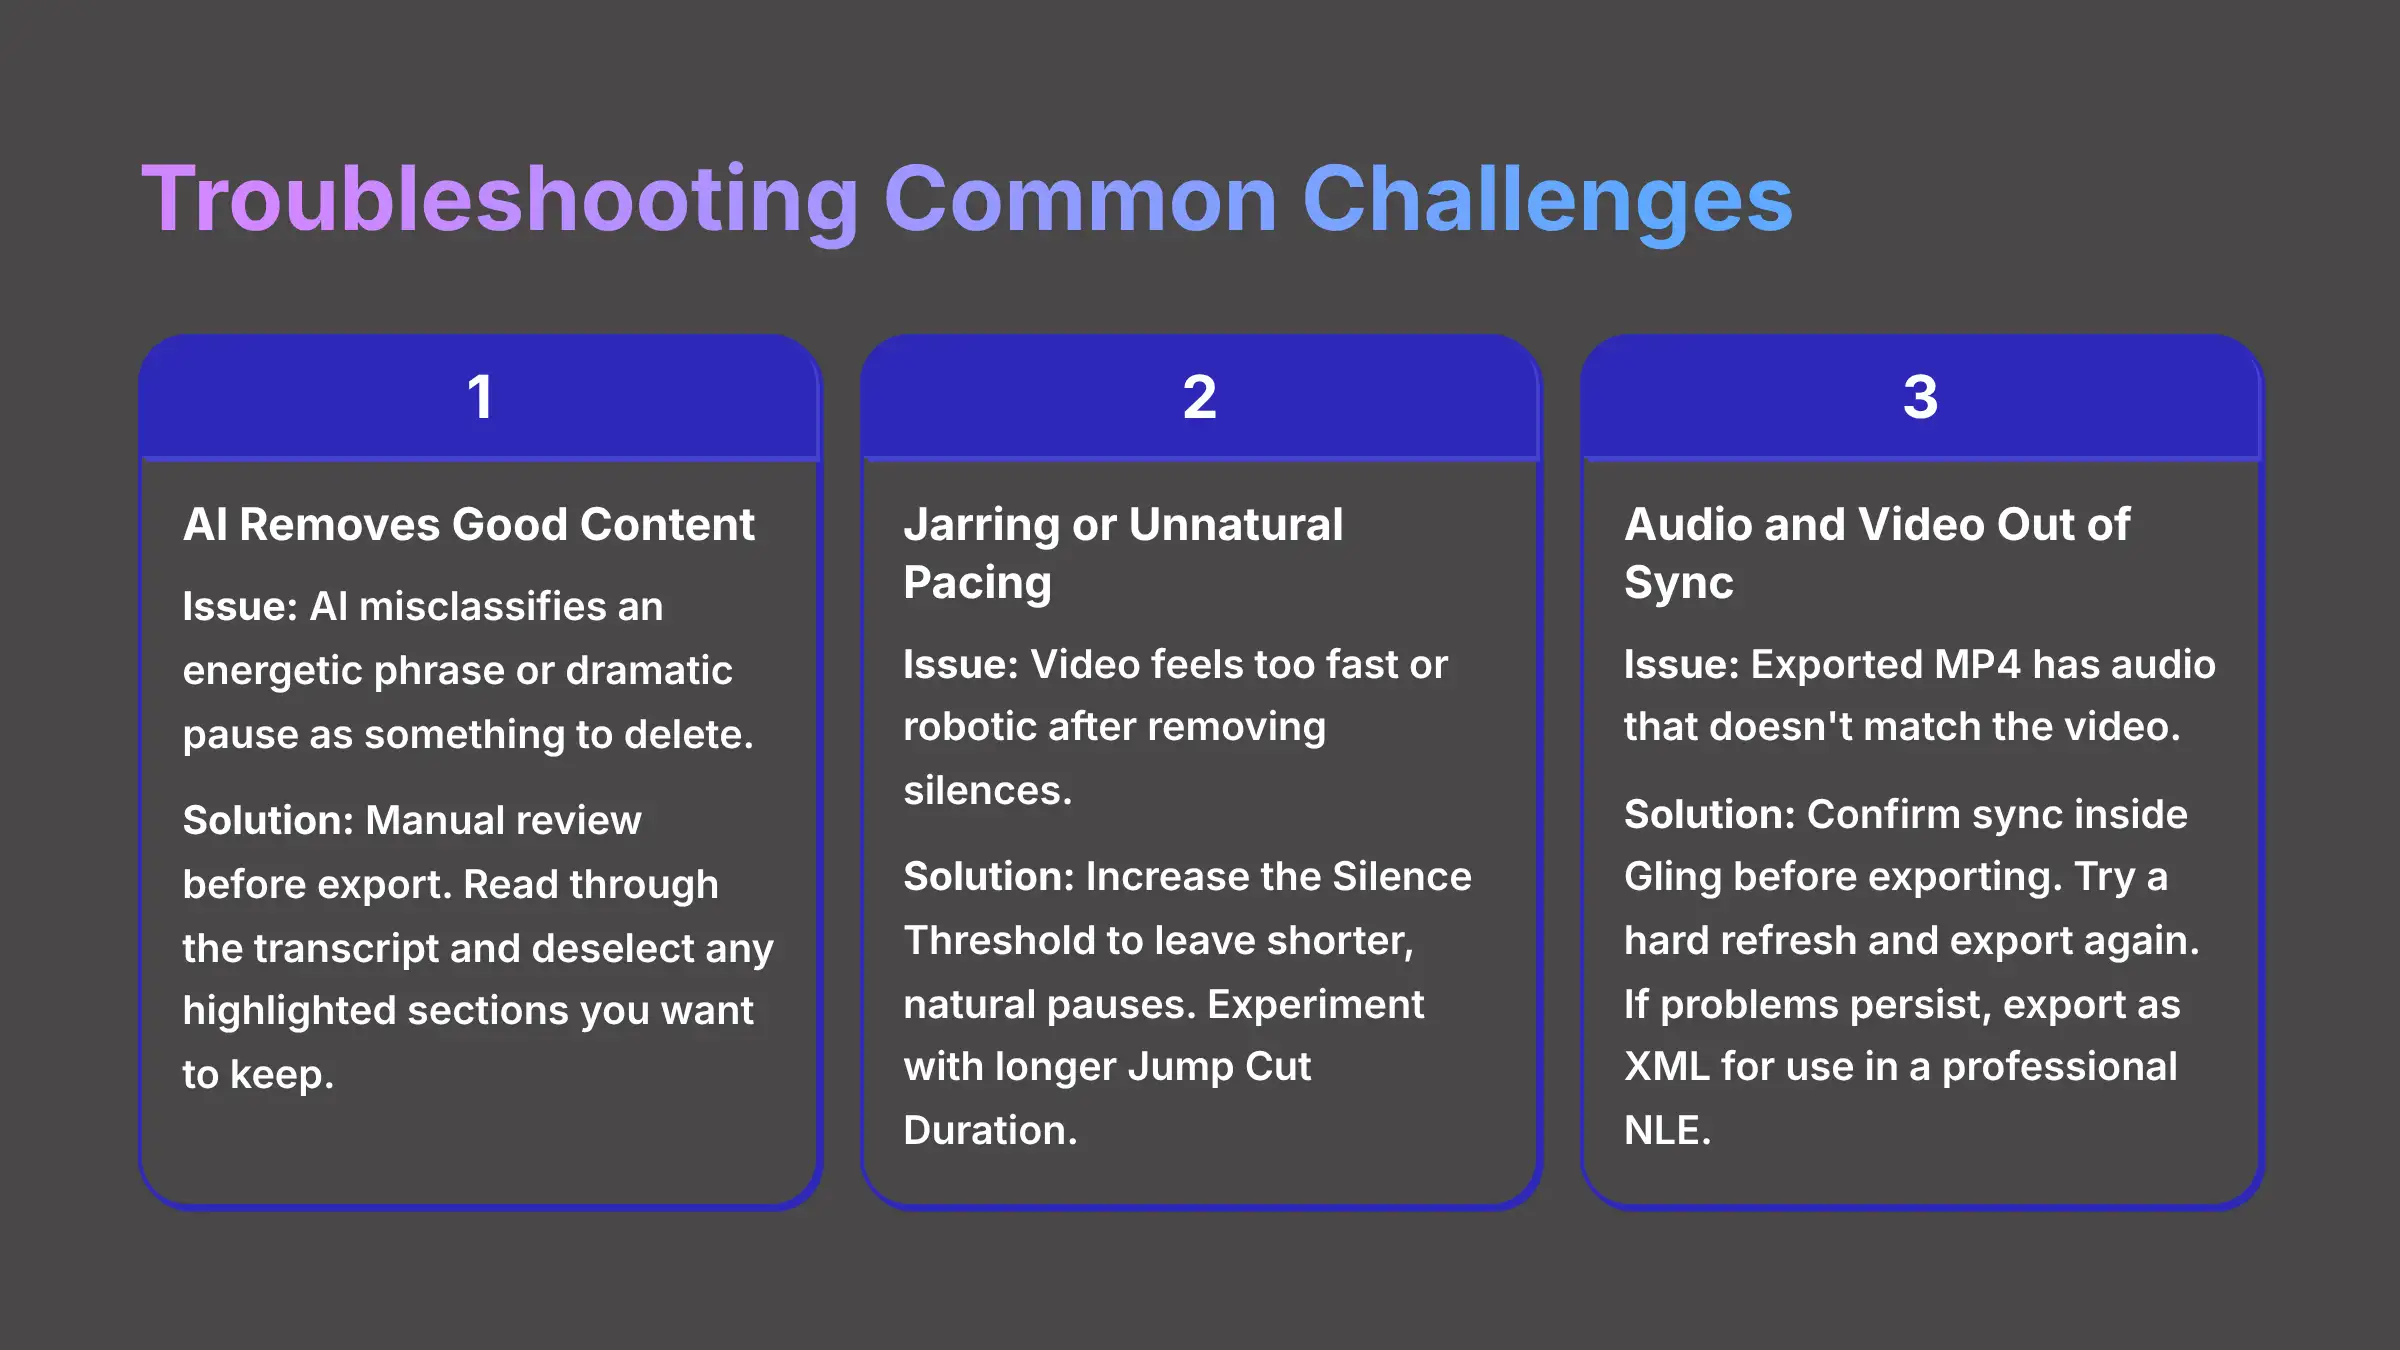
- Issue: The AI Removes Good Content. Sometimes the AI might misclassify an energetic phrase or a dramatic pause as something to be deleted.
- Solution: The solution is manual review. This is the most common issue and has the simplest fix. Before you export, always read through the transcript one last time. You see a highlighted section you want to keep, just click on it to deselect it. This restores the clip to your timeline instantly.
- Issue: The Pacing Feels Jarring or Unnatural. After the AI removes all the silences, your video might feel too fast or robotic.
- Solution: Your primary controls for pacing are the Silence Threshold and Jump Cut Duration. The video is too fast, go into the settings and increase the silence threshold. This will tell the AI to leave shorter, more natural pauses alone. You can also experiment with a slightly longer jump cut duration.
- Issue: The Audio And Video Are Out Of Sync In The Export. You might find that the exported MP4 file has audio that doesn't match the video.
- Solution: This is rare, but it can happen. First, do a final playback inside Gling before exporting to confirm everything is synced. It is, but the export is still off, try a hard refresh of your browser page and export again. The problem persists, the best fix is to export your project as an XML file for use in a professional NLE, which often resolves any sync issues.
Part 4: Professional Workflows And Integration
Project-Based Tutorial: How To Edit A Talking-Head Video From Start To Finish
Let's put everything together. I'll walk you through a complete, real-world project: editing a 10-minute educational video for YouTube. This workflow synthesizes all the skills you've just learned into a practical, repeatable process.
Here is the goal and the steps to get there:
- Goal: Create a tightly edited 10-minute talking-head YouTube video.
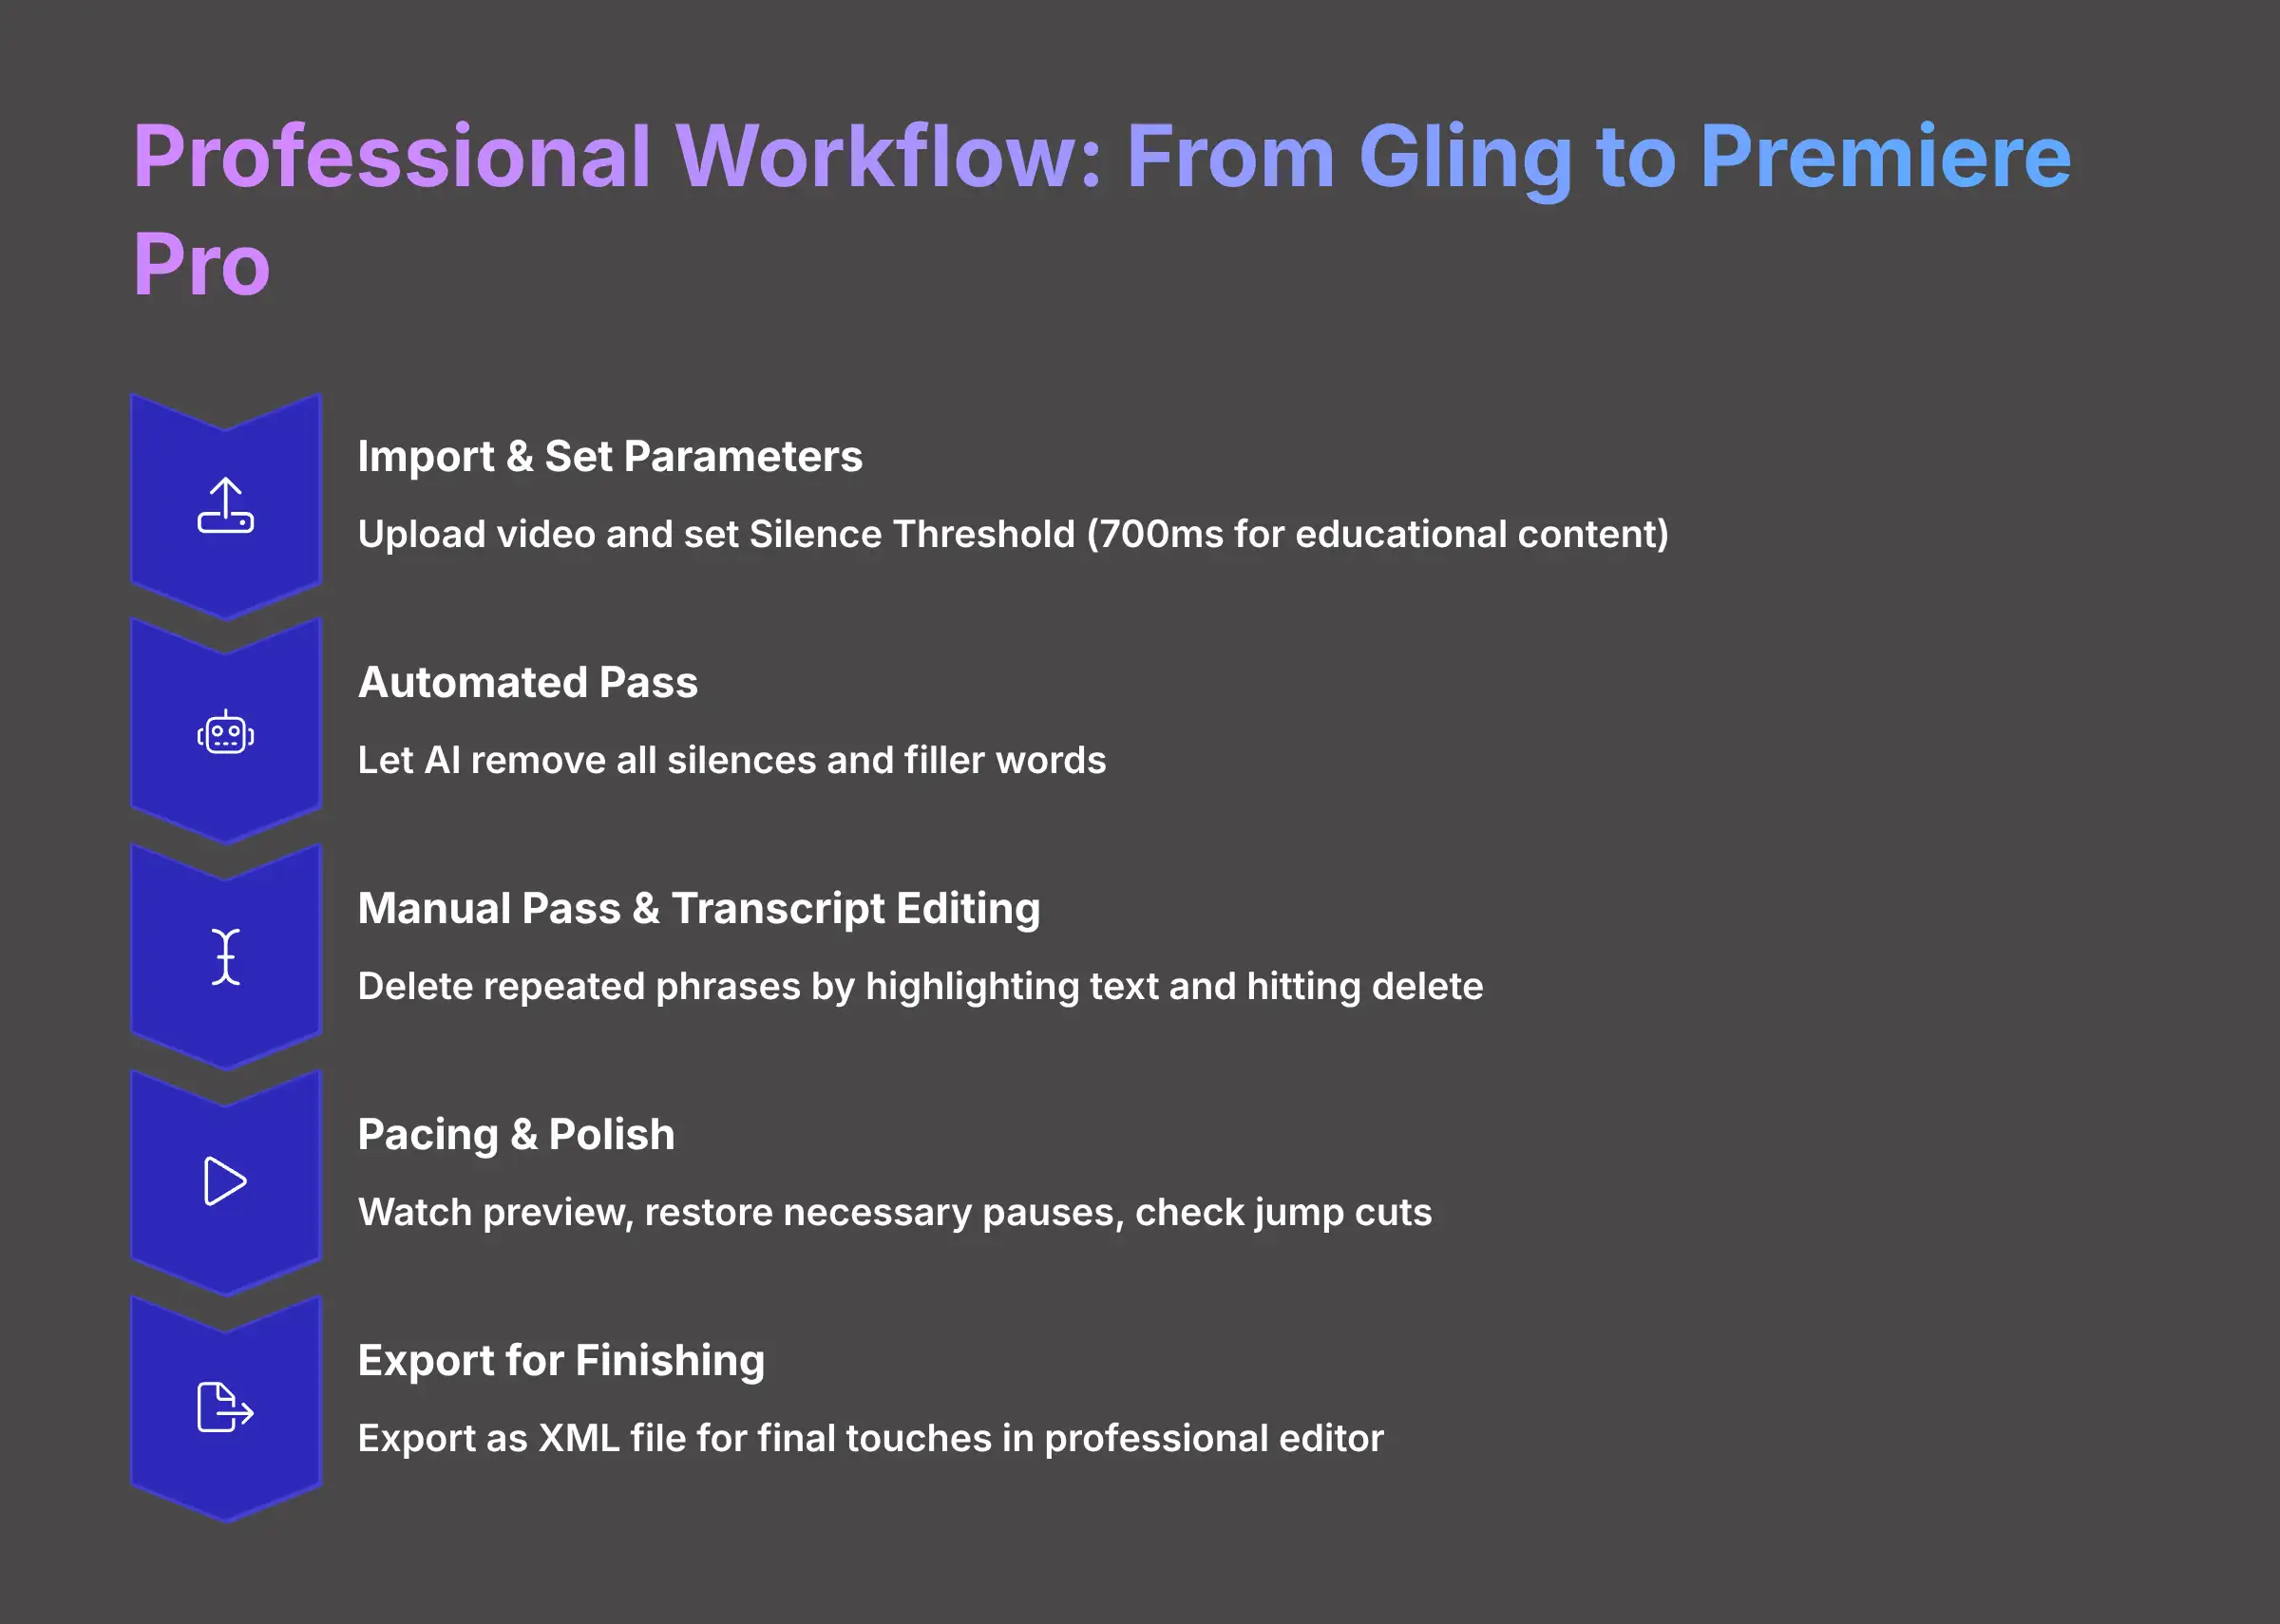
- Step 1 – Import And Set Parameters: Upload your video file to a new Gling project. Before the AI pass, go into the settings and set the Silence Threshold to around 700ms. This is a good starting point for educational content.
- Step 2 – Automated Pass: Click the button to let the AI remove all silences and filler words. This is your first major time-saver.
- Step 3 – Manual Pass And Transcript Editing: Now, read the full transcript from top to bottom. As you read, delete any repeated phrases or bad takes simply by highlighting the text and hitting the delete key. Editing the video becomes just like editing a Word document. This is your chance to correct any transcription errors for caption accuracy, too.
- Step 4 – Pacing And Polish: Watch the video in the preview window. Does the pacing feel right? Manually restore any necessary pauses by clicking on them in the transcript. Check the jump cuts to make sure they feel smooth.
- Step 5 – Export For Finishing: The edit is clean. The final step is to export the project as an XML file. This prepares it for final touches in a professional editor.
How To Integrate Gling With Premiere Pro And Other NLEs
This is the workflow that saves me 5 to 10 hours a week. Instead of using Gling as the final step, I use it for what it does best: incredibly fast rough cuts. Then, I move the project to a full-featured NLE (which stands for Non-Linear Editor) like Adobe Premiere Pro for the creative finishing. Gling handles the science of cutting; I handle the art of color, graphics, and sound design.
Exporting your project as XML creates a bridge to professional NLEs like Premiere Pro
Exporting an XML file is like giving your professional editor a perfect set of blueprints. It's not the finished house, but all the walls are in the right place, ready for the detailed work of painting and decoration.
It's crucial to understand what an XML file transfers: it contains the edit decision list (EDL)—meaning, all your cuts, the sequence of your clips, and their timing. It does not transfer visual effects, color grades, text overlays, or audio adjustments made inside Gling. The XML workflow is based on the principle of a clean handoff; Gling handles the structural edit, while your NLE handles the creative and aesthetic finishing.
Here's the step-by-step professional workflow:
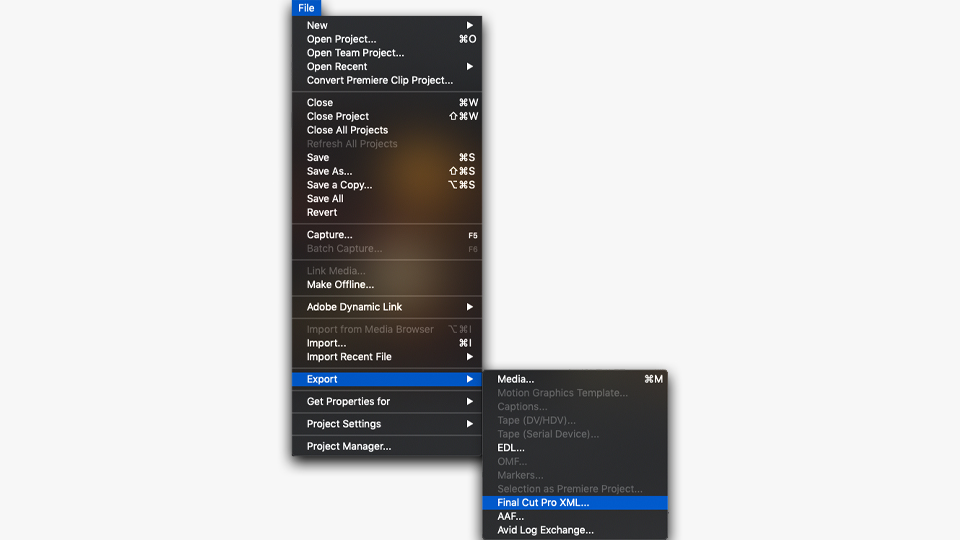
- In Gling, once your edit is complete, click the “Export” button.
- Instead of choosing MP4, select the “XML” or “AAF” option. XML is generally best for Premiere Pro and Final Cut Pro, while AAF is better for DaVinci Resolve.
- Open Adobe Premiere Pro and go to
File > Import. Select the XML file you just downloaded from Gling. - Premiere Pro will automatically recreate your Gling project as a new sequence on your timeline. All your cuts will be perfectly preserved, ready for you to add B-roll, color grade, mix audio, and add graphics.
Part 5: Advanced Techniques And Creative Applications
Power-User Tips And Keyboard Shortcuts
Once you've mastered the basics, you can use a few advanced techniques to work even faster and get more creative. These are the little tricks I've picked up from my own testing and from following other professional creators.
Here are some power-user tips:
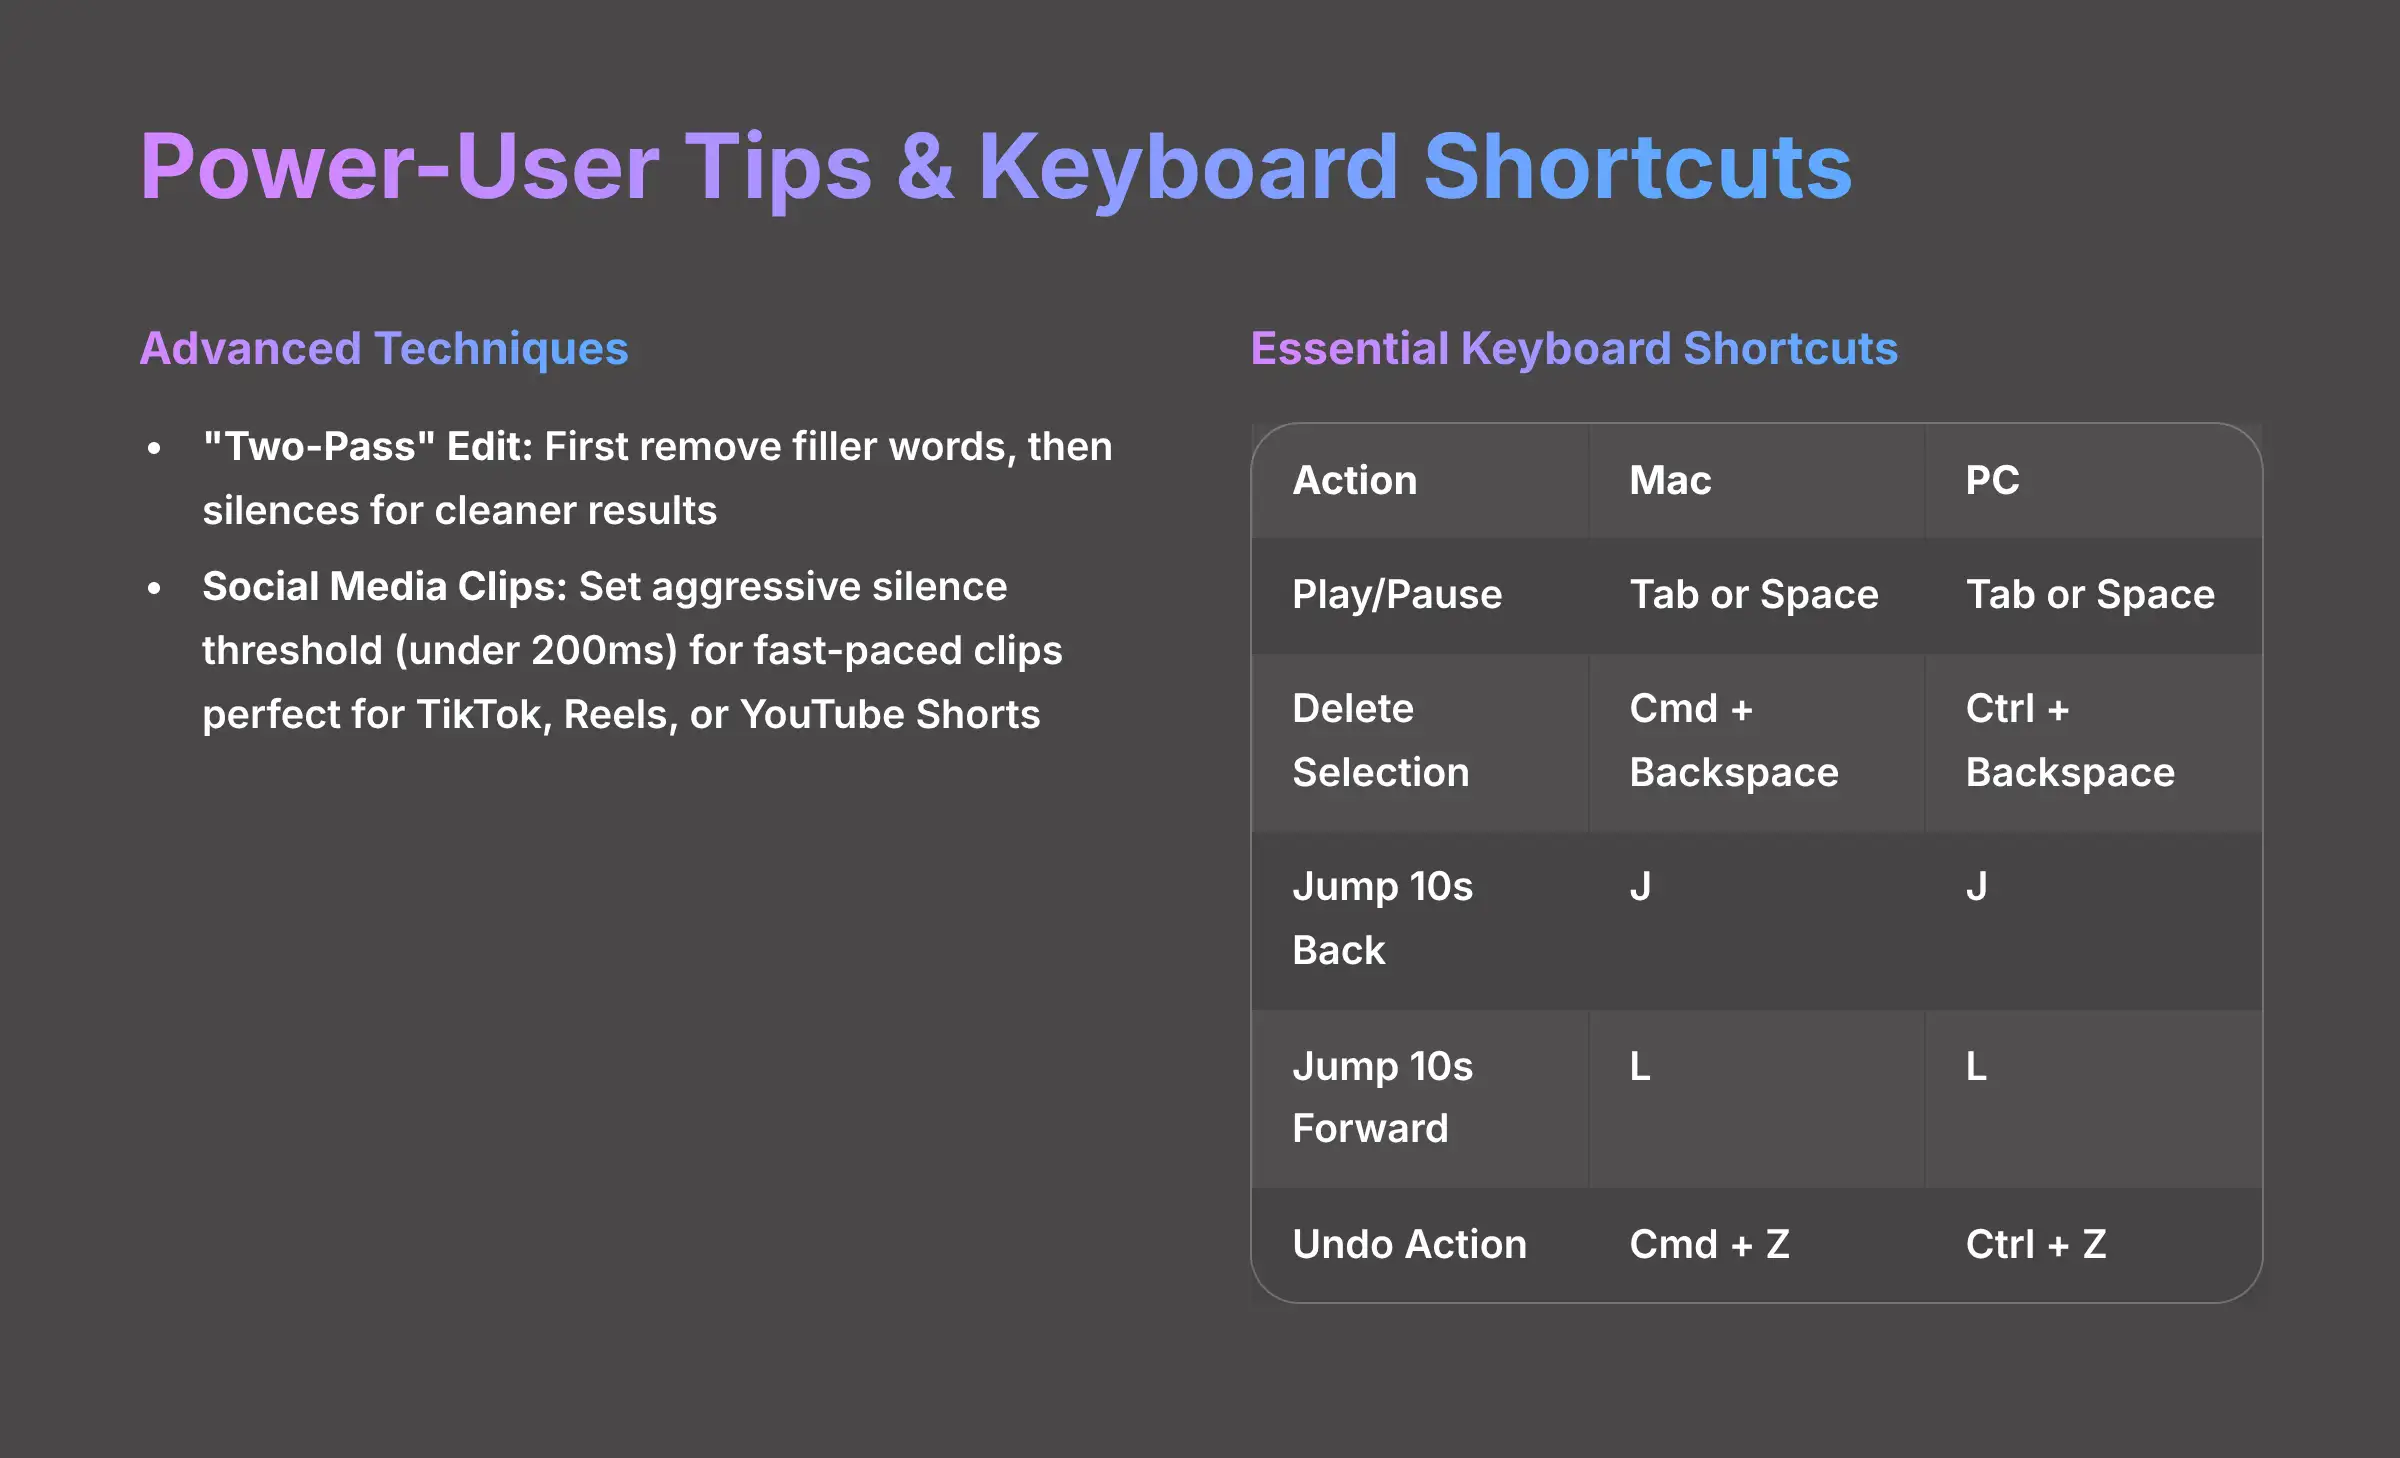
- The “Two-Pass” Edit: For very messy footage, try this. First, run an automated pass to remove only the filler words. After reviewing that, run a second pass to remove the silences. Some editors find this gives them a cleaner, more controlled result.
- Creating Social Media Clips: Gling is fantastic for this. Take a long video and set a very aggressive silence threshold, like under 200ms. This will rapidly chop the video into a series of high-energy, fast-paced clips perfect for TikTok, Reels, or YouTube Shorts.
- Use Keyboard Shortcuts: Learning a few shortcuts dramatically speeds up the manual review process. These are the most useful ones:
| Action | Shortcut (Mac) | Shortcut (PC) |
|---|---|---|
| Play / Pause | Tab or Space |
Tab or Space |
| Delete Selected Text & Clip | Cmd + Backspace |
Ctrl + Backspace |
| Jump 10 Seconds Back | J |
J |
| Jump 10 Seconds Forward | L |
L |
| Undo Action | Cmd + Z |
Ctrl + Z |
Conclusion & What To Learn Next
You now have a solid foundation for using Gling to edit your videos faster than ever before. You've learned how to perform an automated edit, fine-tune the AI's settings, troubleshoot common issues, and even integrate Gling into a professional workflow with tools like Premiere Pro. You are well-equipped to cut down hours of tedious work and focus more on the creative side of your content.
The journey doesn't stop here. To stay on the cutting edge, I highly recommend you:
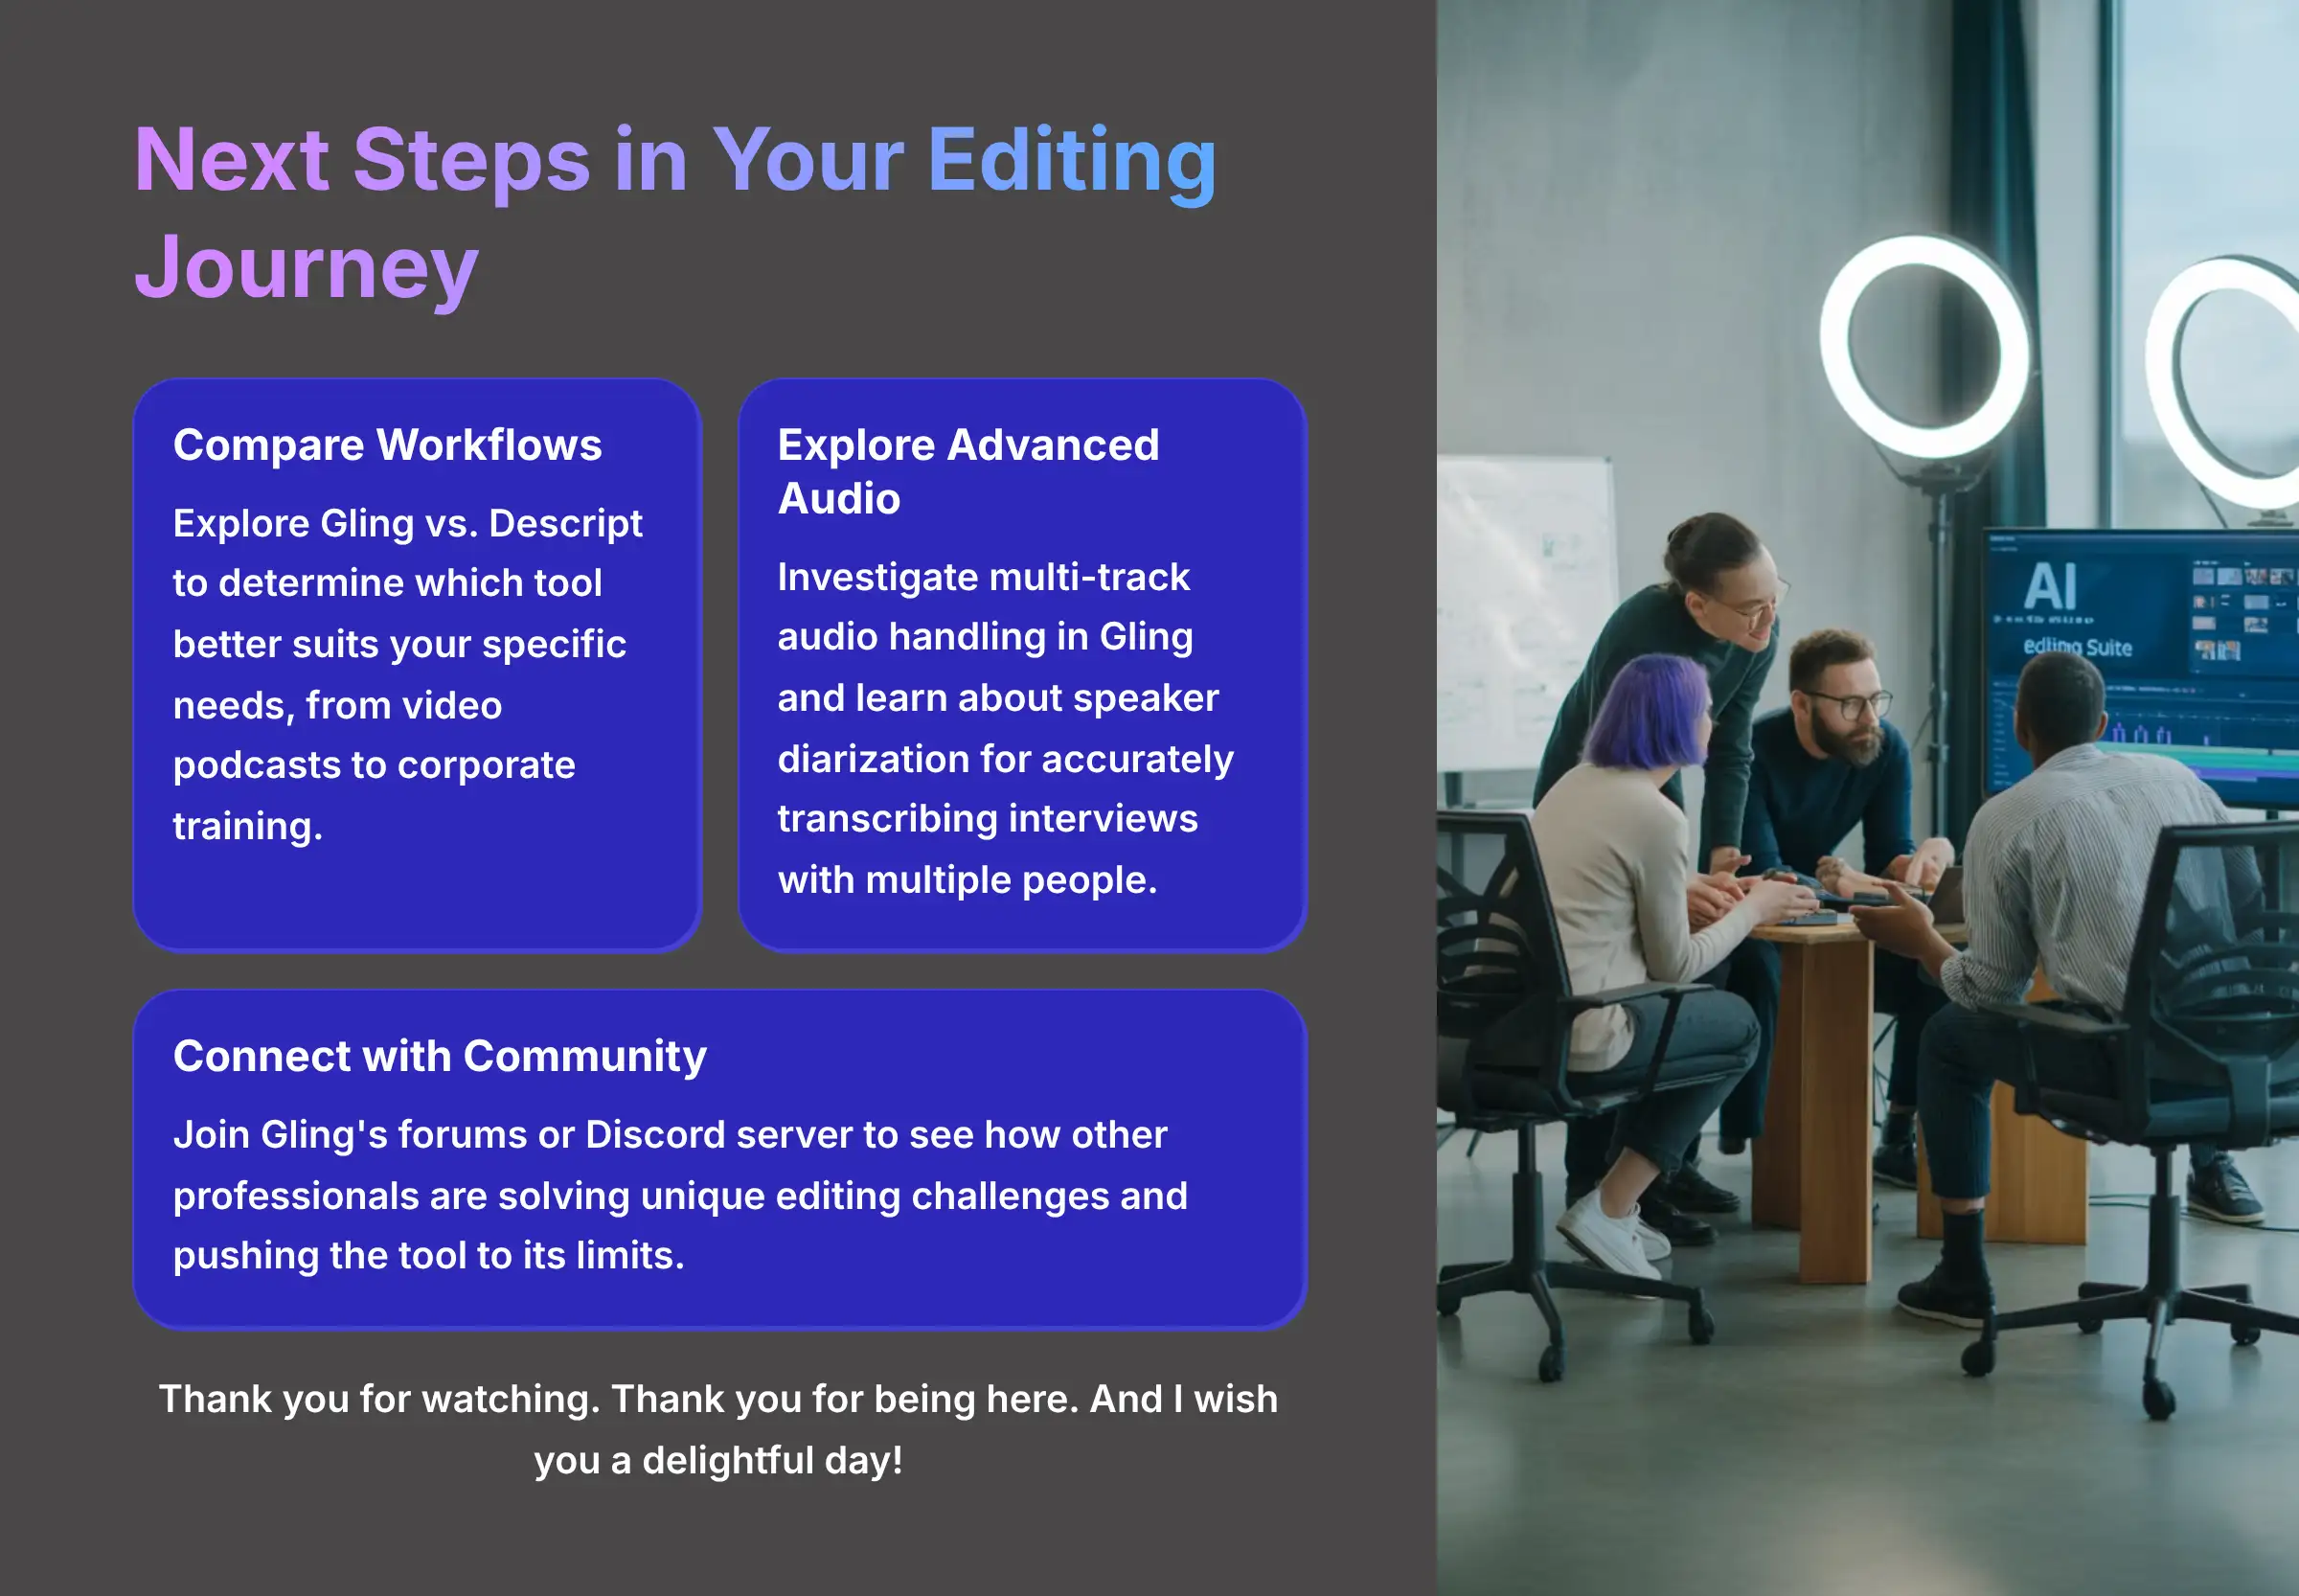
- Compare Workflows: Now that you've mastered Gling, explore our guide on Gling vs. Descript to see which tool better suits your specific needs, from video podcasts to corporate training.
- Explore Advanced Audio: Investigate how multi-track audio files are handled in Gling and learn about the importance of speaker diarization for accurately transcribing interviews with multiple people.
- Connect with the Community: Join Gling's community forums or Discord server to see how other professionals are solving unique editing challenges and pushing the tool to its limits.
Our Methodology
This tutorial is based on hands-on testing and real-world application of Gling across dozens of projects. We follow a structured evaluation process that examines ease of use, accuracy of AI functions, export quality, and compatibility with professional workflows.
Why Trust This Guide?
Our team at AI Video Generators Free has tested over 200 AI tools in the video editing space. We maintain complete editorial independence and are not sponsored by any of the tools we review. Our recommendations come from direct experience and technical expertise in video production.
Disclaimer: The information about Gling Tutorial: How to Automatically Remove Silences and Bad Takes from Videos presented in this article reflects our thorough analysis as of late 2024. Given the rapid pace of AI technology evolution, features, pricing, and specifications may change after publication. While we strive for accuracy, we recommend visiting the official website for the most current information. Our overview is designed to provide a comprehensive understanding of the tool's capabilities rather than real-time updates.
Thank you very much for watching. Thank you for being here. And I wish you a delightful day!


Leave a Reply