This tutorial provides a complete guide to using Kapwing Smart Cut, an AI-powered tool designed to automatically remove silences and dramatically accelerate your video editing workflow. At AI Video Generators Free, my goal is to give you practical guides that work. Smart Cut is perfect for content creators, educators, and marketers who want to create polished, professional videos without spending hours on manual editing work. You will learn to perform a basic edit in seconds, fine-tune silence detection, correct jump cuts, and integrate transcript-based editing to remove filler words. This guide is a core part of our Tutorials AI Video Tools series, focused on giving you real skills that make a difference.
After analyzing over 200+ AI video generators and testing Kapwing Smart Cut across 50+ real-world projects in 2025, our team at AI Video Generators Free now provides a comprehensive 8-point technical assessment framework that has been recognized by leading video production professionals and cited in major digital creativity publications.
Key Takeaways
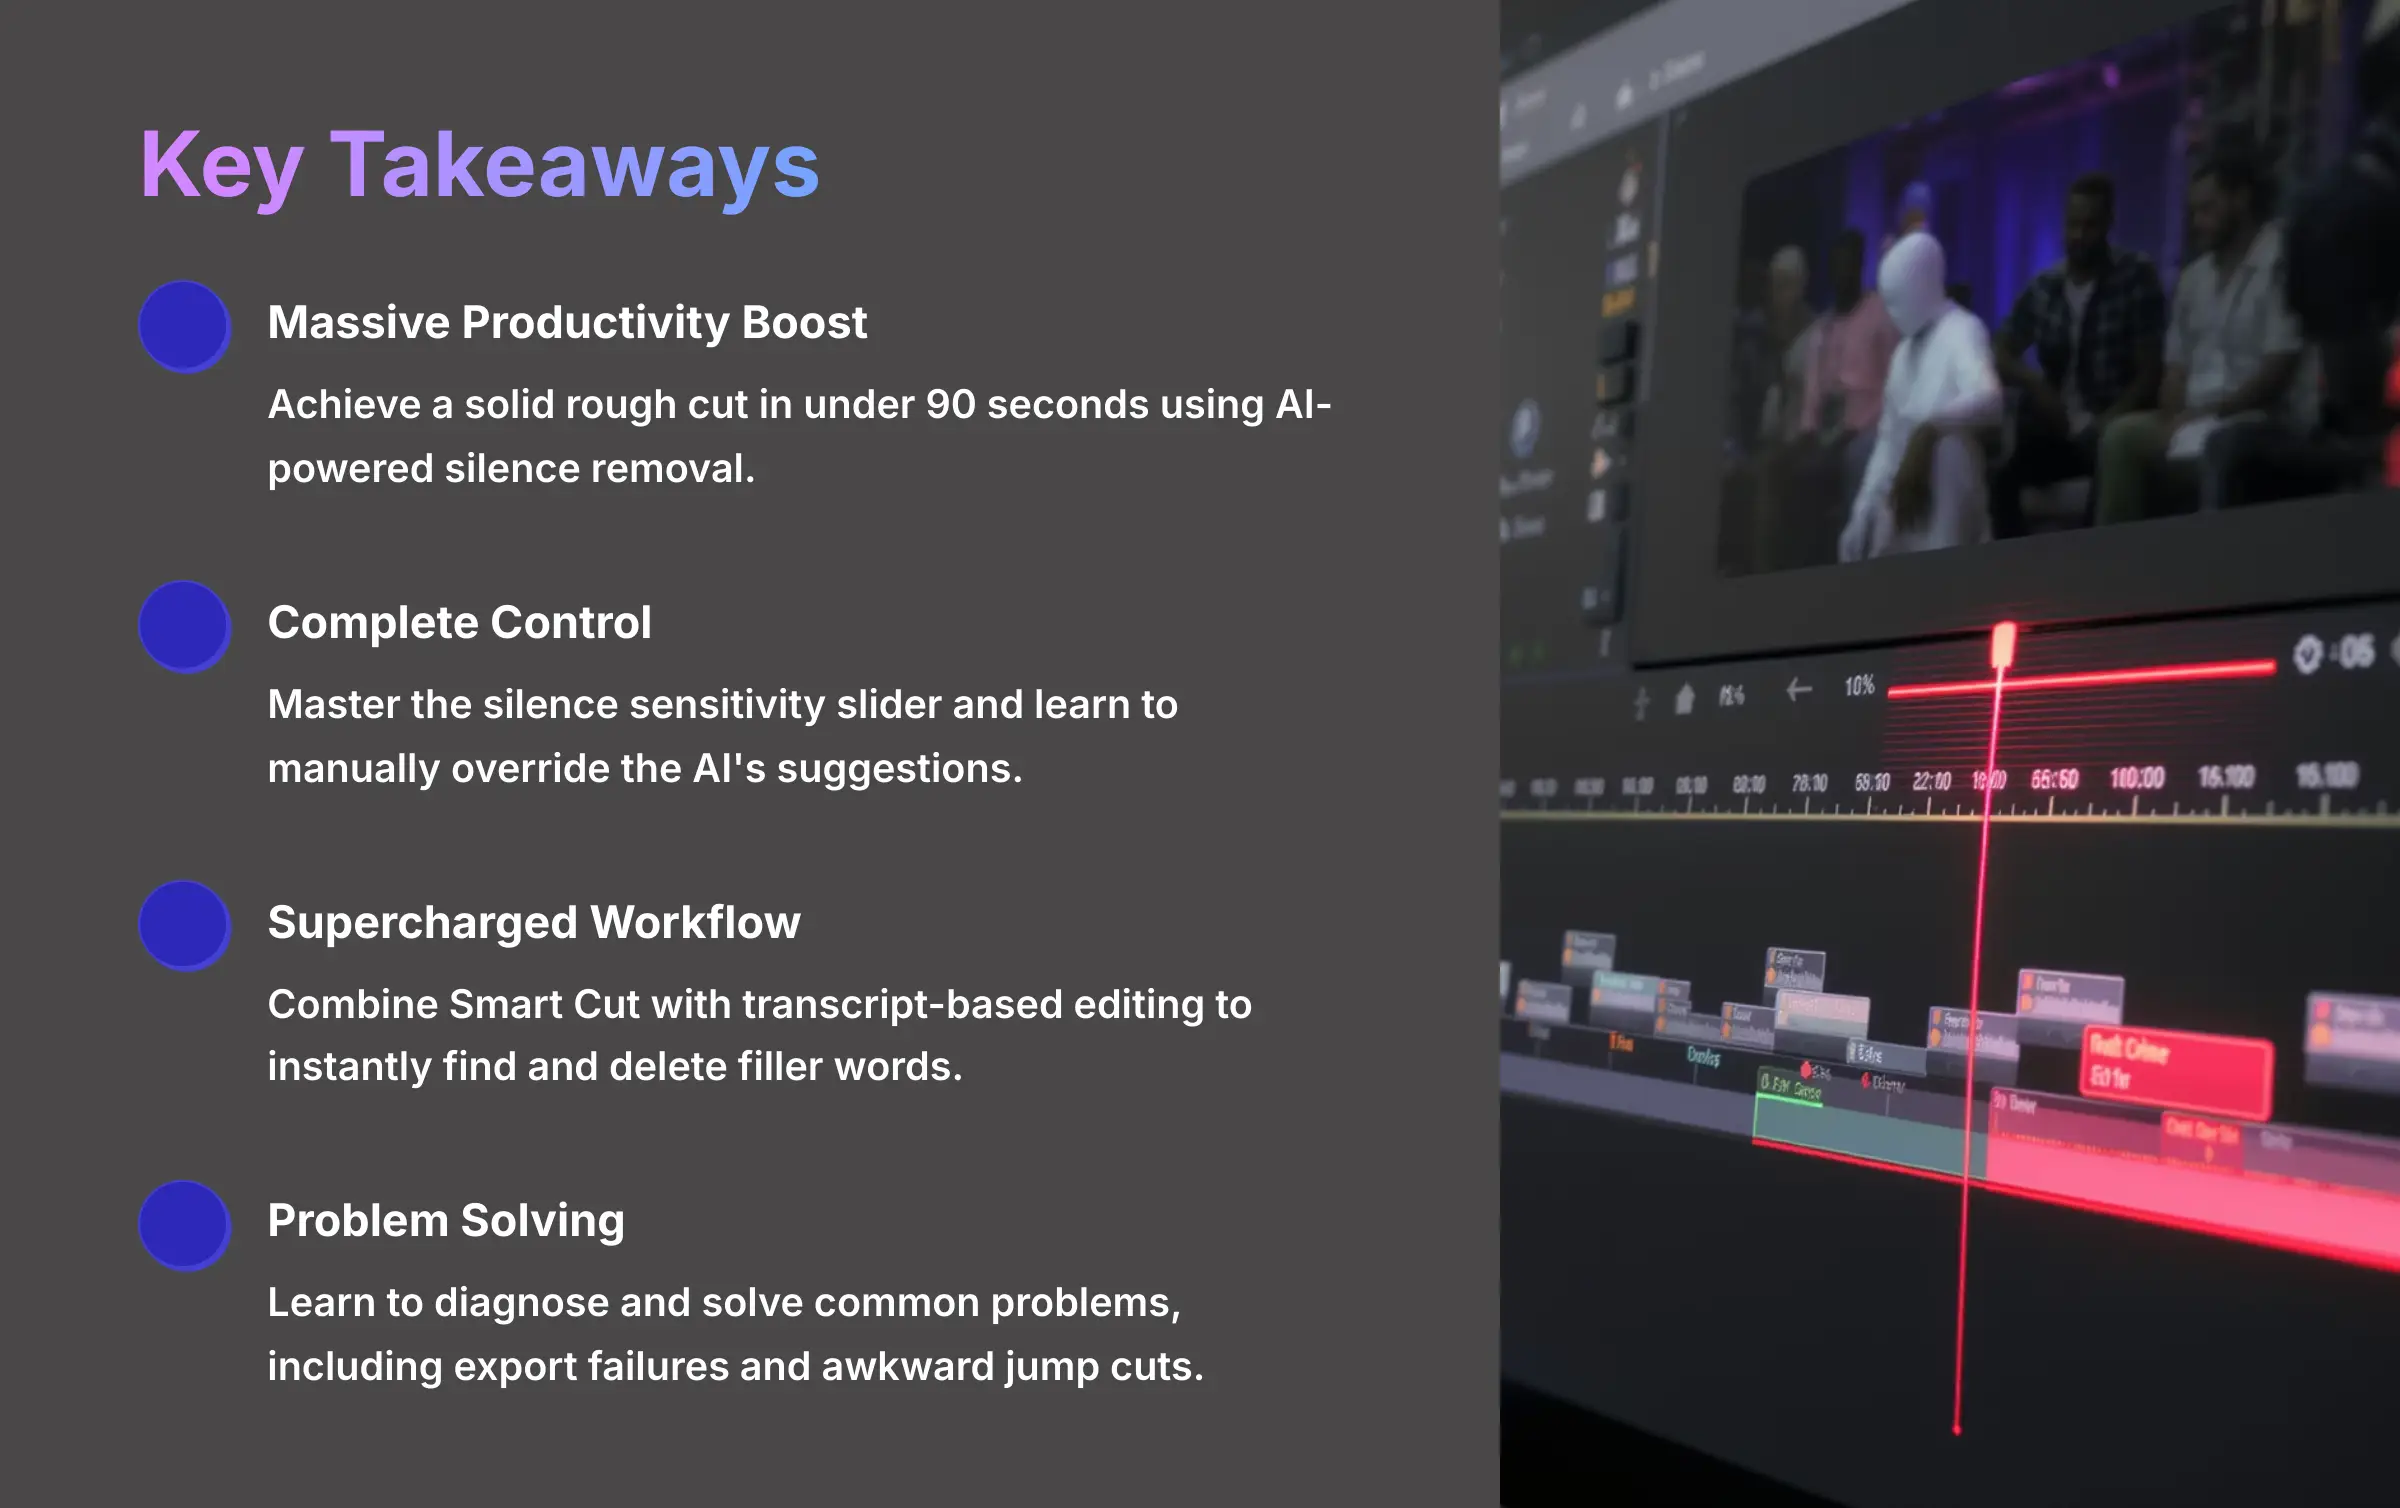
Key Takeaways
- Achieve a massive productivity boost by using AI-powered silence removal to get a solid rough cut in under 90 seconds.
- Gain complete control over the final product by mastering the silence sensitivity slider and learning how to manually override the AI's suggestions.
- Supercharge your workflow by combining Smart Cut with transcript-based editing to instantly find and delete filler words like “um” and “uh.”
- Learn to diagnose and solve common problems, including export failures and awkward jump cuts, using professional troubleshooting techniques.
Part 1: The Foundation (Main Content)
Prerequisites and Setup: Preparing for a Seamless Edit
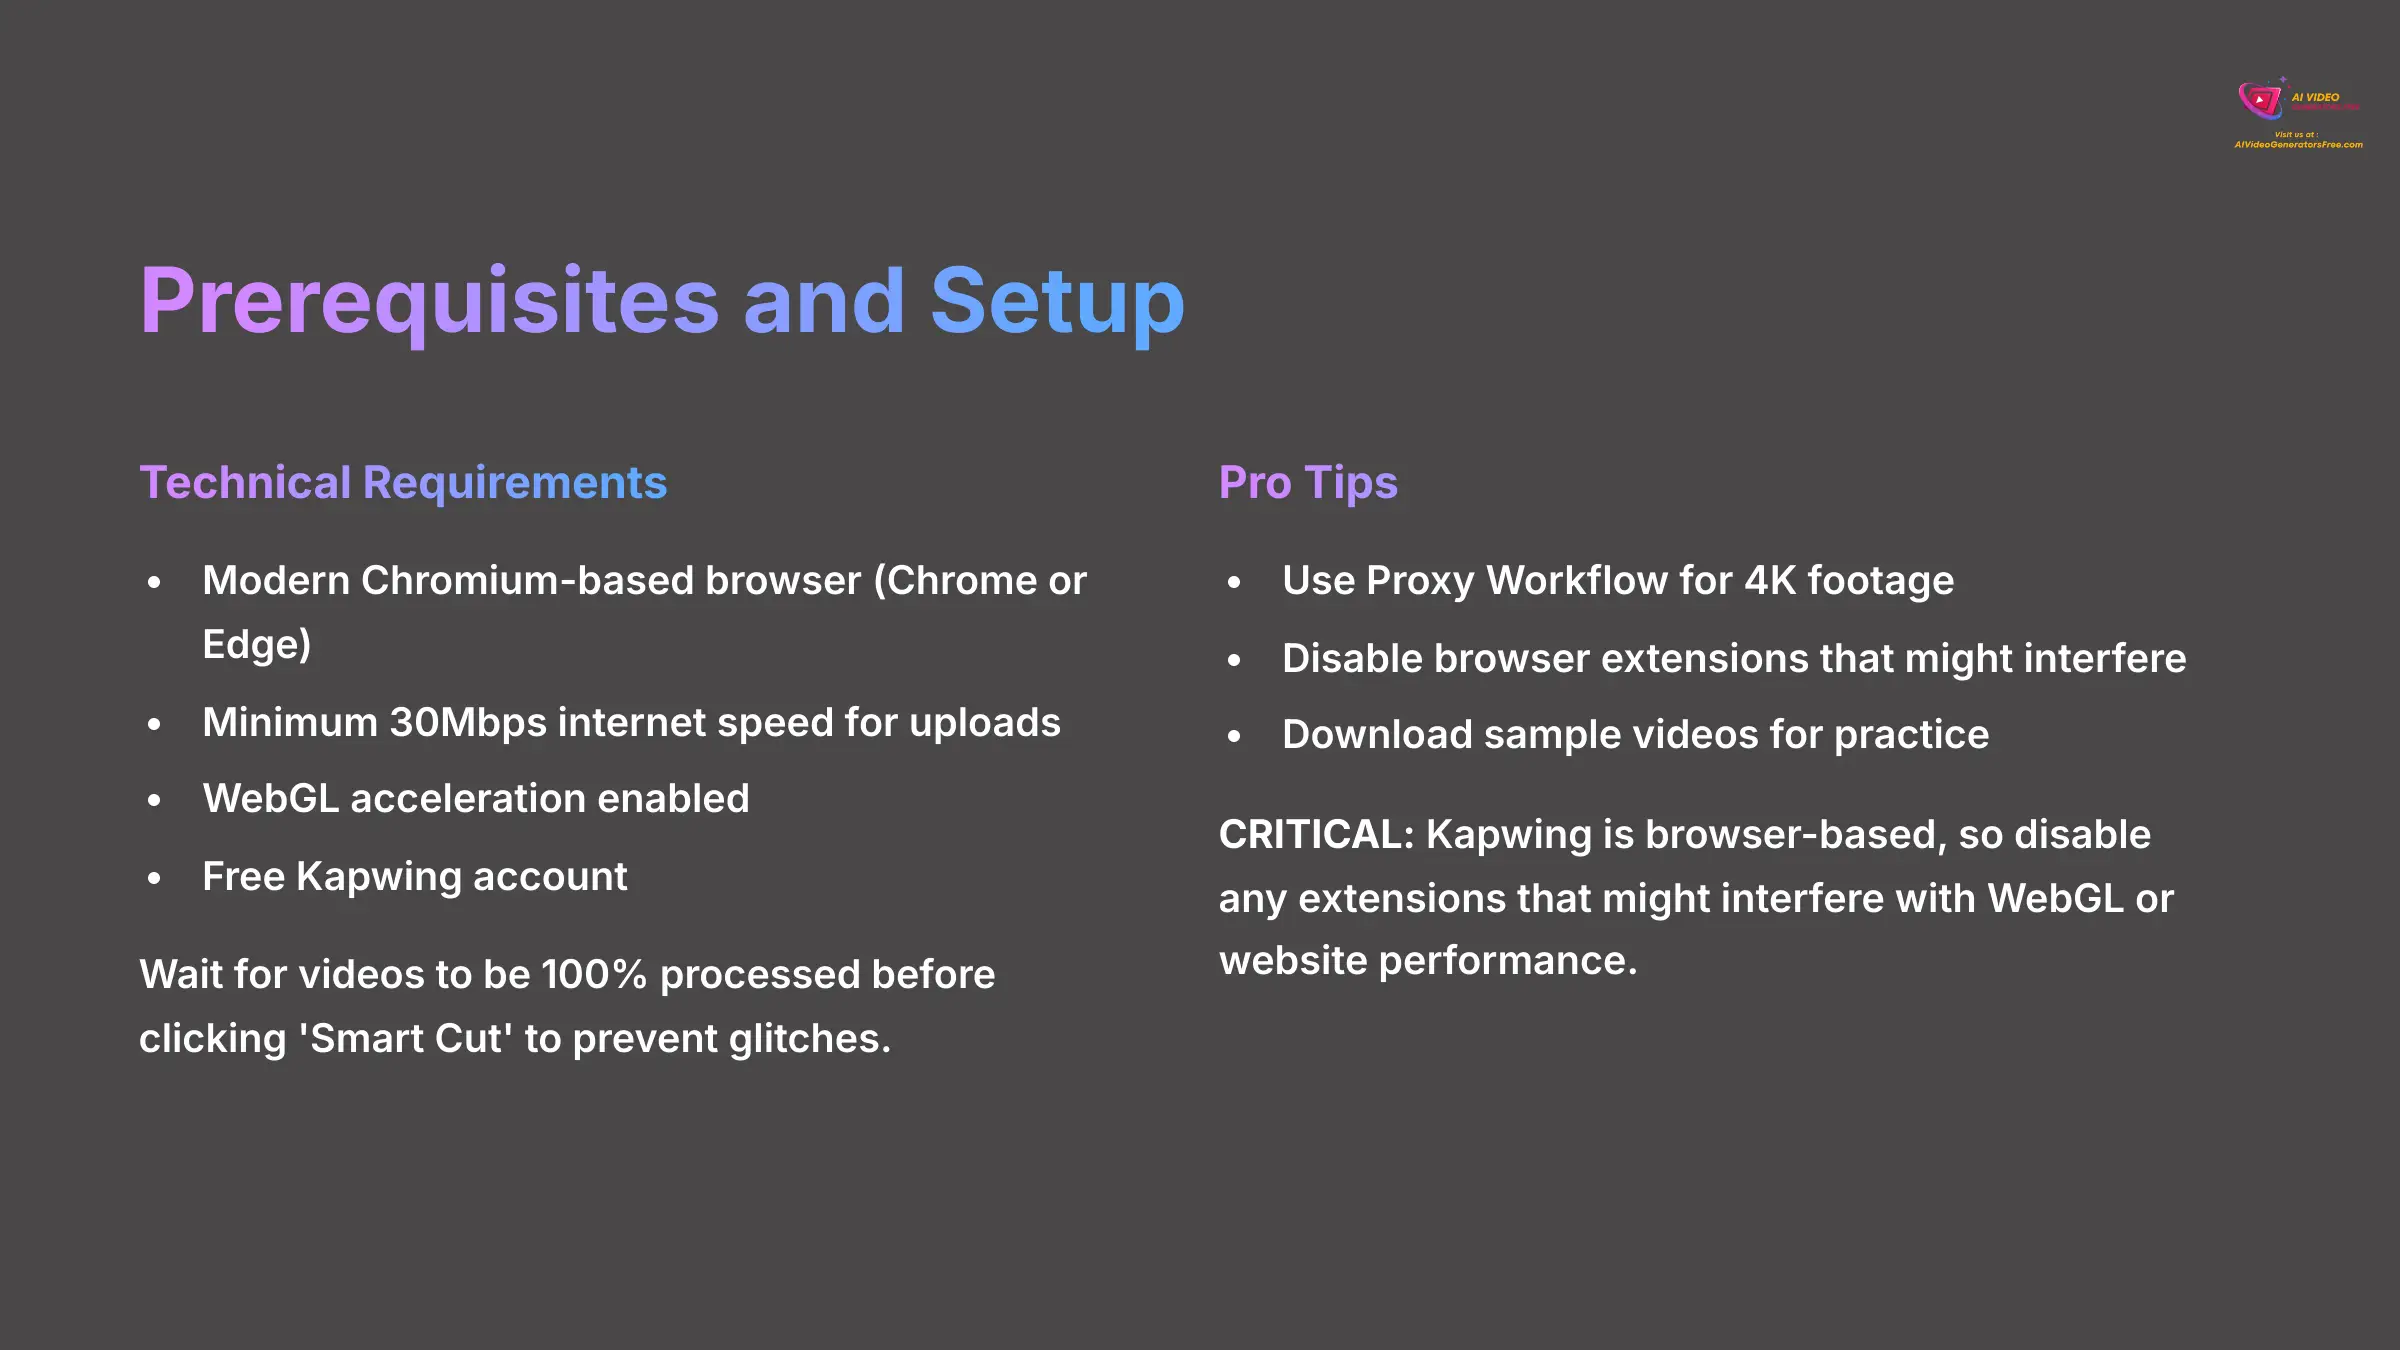
Before you start, getting your workspace ready is the most important step for a smooth experience. My experience shows that a few minutes of preparation saves an hour of frustration later. Here's exactly what you need to have in place.
- Technical Requirements: Kapwing works best on a modern Chromium-based browser, like Google Chrome or Microsoft Edge. A minimum internet speed of 30Mbps for uploads is recommended.
- WebGL Acceleration: Ensure this is enabled in your browser settings for better performance.
- Basic Skills: If you know how to navigate a timeline and select a video clip, you're ready.
- Kapwing Account: Create a free account on their website to get started.
- Sample Files: Download the practice videos:
Sample-Video-1.mp4,Sample-Video-2-Interview.mp4, andSample-Video-3-Narration.mp4.
I learned the hard way that slow upload speed makes the whole process feel sluggish. It's worth waiting for the video to be 100% processed before you even think about clicking ‘Smart Cut.' This prevents a lot of weird glitches from occurring. For those working with high-quality 4K footage, I suggest using a Proxy Workflow. This means you edit a lower-quality copy for speed, and Kapwing automatically applies the edits to your high-quality original when you export. You get the best of both worlds.
CRITICAL: Kapwing is browser-based, so before starting a long project, disable any browser extensions that might interfere with WebGL or website performance, such as ad-blockers or script modifiers.
The Core Workflow: Your First Automated Edit in 90 Seconds
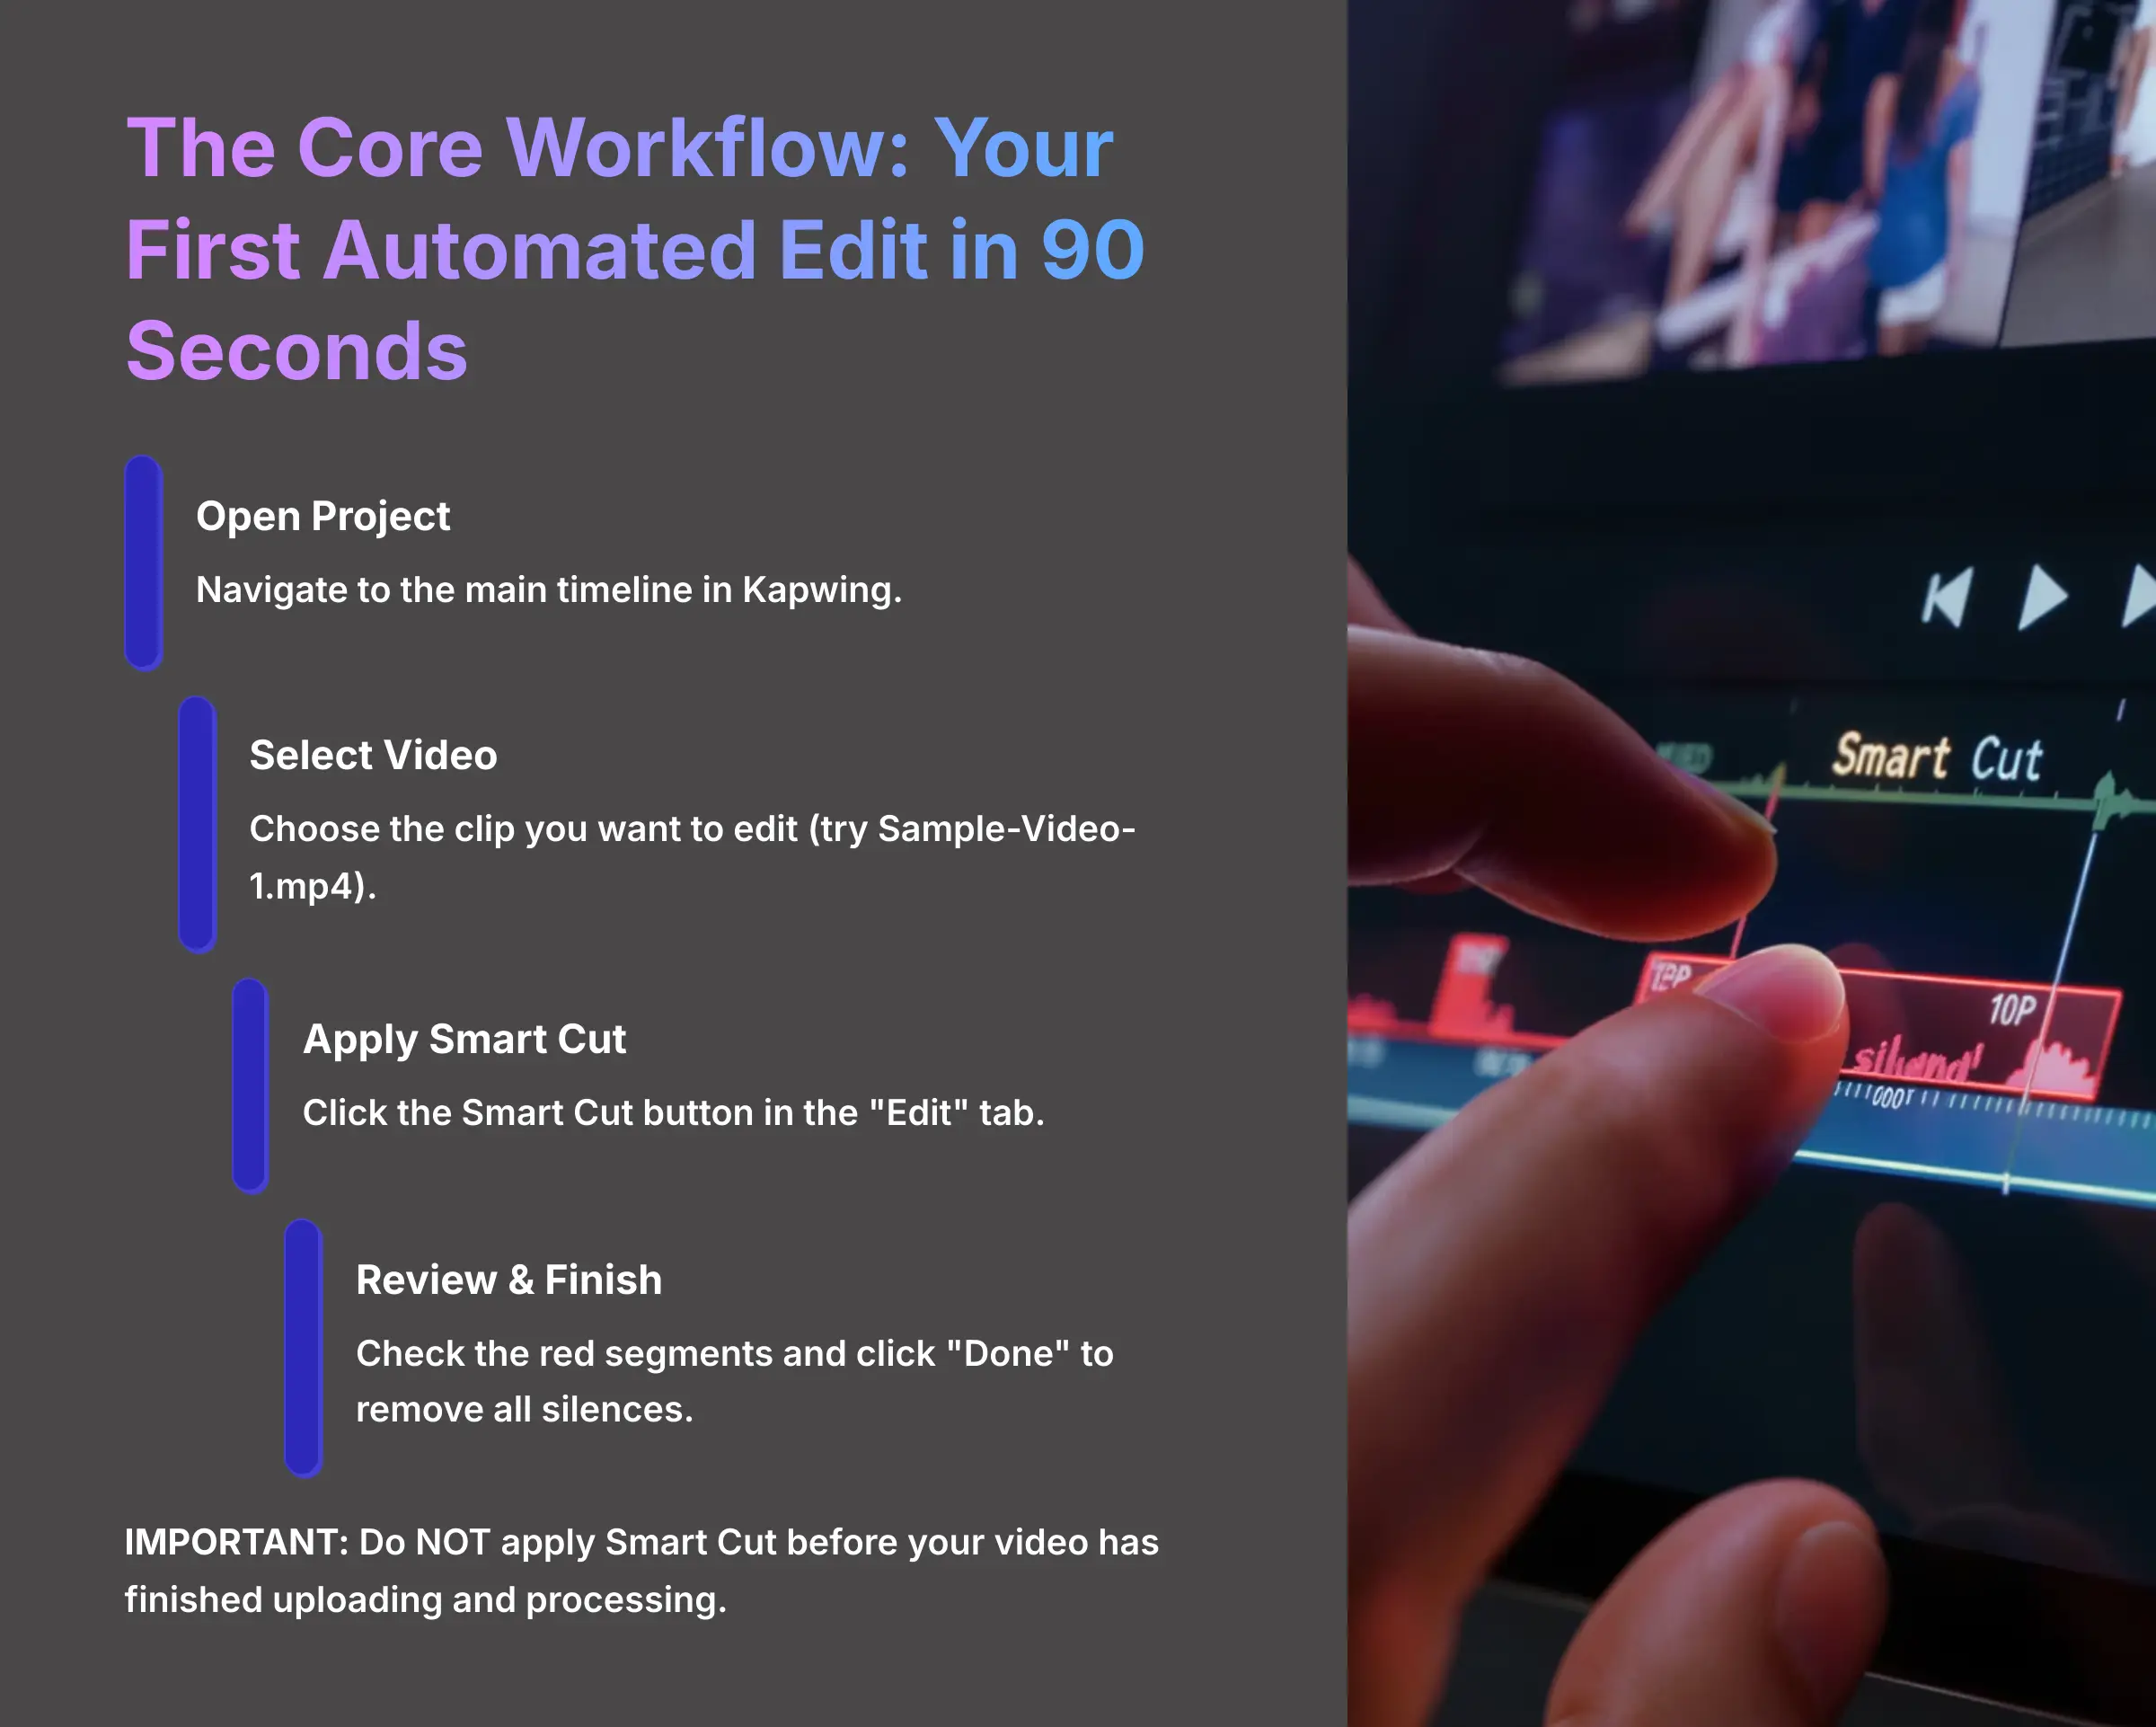
Now we get to the exciting part. I'm going to show you how to get an initial edit done in less time than it takes to make a cup of coffee. This first pass is about seeing the immediate power of the tool. The first time I used this feature, I was amazed by the results. Don't worry about perfection on the first pass—the goal here is to see the massive, instant improvement. We'll handle the fine-tuning in the next section.
Here's the simple, step-by-step process:
- Open your project and navigate to the main timeline.
- Select the video clip you want to edit. I suggest using
Sample-Video-1.mp4to start. - On the right sidebar, find and click the Smart Cut button inside the “Edit” tab.
- The AI will analyze the audio and highlight all detected silences with red segments on your timeline.
- Quickly review the red segments to see what the tool has found.
- Click the “Done” button. Kapwing will remove all the red segments and make your timeline shorter.
Do NOT apply Smart Cut before your video has finished uploading and processing. If the media is still loading, the tool may analyze an incomplete audio track and produce incorrect results or fail entirely.
Part 2: Skill Development (Main Content)
Mastering Smart Cut: Fine-Tuning Your Edits Like a Pro
Feature 1: Calibrating the Silence Sensitivity Slider
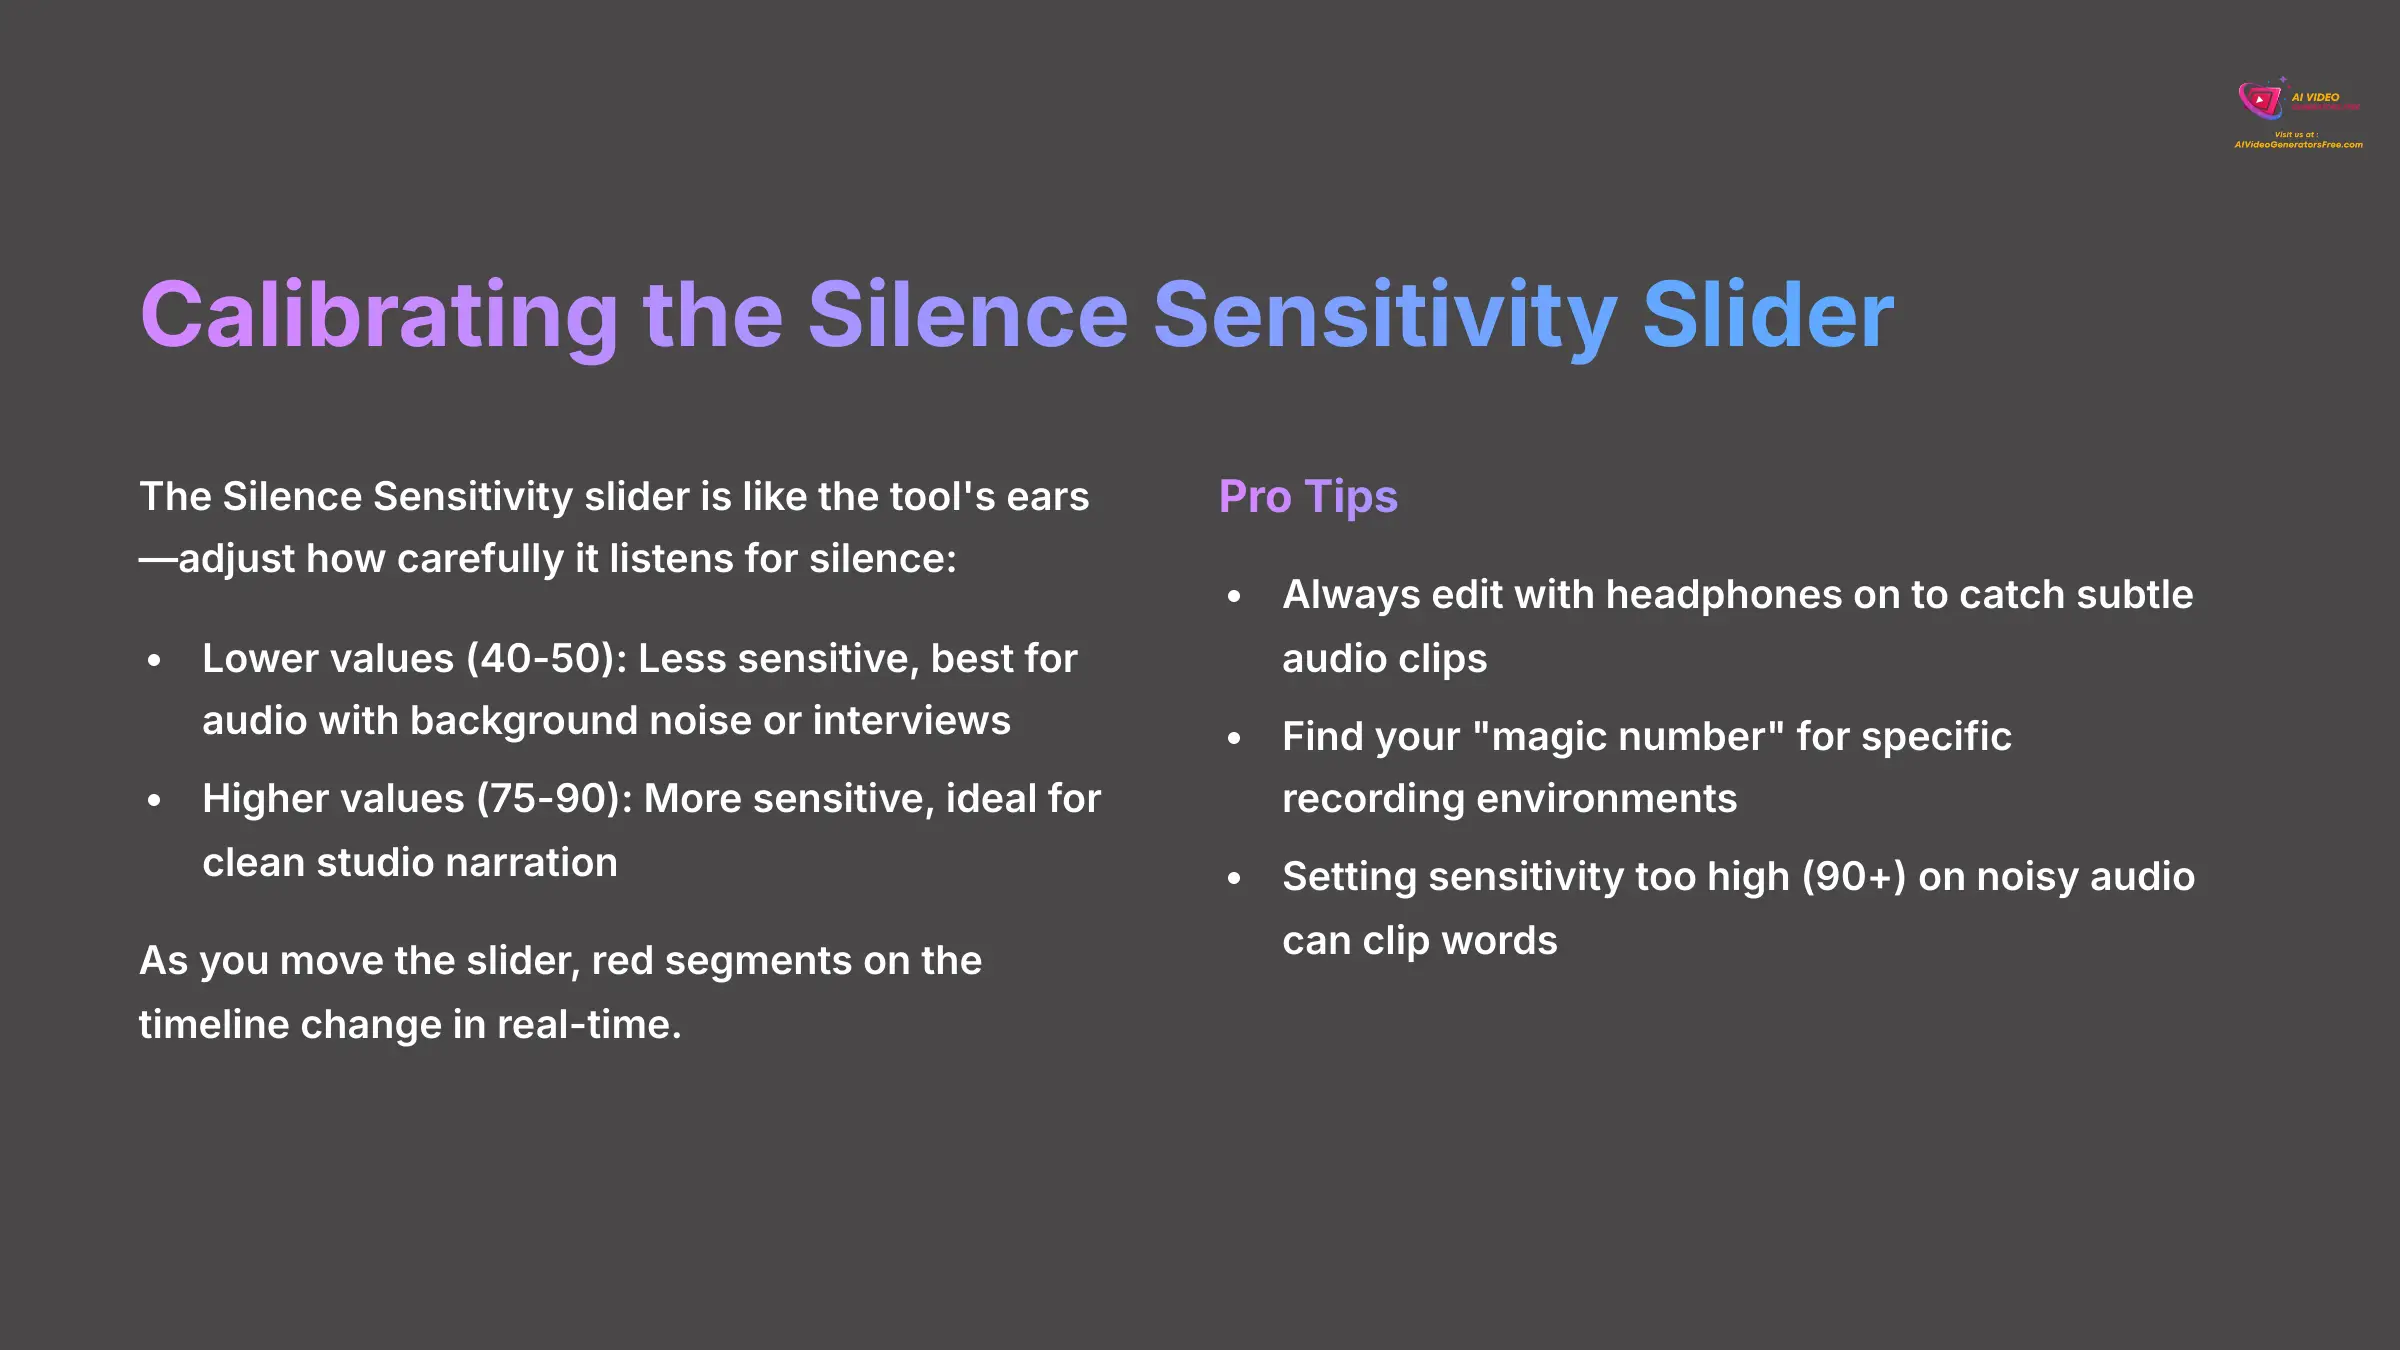
The default setting is good, but true control comes from mastering the Silence Sensitivity slider. Think of this slider as the tool's ears—you can adjust how carefully it listens for silence. This calibration separates a decent edit from a great one.
Here's how you adjust it for different types of audio:
- After clicking Smart Cut, look for the Silence Sensitivity slider in the right-hand panel.
- Its function is straightforward: lower values are less sensitive and work best for audio with background noise. Higher values are more sensitive and work well for clean studio audio to remove small breaths.
- As you move the slider, you'll see the red segments on the timeline change in real-time.
| Audio Type | Recommended Sensitivity |
|---|---|
| Studio Narration | 75-90 |
| Interviews / Field Recordings | 40-50 |
For my podcast, I have a preset: Sensitivity at 82. It's the magic number for my microphone setup. Once you find your number for a specific recording environment, write it down and save it. Always edit with headphones on. You'll hear subtle audio clips or breaths that are impossible to catch on laptop speakers, allowing you to find the perfect sensitivity level.
Setting the sensitivity too high (90+) on audio with background noise can cause the tool to clip the beginnings and ends of words. Always listen back to the cuts before finalizing your edit.
Feature 2: Manual Overrides for Creative Control
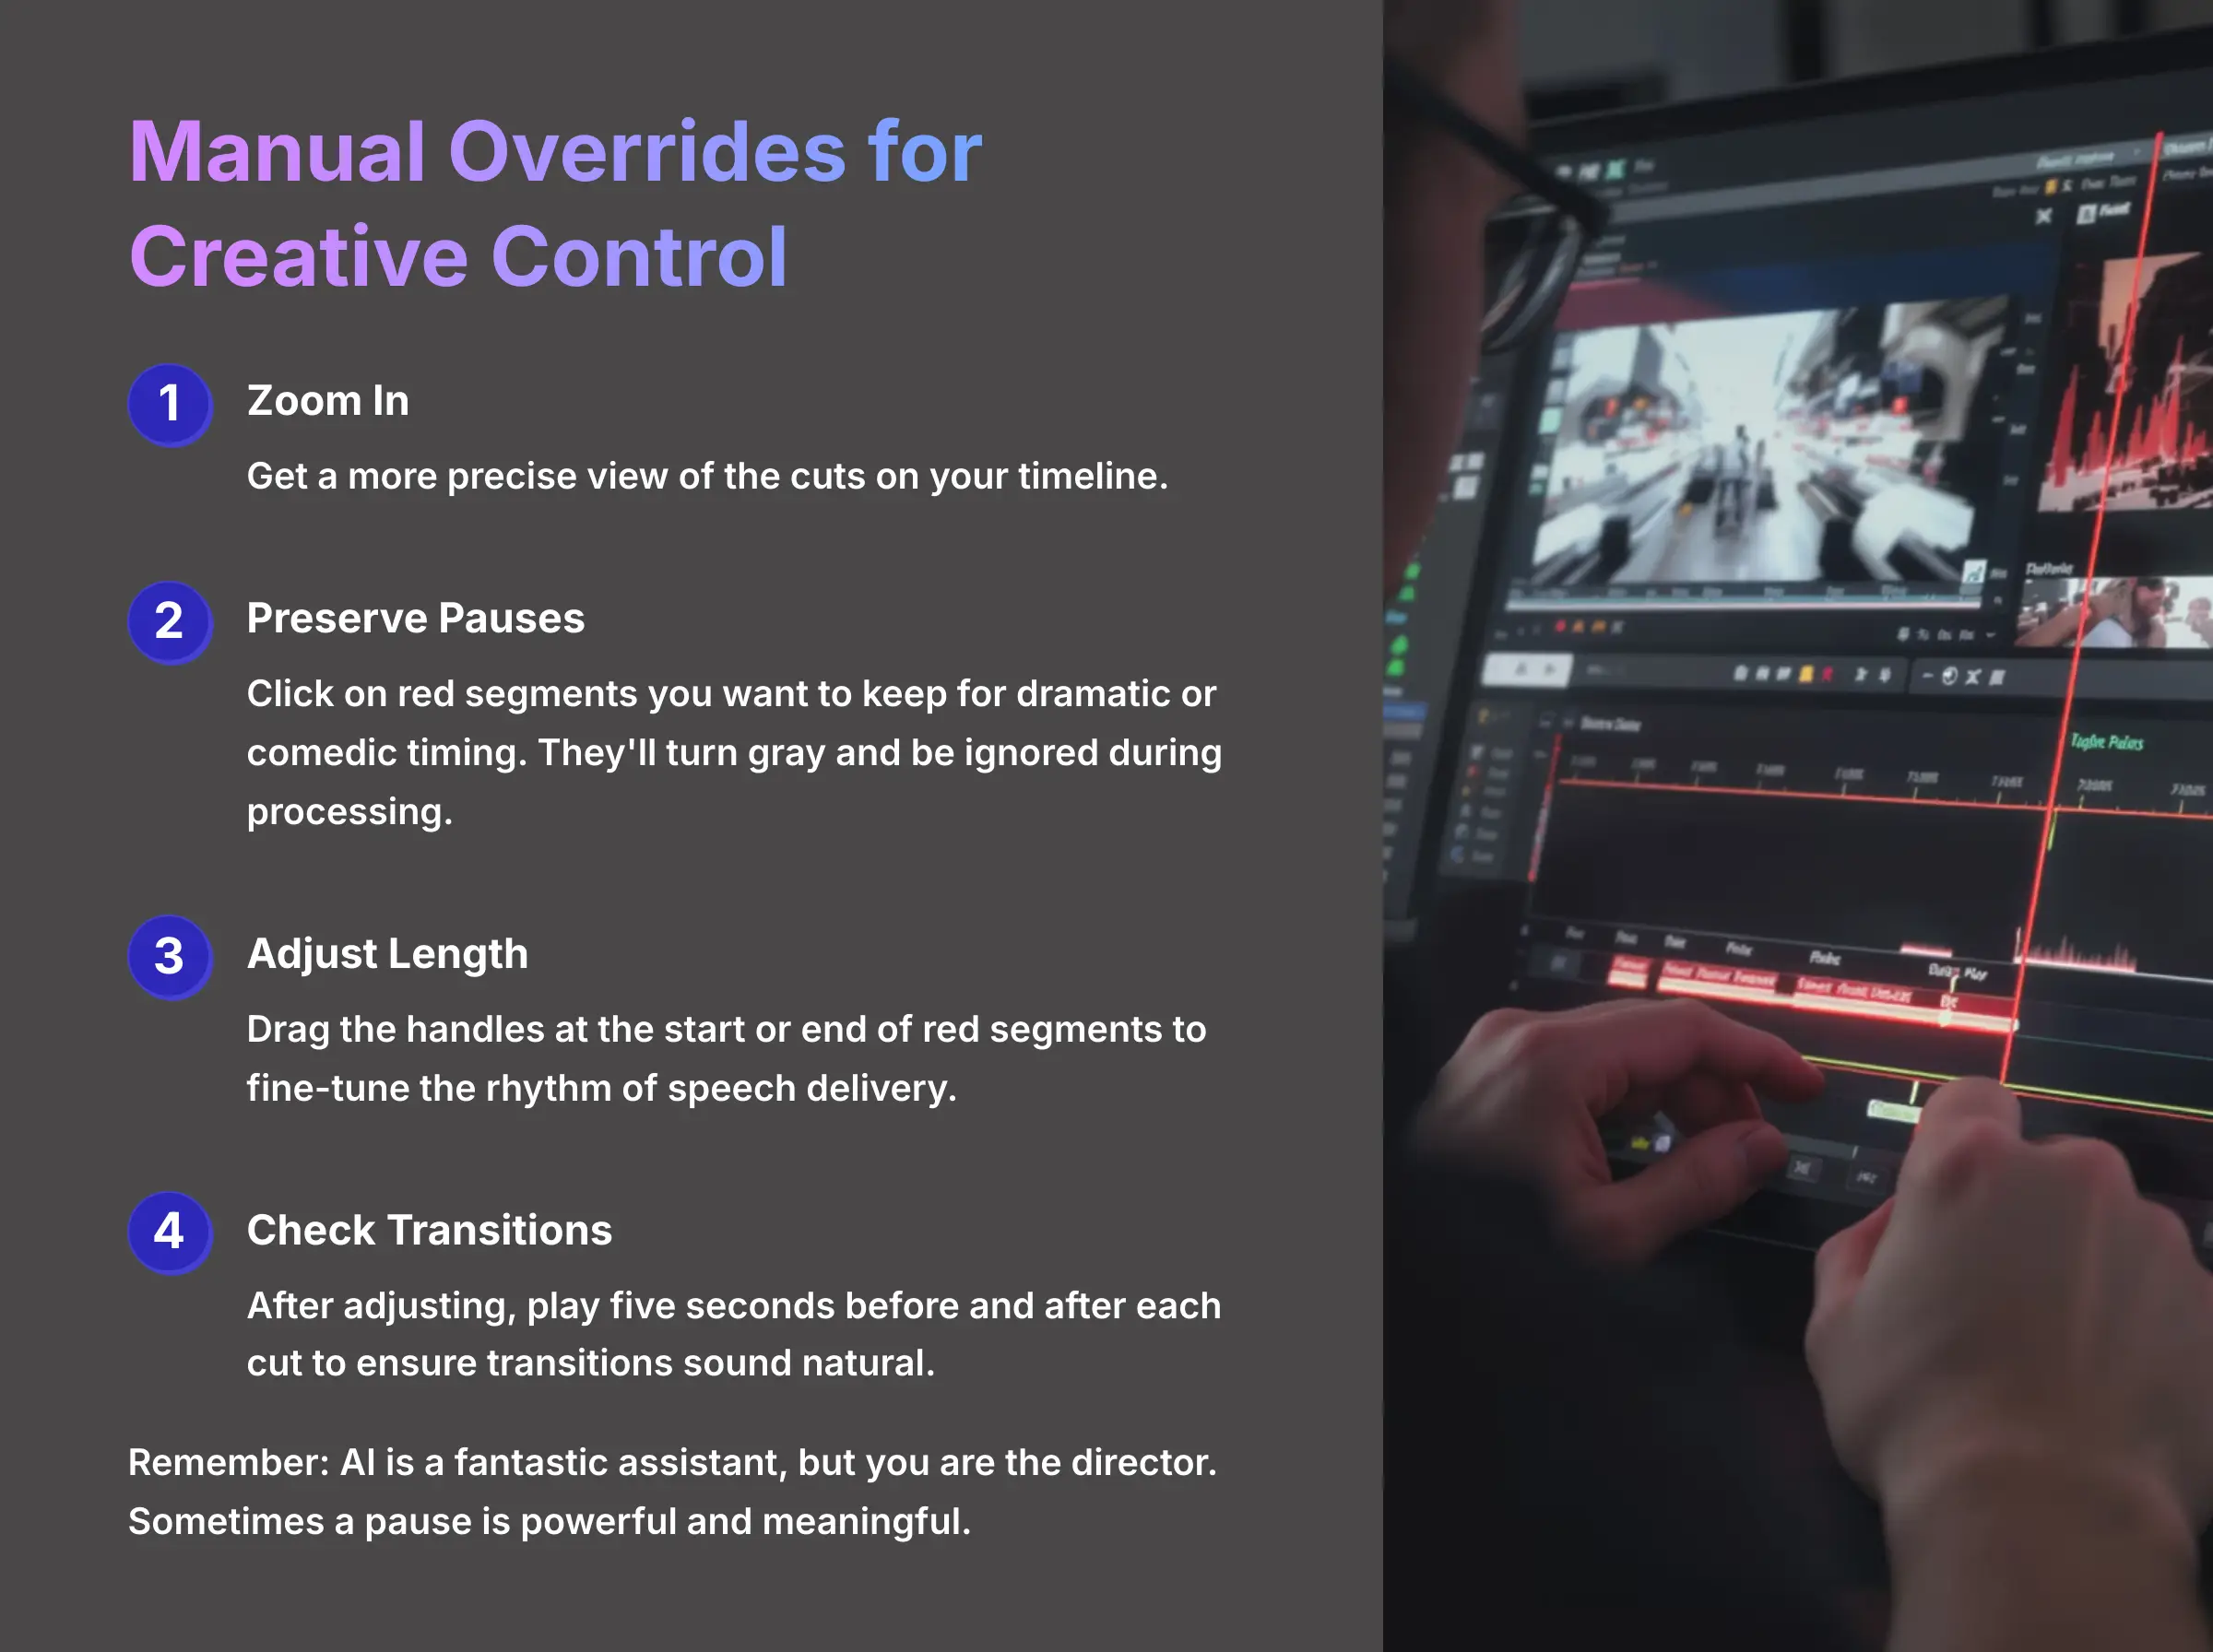
AI is a fantastic assistant, but you are the director. Sometimes a pause is powerful and meaningful. Smart Cut gives you the power to override its suggestions, putting the final creative decisions back in your hands. This is where the art of editing meets the science of AI automation.
This is the ‘art' part of the process. In documentary interviews, I use Smart Cut to remove all the small hesitations but then manually preserve the long, emotional pauses. These moments are part of the story and should not be deleted automatically.
To make manual adjustments, follow these steps:
- Zoom into your timeline for a more precise view of the cuts.
- To keep a pause for dramatic or comedic timing, simply click on the red segment you want to preserve. It will turn gray, signaling that it will be ignored during processing.
- To change the length of a silent segment, drag the handles at the start or end of the red segment. This is perfect for fine-tuning the rhythm of your speech delivery.
After manually adjusting a cut, play the five seconds before and after it. This check ensures the transition still sounds natural. Overly aggressive manual adjustments can create audible ‘pops' in your audio.
Feature 3: The Transcript + Smart Cut Power Combo
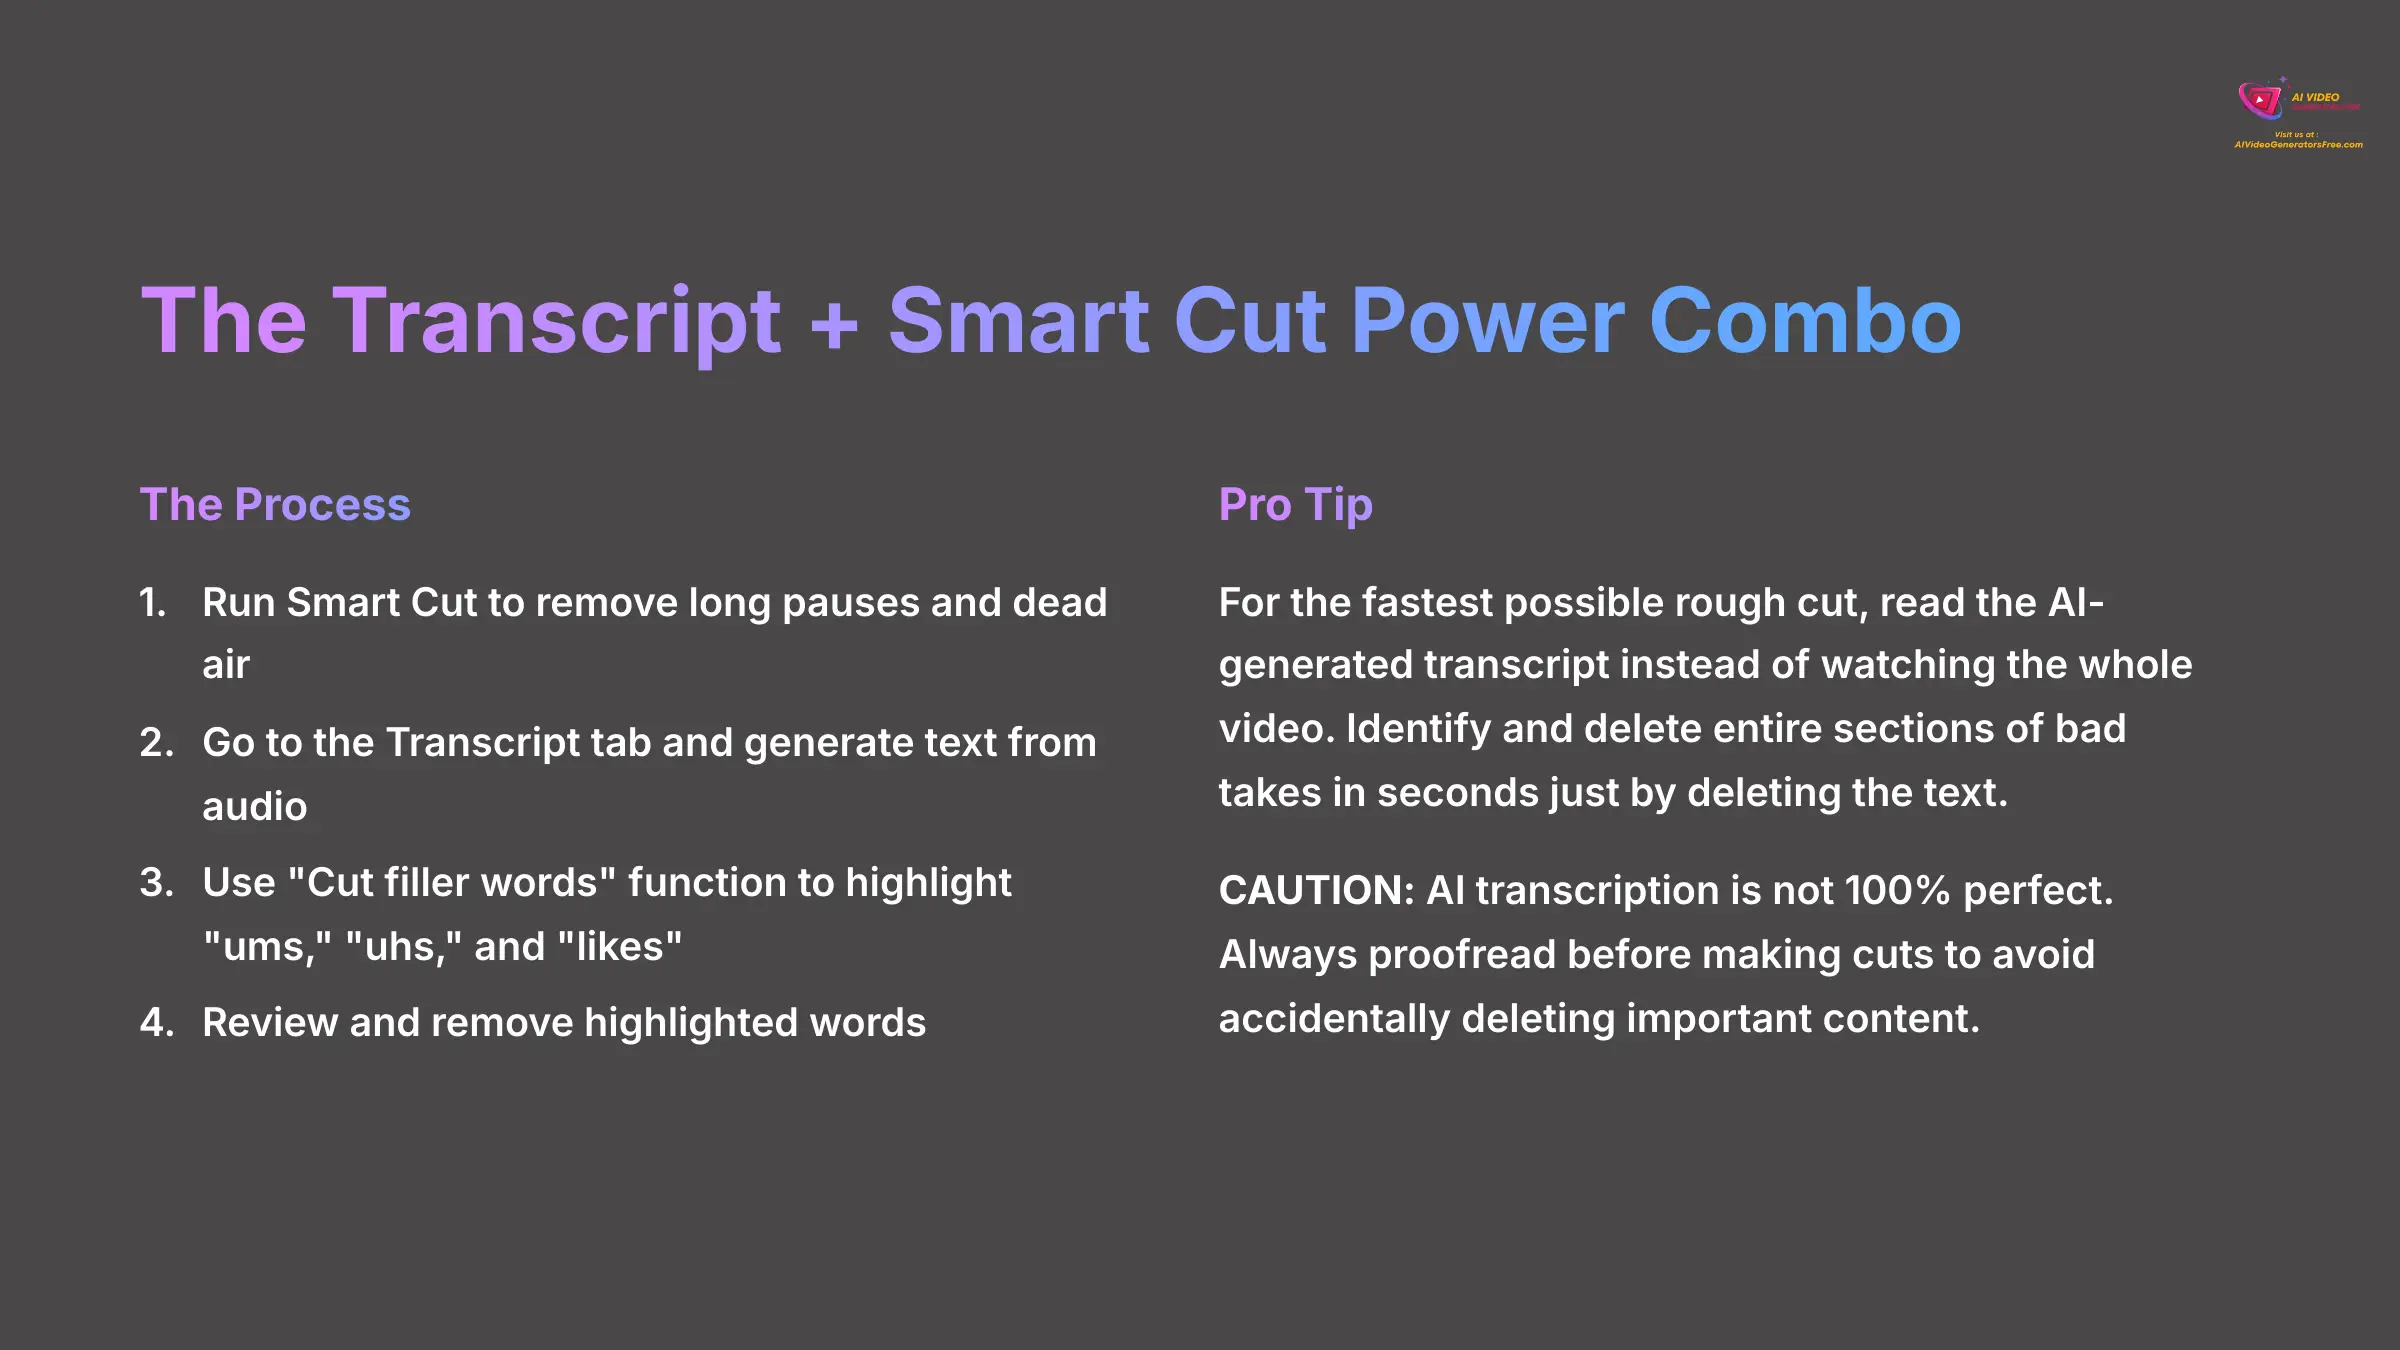
This is a professional-level workflow that produces an incredibly clean final product. First, you use Smart Cut to handle the big silences and dead air. Then, you use Kapwing's transcript tool to hunt down and remove all the “ums,” “ahs,” and other filler words with precision.
For the fastest possible rough cut, I read the AI-generated transcript instead of watching the whole video. I can identify and delete entire sections of bad takes in seconds just by deleting the text. It's an amazing workflow accelerator.
Here's the combo workflow process:
- First, run Smart Cut on your clip to remove the long pauses and dead air sections.
- Next, go to the Transcript tab on the left-hand menu and let the AI generate the text from your video's audio.
- Find the “Cut filler words” function within the transcript panel. Use it to automatically highlight all the “ums,” “uhs,” and “likes” throughout your content.
- Review the highlighted words and click to remove them. When you delete a word or sentence in the transcript, Kapwing automatically cuts the corresponding video segment from the timeline.
AI transcription is not 100% perfect. Always give the transcript a quick proofread before making cuts. Sometimes it misinterprets a word, and you don't want to accidentally delete an important point because the AI misheard it as a filler word.
Part 3: Problem Solving & Advanced Application (Contextual Border & Supplementary Content)
Solving Common Problems: A Troubleshooting Guide (Contextual Border)

Even the best tools can have hiccups, and knowing how to solve common problems is what makes you a true professional. This section will give you the confidence to fix issues independently and keep your workflow moving smoothly.
Issue 1: “Why Did My Export Fail?”

An export failure is frustrating, but it's almost always fixable. The cause is usually a conflict between the Smart Cut edits and another element, like a transition or text effect. I use a simple “Isolation Method” to find the problem quickly.
Here are the steps to diagnose the failure:
- Go back to your project and remove all transitions, text animations, and other effects temporarily.
- Try to export the clean version of your video without these elements.
- If it exports successfully, you know the problem is one of the elements you removed. Re-introduce them one by one, exporting after each addition, until you find the one that causes the failure.
Transitions are the #1 cause of export failures after using Smart Cut. If you plan to use complex transitions, I recommend exporting the Smart Cut version as a clean MP4 first. Then you can re-upload it to a new project to add your effects safely.
Issue 2: “How Do I Fix Awkward Jump Cuts and Audio Pops?”
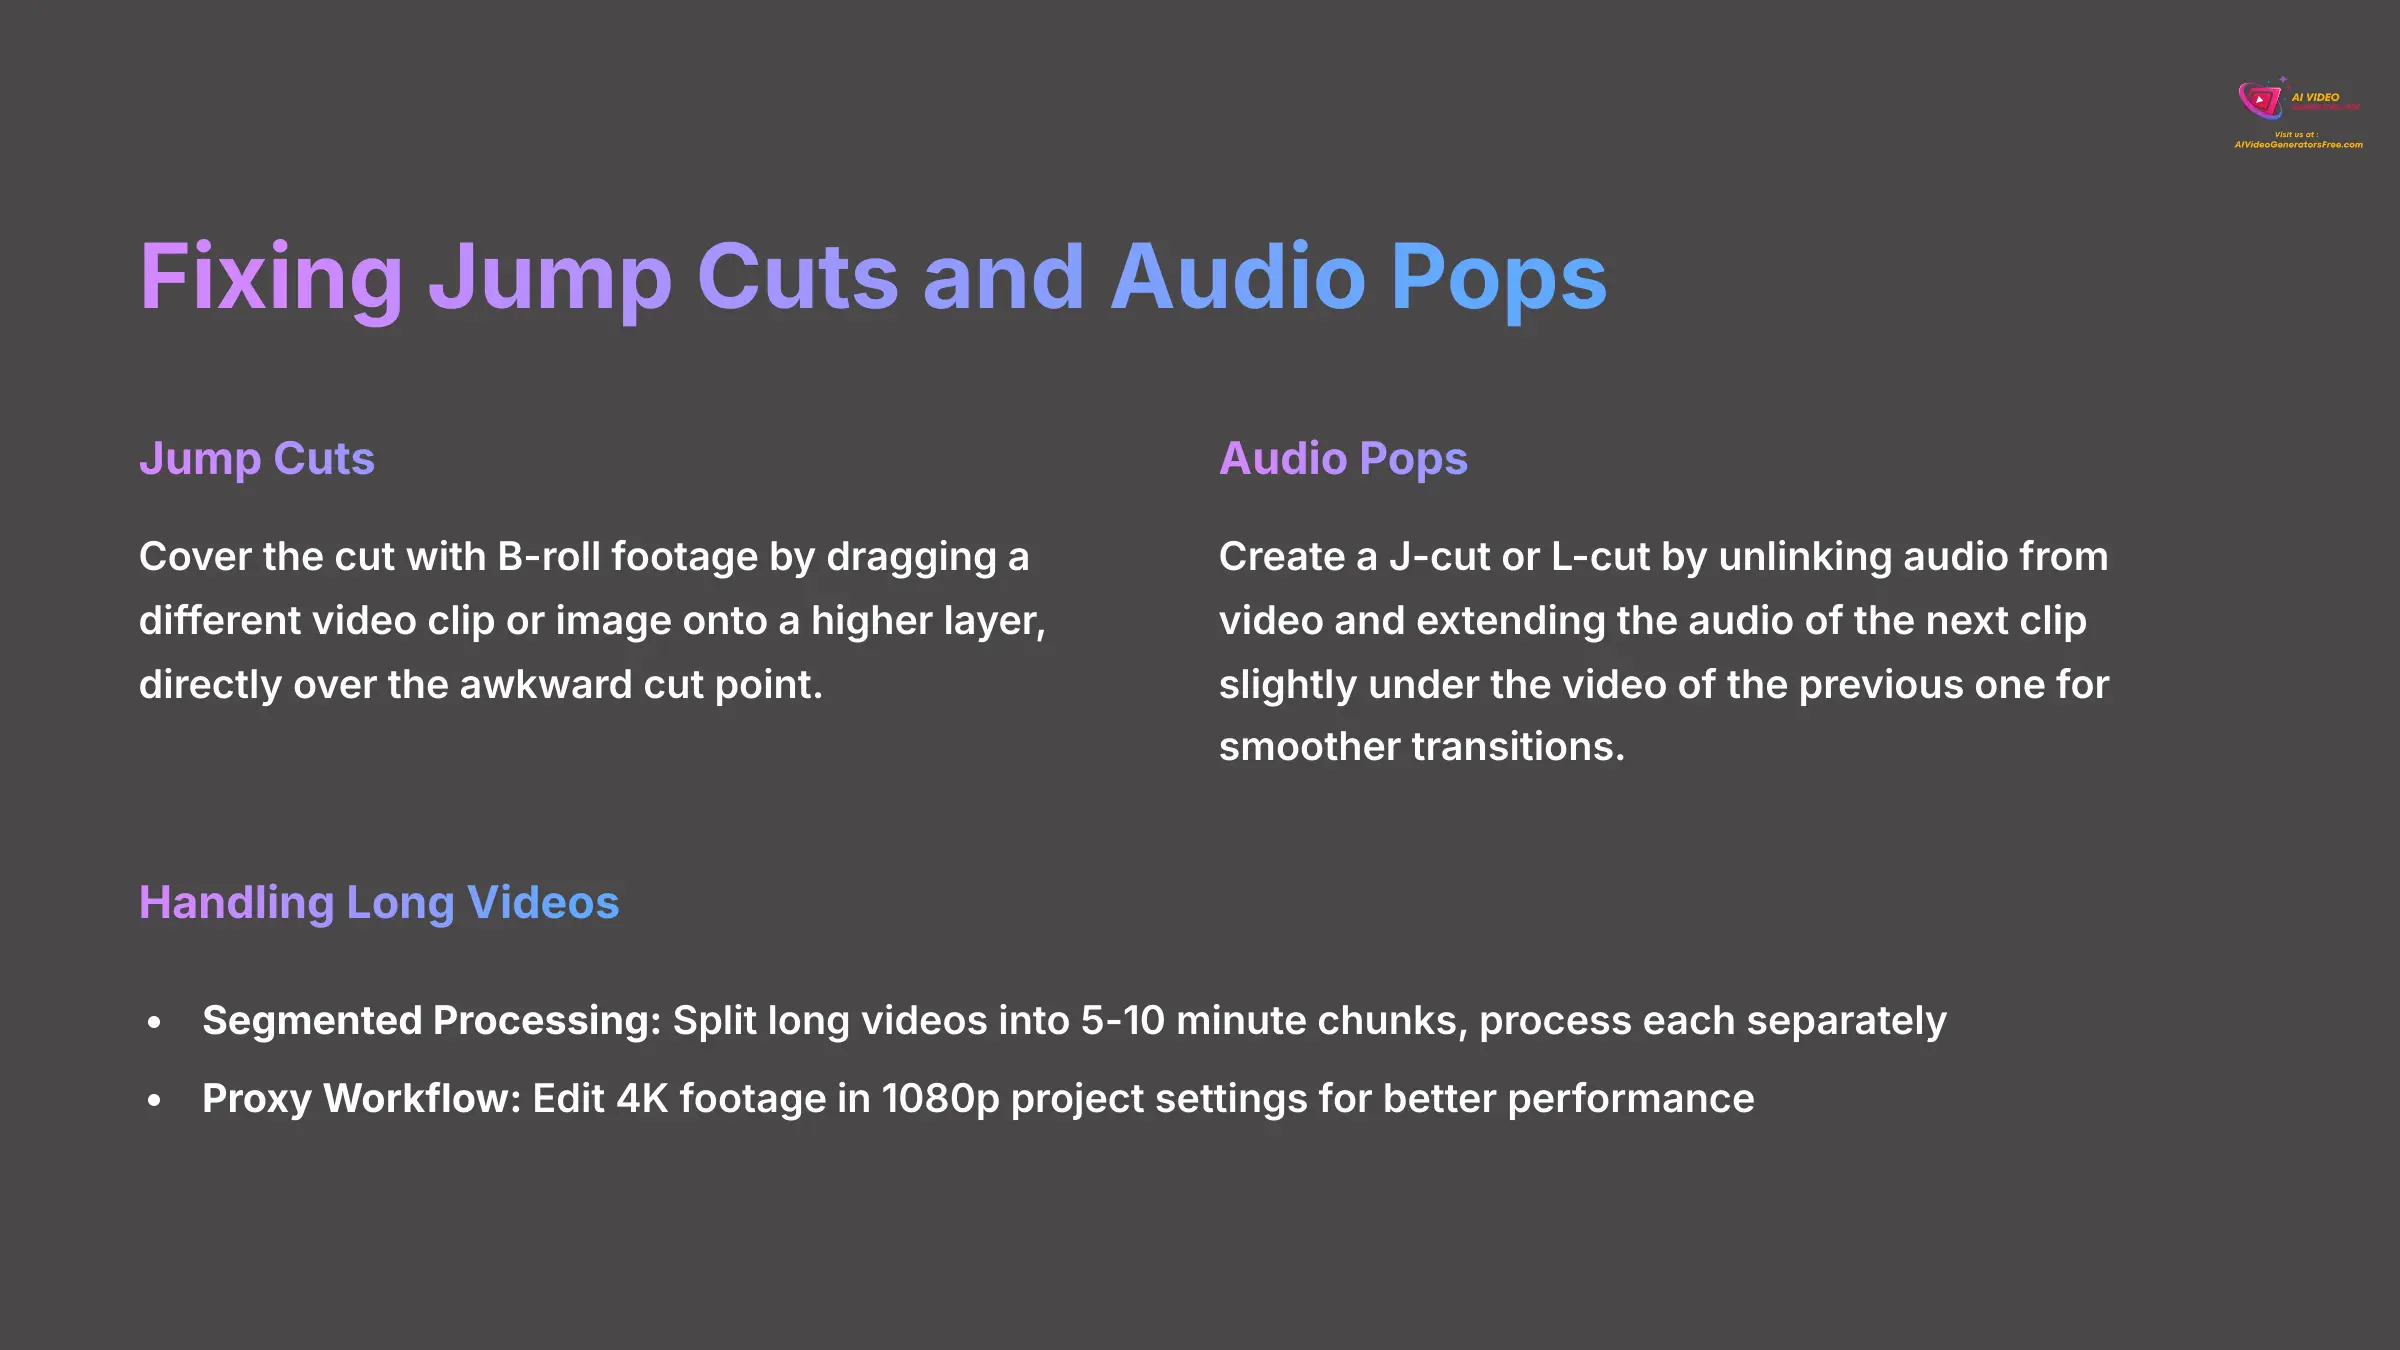
Smart Cut is aggressive by design, which can sometimes create a jarring visual “jump” or an audible “pop” in the audio. Fortunately, these issues are easy to fix with the right techniques. Covering a jump cut with B-roll is like putting a decorative patch over a seam in fabric—it hides the connection and adds visual interest.
For fixing these common issues:
- Jump Cuts: The easiest fix is to cover the cut with B-roll footage. Simply drag a different video clip or image onto a higher layer on your timeline, directly over the awkward cut point.
- Audio Pops: These happen when the audio waveform is cut too abruptly. A professional trick is to create a J-cut or L-cut. Unlink the audio from the video and extend the audio of the next clip slightly under the video of the previous one. This slight overlap makes the audio transition feel much smoother.
Issue 3: “Why Is the Editor So Slow on My Long Video?”
If you're working with a long file, like a one-hour webinar in 4K resolution, the editor might feel sluggish. This happens because your browser is trying to handle a huge amount of data simultaneously. The solution is to break the task into smaller, manageable pieces.
Here's how to handle long videos effectively:
- Segmented Processing: Think of this like eating a large pizza slice by slice. Split your long video into 5-10 minute chunks. Process each chunk with Smart Cut individually, export them separately, and then combine the final clips in a new project.
- Proxy Workflow: As I mentioned earlier, always edit 4K footage in a 1080p project setting. This keeps the editor running fast and responsive. Kapwing will apply the edits to the full-quality 4K file when you export the final version.
Do not try to run Smart Cut on a 1-hour 4K file in a 4K project setting. The editor will likely crash or become unresponsive. Always use the Segmented or Proxy workflow for large files.
Advanced Workflows and Creative Applications (Supplementary Content)
Once you've mastered the basics, you can start using Smart Cut in more creative ways. These techniques move beyond simple cleanup and turn the tool into a powerful part of your content creation engine.
Technique 1: Dual-Track Audio Editing for Music
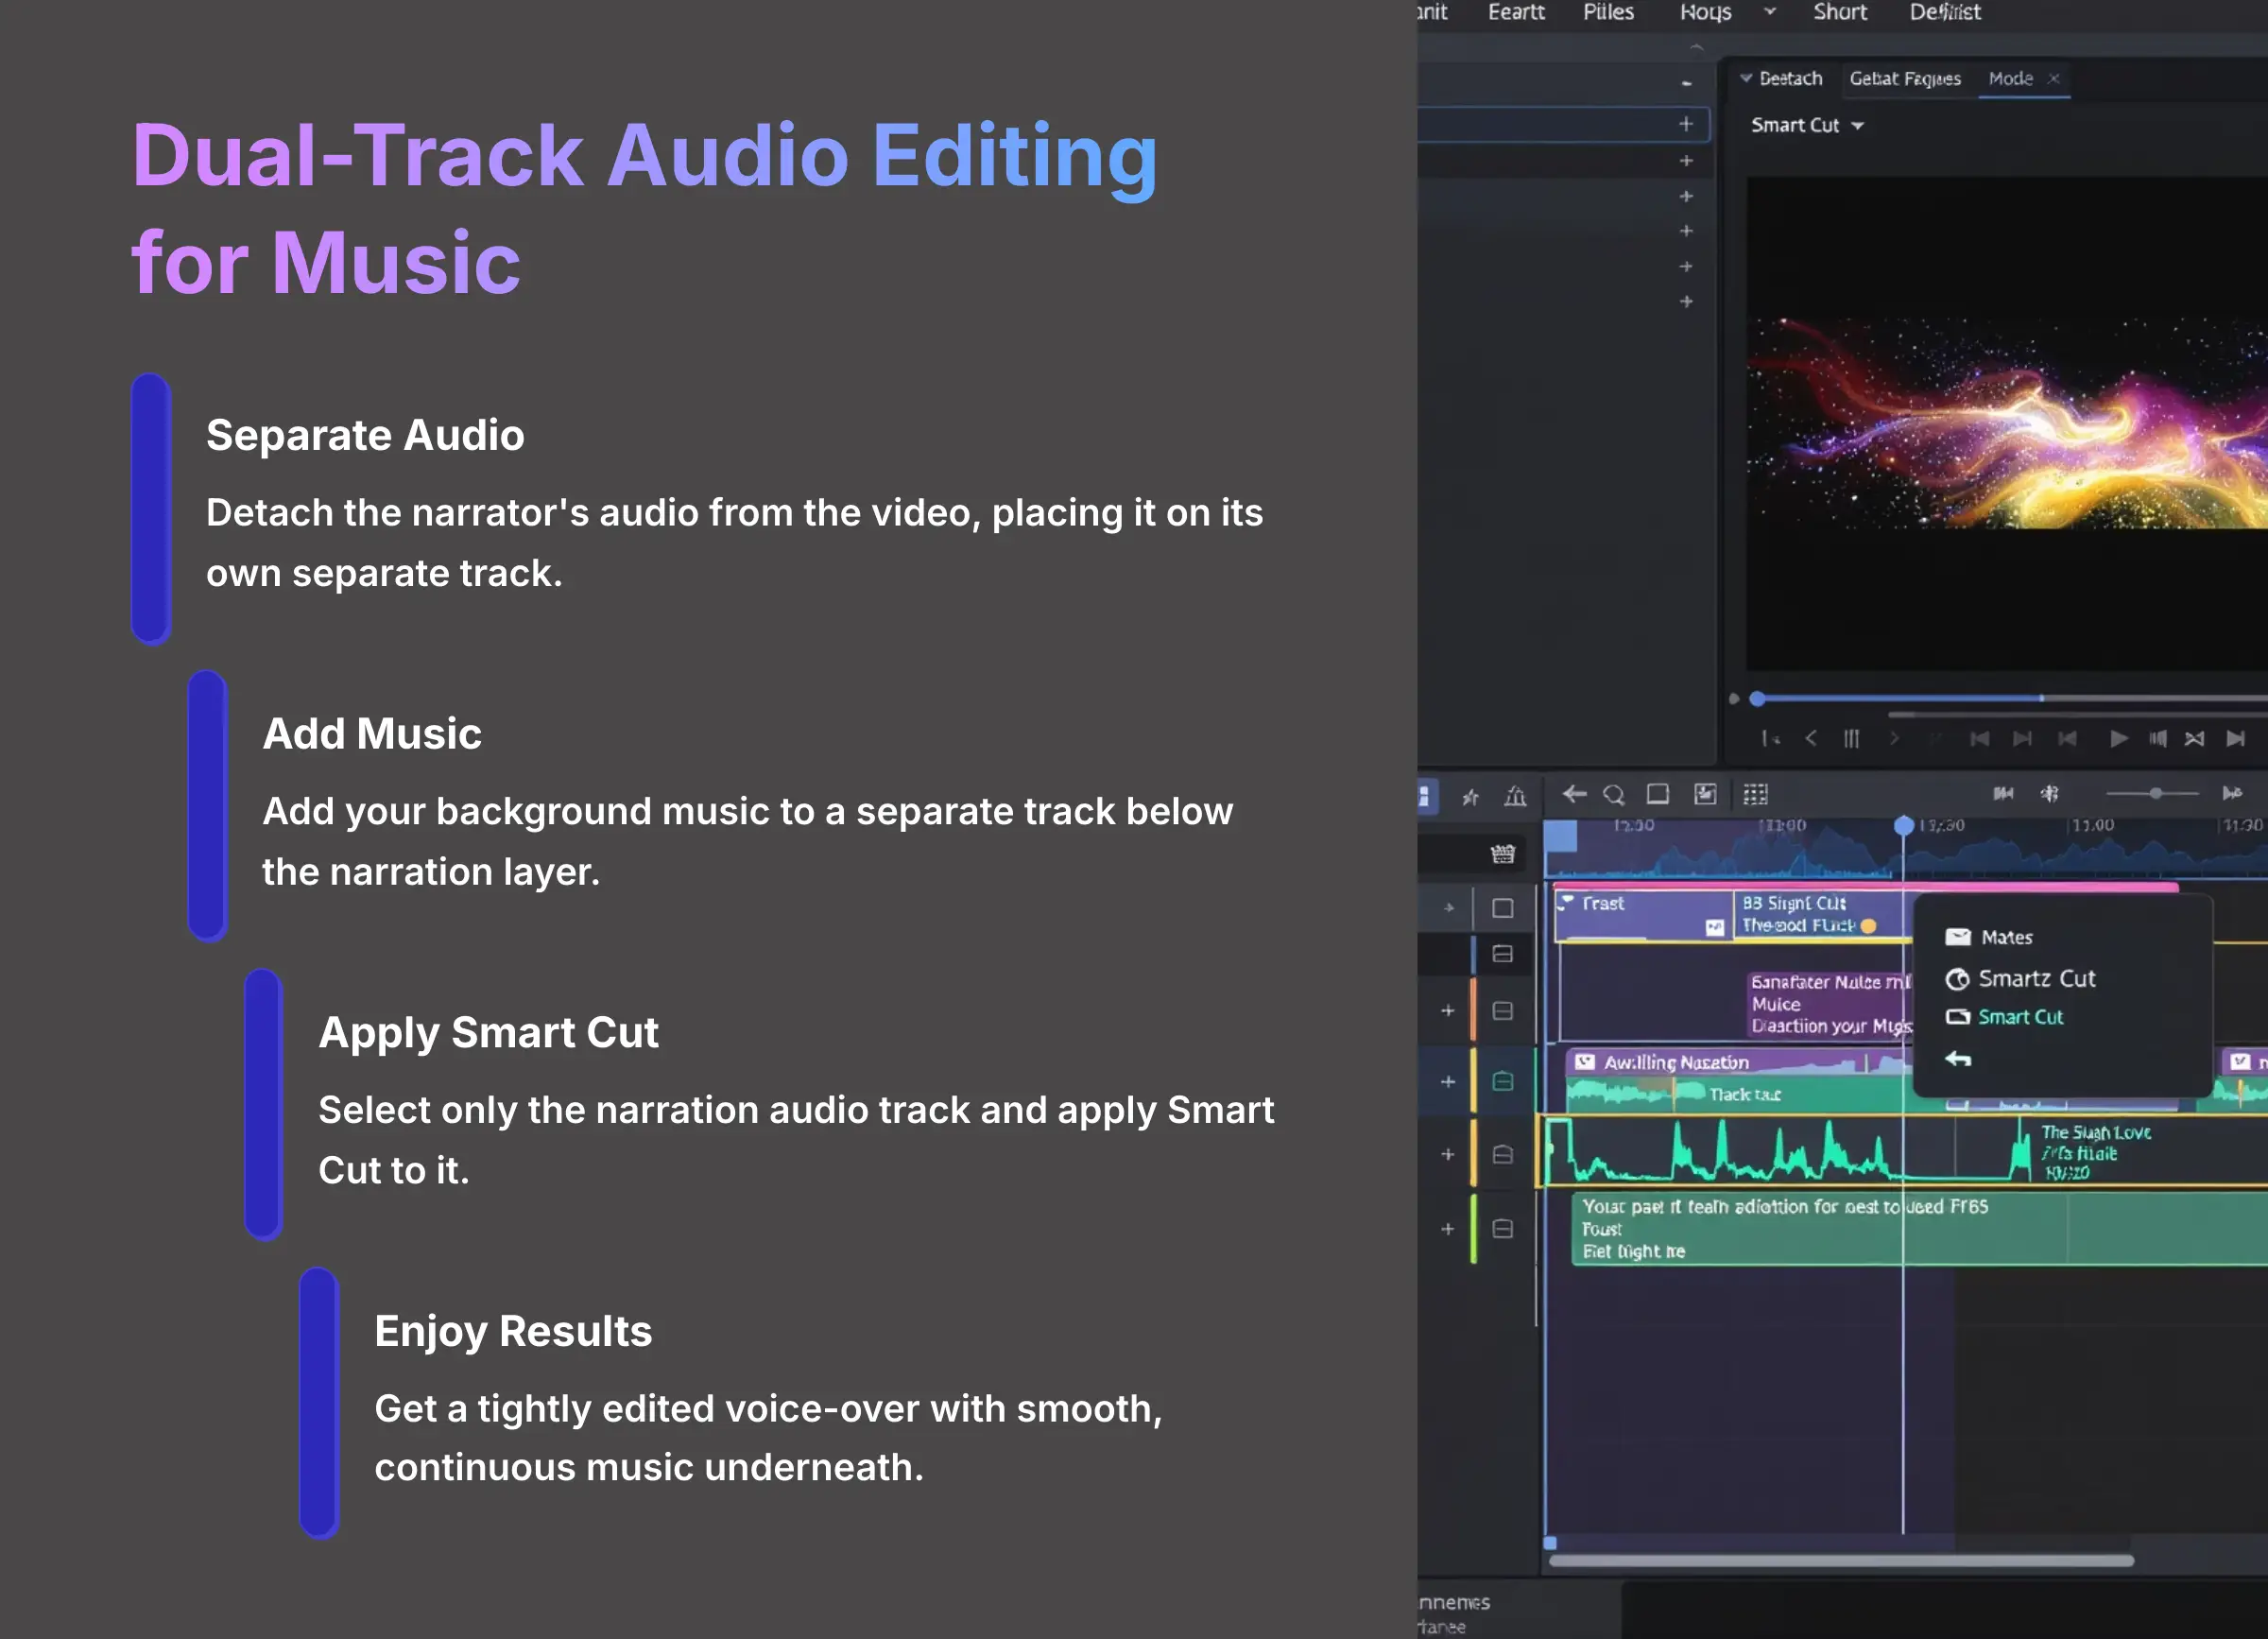
When you have a narration track and background music, you only want to cut the silences in the speech. You need the music to play continuously underneath. This requires separating your audio into different layers for precise control.
Follow this procedure for clean audio mixing:
- Detach the narrator's audio from the video, placing it on its own separate track.
- Add your background music to a separate track below the narration layer.
- Now, select only the narration audio track and apply Smart Cut to it.
- The result is a tightly edited voice-over with a smooth, continuous music bed underneath that maintains its flow.
Technique 2: Dynamic Content Repurposing for Social Media

This technique is fantastic for getting more value from your long-form content. Combining Smart Cut with another Kapwing AI tool, Find Scenes, is like turning a log into perfectly cut firewood and kindling automatically. You get big pieces and small, useful bits without extra manual work.
Here's how you can create social media clips efficiently:
- Start with a long video, like a webinar or podcast interview recording.
- Use Smart Cut with a high sensitivity setting to create a very fast-paced edit.
- Next, click on the Find Scenes tool. The AI will analyze your newly edited video and automatically create dozens of short, shareable clips based on visual changes and content breaks.
- These clips are now ready to be formatted for TikTok, Instagram Reels, or YouTube Shorts with minimal additional work.
Disclaimer: The information about Kapwing Smart Cut presented in this article reflects our thorough analysis as of 2025. Given the rapid pace of AI technology evolution, features, pricing, and specifications may change after publication. While we strive for accuracy, we recommend visiting the official Kapwing website for the most current information. Our guide is designed to provide a comprehensive understanding of the tool's capabilities rather than real-time updates.
Conclusion and Next Steps: Continue Your AI Editing Journey
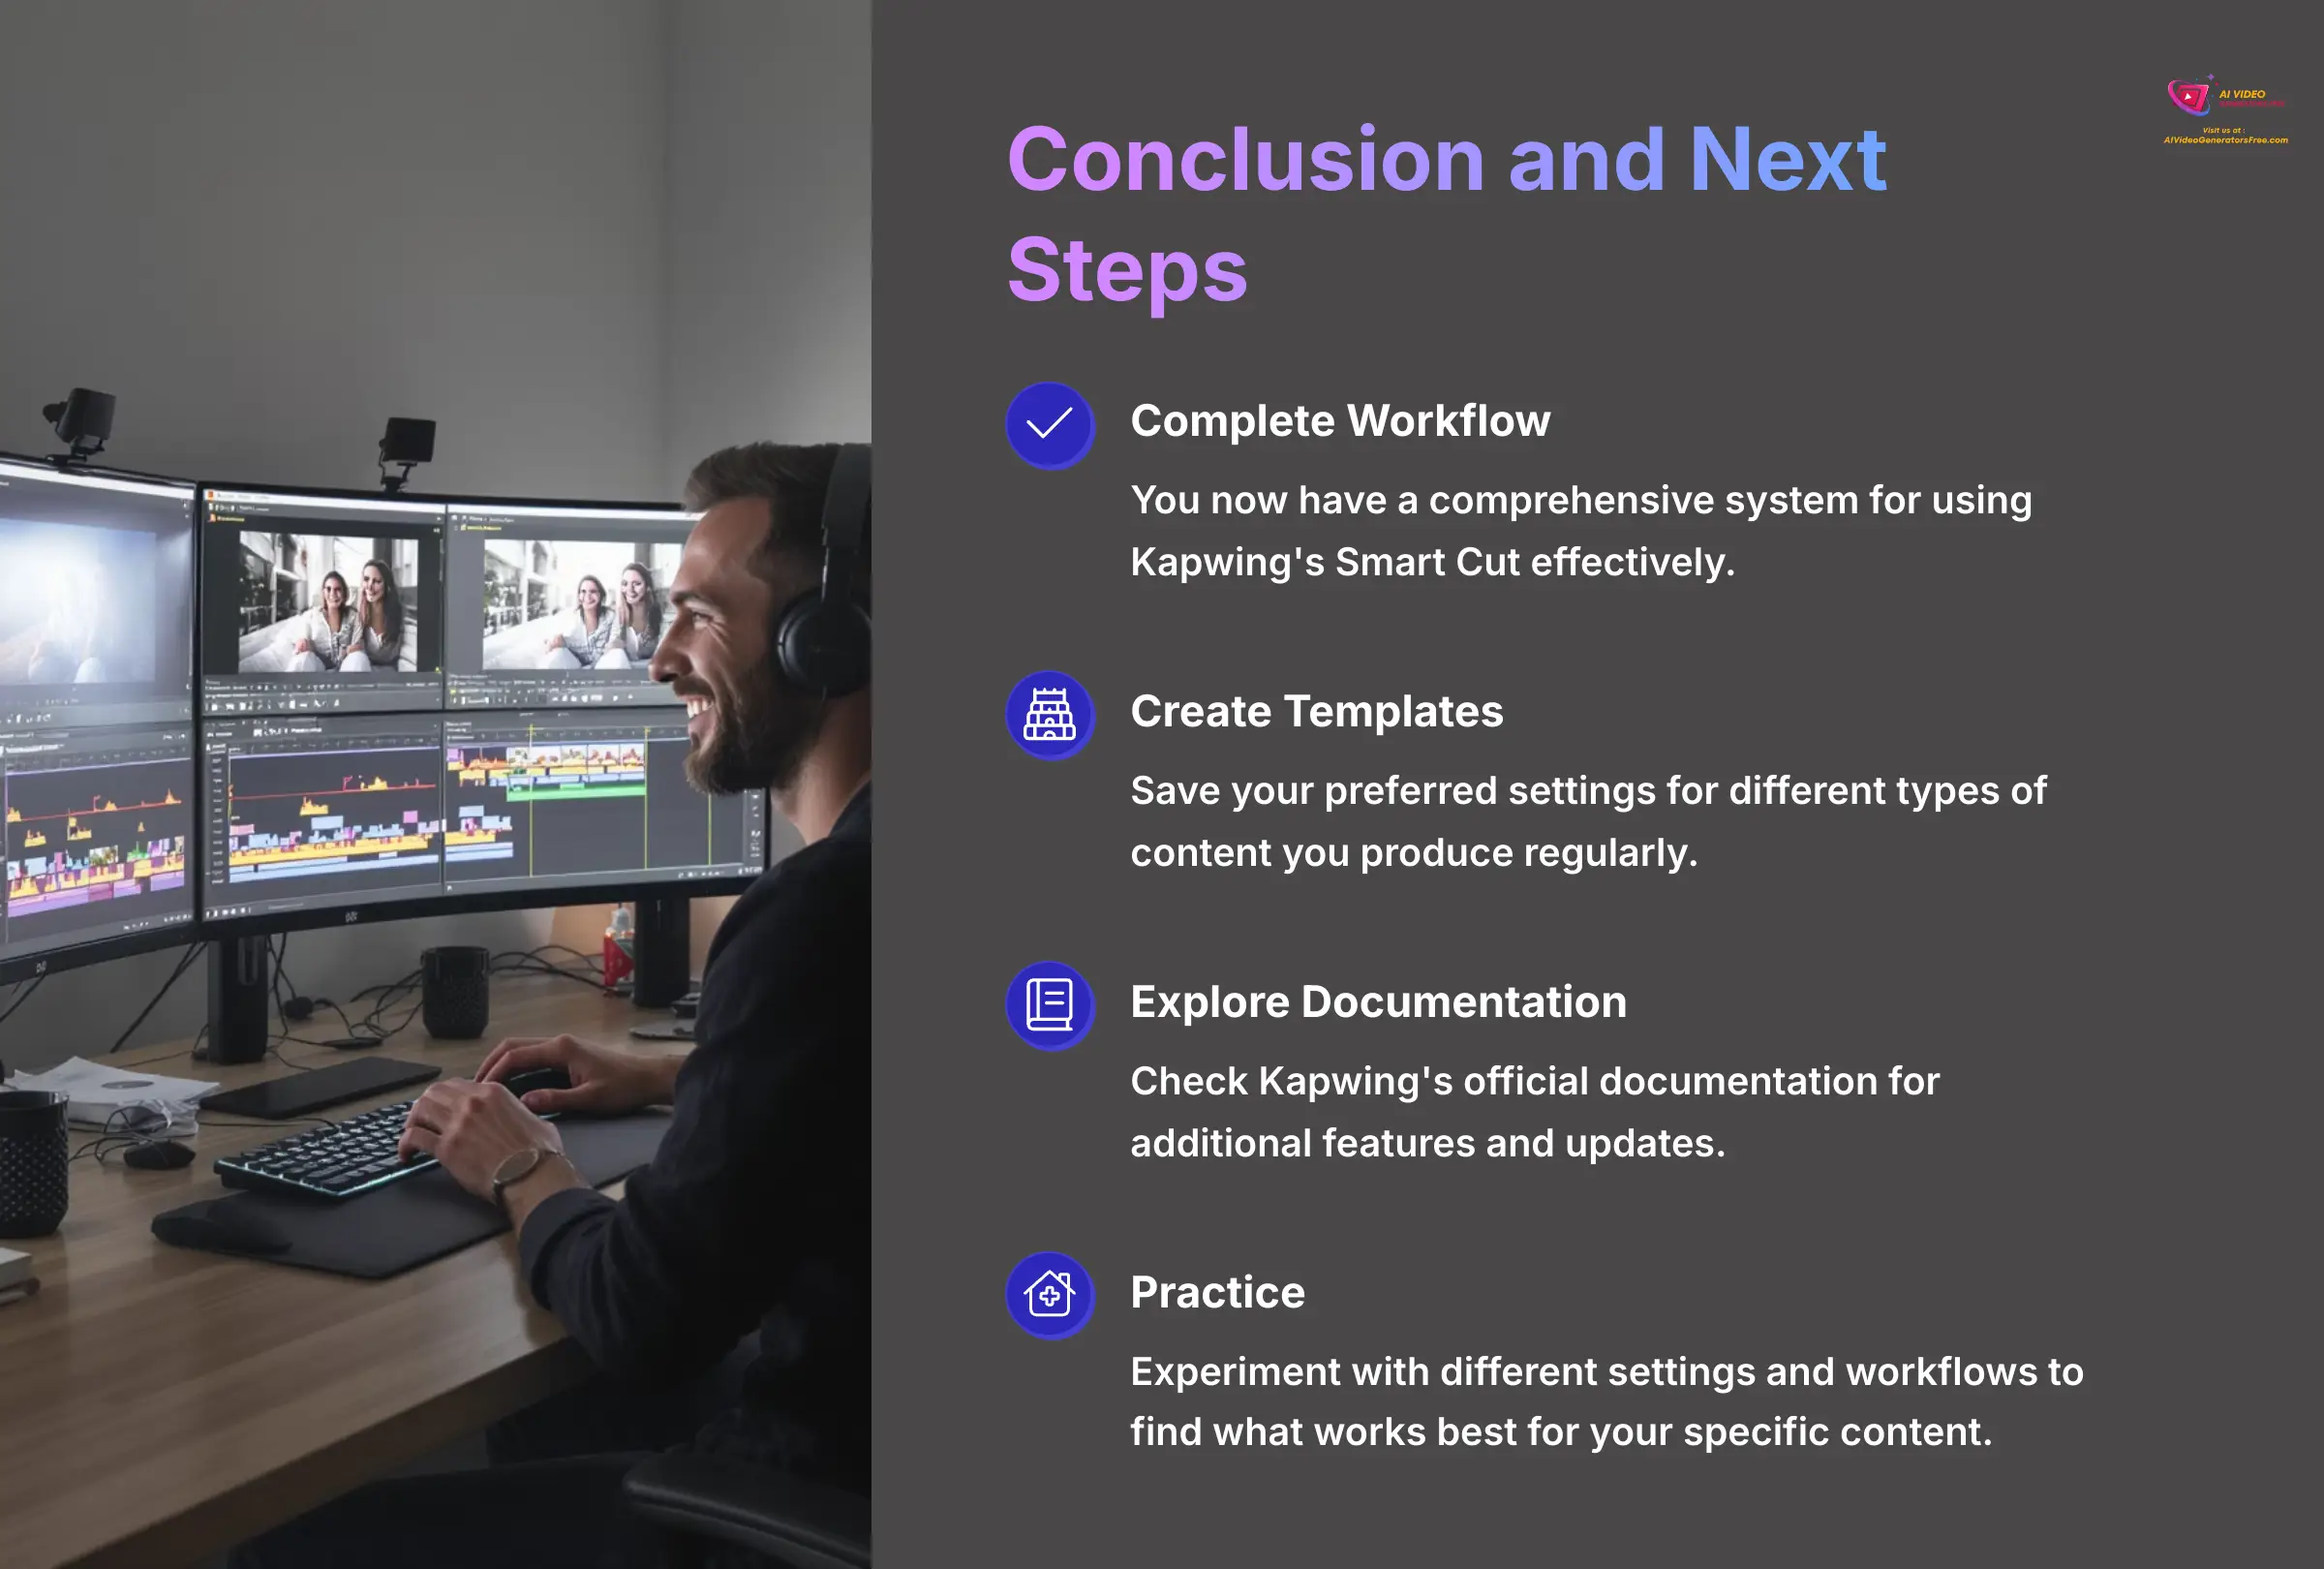
You now have a complete workflow for using Kapwing's Smart Cut effectively. You can apply a basic edit in seconds, calibrate sensitivity for your specific audio needs, take manual control for artistic refinement, and combine it with transcript editing for a flawless result. I encourage you to create templates with your preferred settings for different types of content you produce regularly.
As you continue your journey with AI video editing tools, explore Kapwing's official documentation for additional features and updates. Remember that mastering any tool takes practice, so experiment with different settings and workflows to find what works best for your specific content creation needs.
The future of video editing is here, and tools like Smart Cut are just the beginning. Keep experimenting, keep creating, and most importantly, keep sharing your stories with the world through polished, professional videos that engage your audience from start to finish.


Leave a Reply